Quick Thick Chicken Mulligatawny

Mulligatawny – it’s super fun to say, super fun to cook, and super fun to eat. As a soup fiend, it was only a matter of time before this spicy, sweet, and utterly delicious soup made its way onto my blog, and frankly, I’m surprised it took quite so long.

Like all my favourite meals, this one ticks all the boxes – it’s healthy, tasty, cheap, quick, and everyone in the family will eat it (although I did add more yoghurt to Miss 7’s, as it is a bit spicy). And a bowl of the stuff is only 350 calories, which, considering how very filling it is, isn’t very much at all. It’s really just a winner. Also, is it just me, or does any one else find that the more complex a flavour profile, the more filling it is? Maybe it’s just me!

Serves 5 (generously)

Ingredients

1tsp olive oil

1 tsp minced garlic

1tsp minced ginger

1 large celery stick

1 onion

2tbs curry powder

1tsp ground cinnamon

2tbs tomato paste

5 cups chicken stock

400g skinless chicken thigh fillets

2/3 cups rice

300g pumpkin, diced

2 red apples, cored and cut into 4cm chunks

5 scant tablespoons Icelandic or Greek yoghurt (I much prefer Icelandic)

4tsp mango chutney

Method

  1. Heat oil over low heat in a large, deep saucepan or stockpot. Add garlic, ginger, onion and celery, and cook for 5 minutes, or until softened and very lightly coloured.
  2. Add cinnamon, curry and tomato paste, and stir for 30 seconds.
  3. Add stock, cover, and bring to the boil.
  4. Lower heat to simmer. Add thigh fillets and poach (still covered) for 5 minutes.
  5. Remove chicken and add rice, pumpkin and apple. Cover, and cook, stirring occasionally, for 10 minutes.
  6. Meanwhile, cube or use two forks to shred chicken.
  7. Add chicken back to the soup, and simmer for 5-10 minutes, until chicken and rice are both fully cooked.
  8. Ladle mulligatawny into bowls. Top with yoghurt and chutney to serve.


Facebooktwitterredditpinterestlinkedinmail

Cheese and French Onion Meatloaf

I’ve never really considered myself a meatloaf fan (pause to wait for my father in law to make a joke about how he really enjoyed Bat out of Hell…), and can count on two hands the number of times I’ve cooked one, with fingers to spare. Apart from my turkey and apple meatloaf (which I really should include here, as it’s pretty divine), I generally find meatloaves stodgy and a whole lot of effort for not a whole lot of reward. Nobody’s ever complained about the lack of meatloaf in our lives, so I’ve never really thought about it.

However, the other night, the hubby and I were curled up watching something or other, and the characters were eating meatloaf. After 10 years of marriage, I didn’t even need to glance over to know that he was giving me “the look”. No, not that one. The “why are they eating something delicious, and I’m not?” look.

So, I went hunting for a meatloaf recipe. I’m a good wife like that. But not just any old loaf. It had to be Something Different. Not just a big dry meatball with some barbecue sauce concoction glazed over it. Something I would be excited to make, and, knowing that meatloaf is generally a more calorically dense kind of meal, something that would be what I considered worth it. 2 slices of this bad boy is 390 calories, but the slices are generous, and there’s absolutely no reason (except for how good it tastes) that you couldn’t have 1 slice and fill up on veggies. In fact, that’s exactly what I did. Bonus to this – more leftovers! Like most of its ilk, this is possibly even  better the next day.

It didn’t take too long. I had to sift through a gazillion recipes, because everybody has their own spin on this classic, but once I saw this on Taste (yes, again! I have so many wonderful cookbooks, but I do love this website for midweek meals!), I knew this was The One. Promises of sweet, jammy onions, a cheesy crust, and mustardy meat suckered me right in. I adore the sum of its parts, and the whole is even better. It just… works. And, the house smells amazing while it’s cooking away. For such a easily cooked meal, the results are spectacular!

Serves 6, generously

Ingredients

3/4 cup dried breadcrumbs

2tbs milk                                                                                                                                                                                              4 brown onions                                                                                                                                                                                          1kg beef mince (resist the urge to go lean for this, it just falls apart!)

35g sachet salt-reduced French onion soup mix

2 garlic cloves, crushed

1 tablespoon Dijon mustard
1 egg, lightly beaten
1/4 cup finely chopped fresh flat-leaf parsley leaves
1 tsp olive oil
1 tablespoon brown sugar
2 tablespoons balsamic vinegar
50g gruyere cheese, grated
Gravy, to serve (optional)
Method
  1. Preheat oven to 180C. Line base and sides of a large loaf tin with baking paper, allowing for some overhang.
  2. Grate one of the onions (or stick it in the food processor). Combine it with mince, breadcrumbs, milk, soup mix, garlic, mustard, egg and parsley in a large bowl. Season with pepper (you really don’t need more salt). Mix well to combine.
  3. Press mixture into the prepared pan, using a spatula to make sure it is compact and level. Bake for 1 hour, until meatloaf is firm and juices run clear.
  4. When the meatloaf has been in the oven for 40 minutes, thinly slice remaining onions. Heat oil in a frying pan over medium heat. Add onion, and cook, stirring occasionally, for 10 minutes or until softened. Add sugar and balsamic vinegar. Cook, stirring, for 5 minutes or until onion is caramelised.
  5. Remove meatloaf from oven. Carefully drain excess pan juices, and lift the meatloaf out of the tin using the baking paper, transferring onto a baking tray. Trim paper so it doesn’t stick up – you want the edges to brown a little more in the last cooking. If the baking paper won’t support the weight of this step,  just carefully turn meatloaf, top-side up, onto a baking paper-lined baking tray.
  6. Top meatloaf with cheese and caramelised onion. Bake for a further 15 minutes or until cheese has melted. Stand for 5 minutes. Cut into slices. Serve with gravy, mashed potato and vegetables.
Facebooktwitterredditpinterestlinkedinmail

Mushroom and Bacon Barley Risotto

This is a big call, but barley is my new favourite food. While I’m sure I did, I don’t really remember eating it as a child… in fact, I was well into my twenties before I even recognised it as anything other than one of the ingredients my dad put into this weird, green soup he used to make that nobody in the family was ever game enough to try. However, since the day I first bought it for a non-green, non sludge-looking soup, I’ve been an evangelical convert. I just adore the chewy nuttiness that adds so much texture and body to all manners of dishes. I almost peed myself with excitement when I realised you could make a risotto out of it!

Now, this dish might not really scream “diet food”at first glance, but really, it’s the best kind. It looks, feels and tastes like comfort food, it’s delicious, it’s nutritious, and it’s incredibly filling. The original recipe (from Taste) indicates that it serves 4, but it easily served 6, and that was still a very generous portion… you definitely can make a meal of it, and for only 250 calories a serve (6 serves), I’d recommend doing just that! It also makes a fine side dish.

A little word to the wise: give yourself a little extra time to cook the barley, because it can depend on so many factors: your pan, your stove, the alignment of the planets and stars – it’s the luck of the draw, really. Just keep testing it until the barley is cooked, adding a quarter cup of water (it won’t water the flavour down, there’s plenty to spare!) as necessary.

serves 4-6

Ingredients

1tsp olive oil

1 leek (white part), halved lengthways and thinly sliced

1 tsp minced garlic

1tsp minced ginger

200g diced bacon

250g mushrooms, sliced

1 3/4 cups pearl barley

4 cups chicken stock

2 tbs grated parmesan cheese

1/4 cup fresh parsley

Method

  1. Heat oil over medium-low heat in a cast iron pot or other heavy based saucepan. Add leek, ginger and garlic. Stir for 1 minute or until leek has softened but not coloured.
  2. Increase heat to medium-high. Add bacon and mushrooms. Cook, stirring, for 3 to 4 minutes until bacon is coloured and mushrooms are softened and oozing their liquid.
  3. Stir in barley and add stock. Cover and bring to the boil.
  4. Stir, then reduce heat to low. Simmer, covered, for 30 minutes. Stir occasionally. Barley will be tender, but not completely cooked.
  5. Remove lid. Simmer for 15 minutes or until barley is tender and liquid has absorbed. If the barley starts to stick to the bottom, or is dry but not cooked through, add water and stir. This can be repeated as necessary.
  6.  Remove from heat. Serve with parmesan and parsley.
Facebooktwitterredditpinterestlinkedinmail

Boozy Banana Bread

Alliteration is fun. You know what else is fun? Sneaky booze. And with this boozy banana bread, now we can have both!

Banana bread cops a lot of flack, and for good cause: it’s full of sugar, carbs and fat, and for some reason, we insist on calling it a bread when it is so bloody obviously a cake, which – equally inexplicably – makes it seem healthier than it really is. As such, until today, I hadn’t had a slice of banana bread in eleven months (sob), so that may account for some of the joy I experienced in eating this. However, a number of others have validated my stance that this banana bread, based on a recipe by  Smitten Kitchen  is the best banana bread I’ve ever made – and trust me, I’ve made a few!

While it will never pass as a health food, as far as banana breads go, a small slice of this isn’t too bad. The recipe yields 12 small slices at just 202 calories apiece, which makes for a perfect afternoon treat. I like to make it into 3 smaller loaves using an old mini-loaf pan that I’m pretty sure I accidentally stole from my mum when I moved out of home – I have no recollection of buying it, I don’t recall my mother ever using it when I was living at home, and it’s looked a little banged up ever since I discovered it one day in my kitchen cupboard, but I really love this thing.

Suspicious pan of mysterious origin to the rescue…

Besides, smaller loaves mean even more of the deliciously caramelised crust that makes a banana bread so delectably addictive! However, it also translates into a mighty fine regular loaf – you just need to add another 20-30 minutes to the baking time.

Experience shows that swirling a tablespoon of Nutella through the batter after pouring it into the pan/s doesn’t go astray. But if you’re watching your calories/sugar intake, rest assured that it is just as awesome without it.

Serves 12

Ingredients

3 overripe bananas
75 grams salted butter, cubed
3/4 brown sugar
1 teaspoon vanilla                                                                                                                                                                                      1 egg
1-2 tablespoons Jack Daniels American Honey (any whiskey or bourbon will do, but this is perfect for the job!)
Pinch of salt
1 teaspoon cinnamon                                                                                                                                                                            1/2 teaspoon nutmeg
1/4 tsp ground cloves
1 1/2 cups self-raising flour

Method

  1. Preheat the oven to 180°C.
  2. Mash bananas and butter in a large mixing bowl by hand or electric beaters, or in the bowl of a stand mixer using the paddle whip (which is how I do it).
  3. Add the sugar and beat on medium for one minute.
  4. Mix in egg, vanilla, whiskey, salt and spices.
  5. Gently mix in the flour until combined.
  6. Pour into a greased loaf pan. If using mini loaf pans, bake for 30 minutes. For a large loaf, bake for 50 minutes to one hour, or until a tester comes out clean.
  7. Cool for 10 minutes while still in loaf pan. Remove from pan, cool further on a rack, and serve.
Facebooktwitterredditpinterestlinkedinmail

Vintage Cheddar and Apple Scones

I’ve been a huge fan of Deb Perelman and Smitten Kitchen for several years now – I’ve never cooked a thing of hers that has not been perfection on a plate. However, while actively losing weight, I found a lot of my favourites were not exactly compatible with my lifestyle, and while I kept a covetous eye on her website and social media, I relied heavily on other sources for recipes.

However, now I have a little more wiggle room for treats and more caloric meals, I’m remembering why I’ve spent so many hours trawling her amusing, heartfelt and comfortable blog. Her food is honest and makes you want to share it with those you love the most. (I’m assuming here that other people see cooking as an act of love, but it’s entirely possible I’m just crazy). So yesterday, when the hubby informed me his aunts were coming over for afternoon tea, my second thought (after “yay”, because I totally won the in-law lottery) was “Oooh… SK’s cheese and apple scones!” It’s been a while since I made these, but they were just as amazing as I remembered, even though I don’t follow the recipe exactly. But that’s okay, because SK’s recipe is also an adaptation, and cooking is all about soul, so it stands to reason that each cook will add their personal touch.

These moist little parcels of happiness taste like apple pie, and their slightly salty sweetness hits you right in your soul’s tastebuds. And considering they’re made of cheese, cream and butter (you know… all the good stuff), that’s hardly surprising. What IS surprising is that they only clock in at 197 calories apiece. That’s not too bad considering how decadent they taste. Definitely doable!

Serves 12

Ingredients

2 Granny Smith Apples
1 1/2 cups self raising flour
1/3 cup sugar
85 grams salted butter, cubed
1/2 cup Cracker Barrel Special Reserve, or other extra sharp cheddar
1/4 cup thickened cream
2 eggs

Method

  1. Preheat oven to 200C. Line oven tray with baking paper.
  2. Peel and core apples, and cut into 3 cm chunks. Arrange in a single layer on tray and bake for 10 minutes on the middle rack. Allow to cool for 10 minutes. Reduce temperature to 180C.
  3. Sift flour and sugar together and set aside.
  4. Use beaters of stand mixer with the paddle whip attachment to beat the butter, cheese, cream and one egg until well combined.
  5. Add apple and stir.
  6.  Add flour/sugar mixture and and mix until the dough just comes together. Be careful not to overmix.
  7. Sprinkle a small handful of flour on your workspace and and upturn the dough. Use your hands to gently pat until smooth, taking care not to overmix.
  8. Divide dough into 12, and gently pat into flattened balls. Place onto an oven tray lined with a fresh sheet of baking paper. Leave a small space between each scone, as they do spread, but keep them close so that they are pushed upwards for taller scones.
  9. Beat remaining egg in a small bowl. Brush the scones with egg wash. Bake until firm and golden, about 20 minutes. Allow to cool for 10 minutes (as they’re very fragile when hot), then very gently transfer to a wire rack to cool. Like all scones, these are best eaten on the day they are made. Trust me, this is no hardship.
Facebooktwitterredditpinterestlinkedinmail

Sri Lankan Curry

Many little things still shock me since losing the weight, and the most significant one to date is just how  much I feel the cold lately! Intellectually, I understand that fat keeps the body warm; I just didn’t realise how much insulation I used to carry around! I’ve been complaining about the cold all week, so yesterday morning, when I told the husband that I wanted to go to the Richmond Good Food Market (Richmond being renowned as a particularly chilly part of Sydney at 8am on a Winter morning), he side-eyed me, and, undoubtedly braced himself for a few hours of me complaining about how I couldn’t feel my hands.

However, he needn’t have bothered. I mean, it was cold, but I had enough to occupy me at the little stalls to keep me from whingeing (too much). From spice rubs to jams and pickles, to gourmet bagels to chilli honey (I may never eat honey any other way again), to delectable coffee blends, I sniffed and nibbled my way down the market in a flurry of little wooden spoons and taster cups.

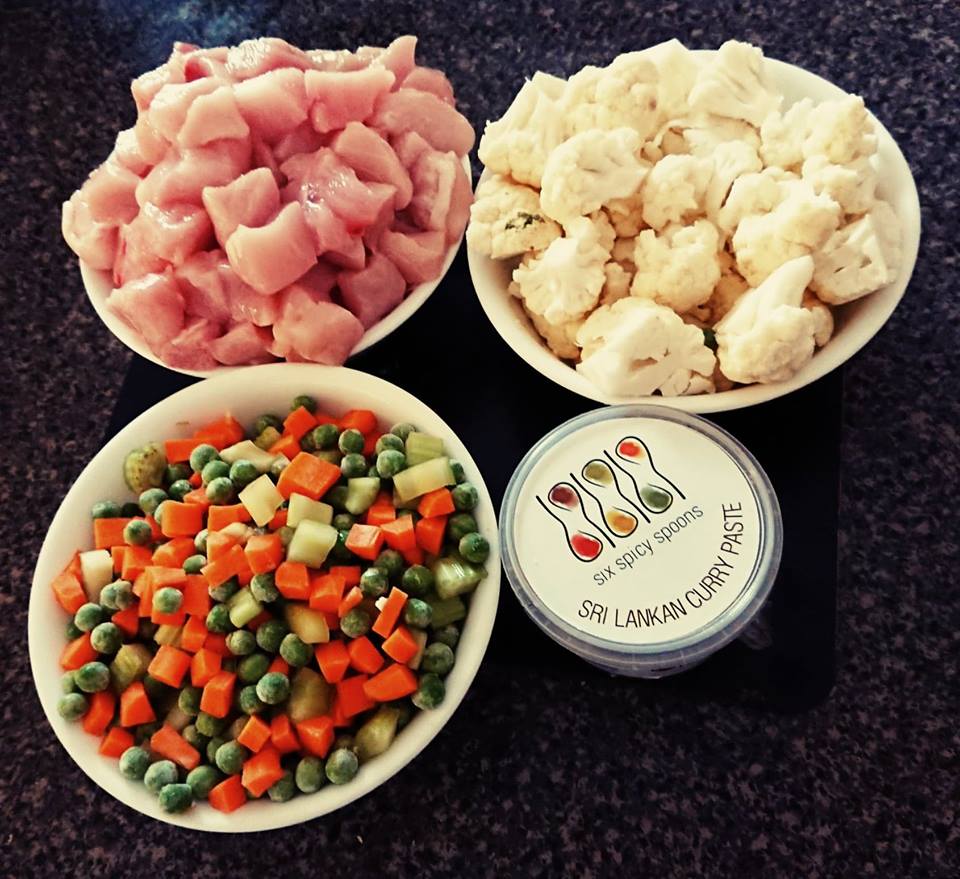
As is so often the way with these things, the stall that stood out the most was one I didn’t intend on visiting. A lone Sri Lankan cuisine stall stood in the middle, smelling like heaven, but hardly seeming like where I would be sourcing my breakfast. However, I got to talking to the very friendly and engaging Sheila from Six Spicy Spoons, and she offered Master 10 and I a taste of her delightful homemade curries and chutney. We were instantly hooked. Pan rolls and samosas for breakfast, it was! I also wasn’t leaving without purchasing a tub of her curry paste and date chutney. Dinner for tonight was sorted.

Sheila was also lovely enough to provide me with some recipes so that I could get started – an absolute necessity, as I’d never cooked Sri Lankan before. Of course, I changed it up a bit, so I cannot speak for the absolute authenticity of my adaptations, but it was declared 5 stars by the same daughter of mine who was determined not to actually enjoy it, and an absolute winner by my husband, son, and self.

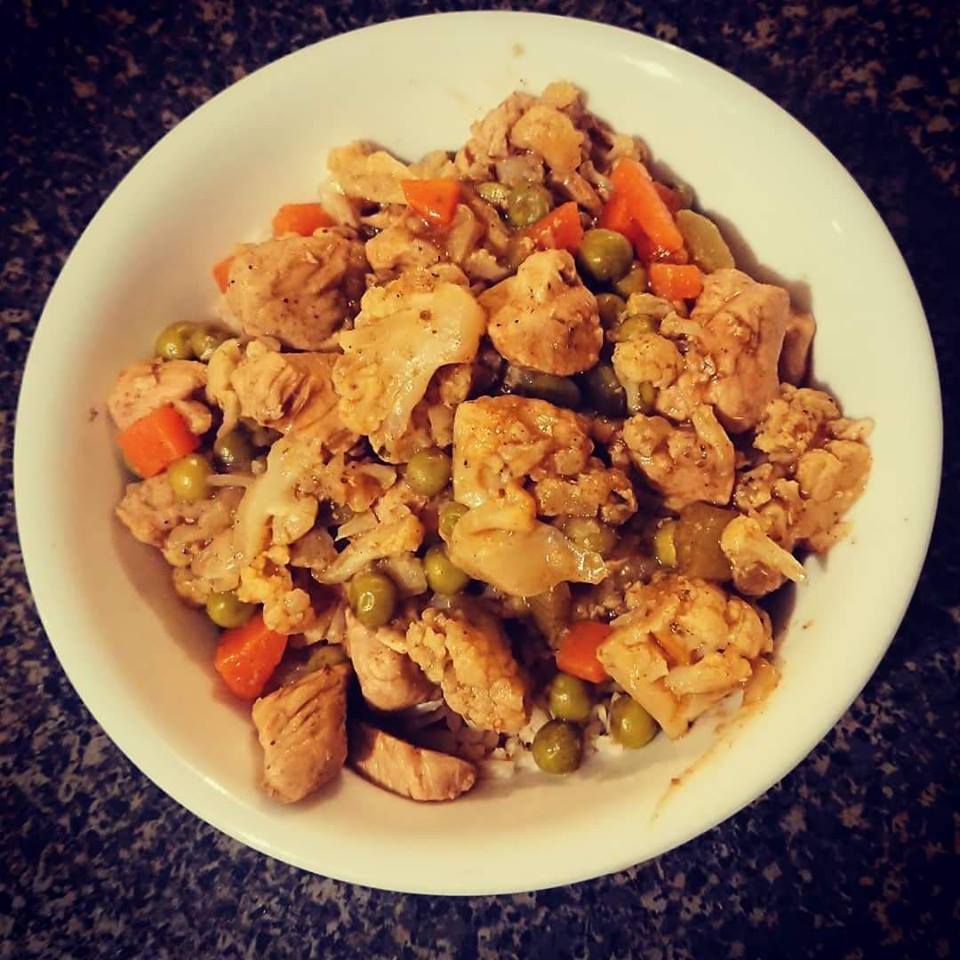
I followed the recipe in terms of how much curry paste to use, as I didn’t want to blow anybody’s head off, and next time, I’ll probably up the ante a little. However, it was pleasingly warming – the spices where there and they were bold, and even though I made it 5 hours ago, the house still has the most delectable aroma about it. I had places to be between making the curry and eating it, and when I came home, walking into the house was walking into comfort personified. Thankfully, I’d forgotten to separate the kilo of chicken I bought last week before freezing it, so I made a double portion. I’m looking forward to eating this for lunch for the next couple of days (I’m a total leftovers fiend), because these flavours will definitely improve with age! At 420 calories a serve, it’s a heavier lunch, but sometimes, it’s just worth it.

Serves 8

Ingredients

3tsp olive oil                                                            

1kg chicken breast fillets, cubed

300g cauliflower, cut into small florets

3 celery sticks, diced

2 carrots, diced

1/2 cup frozen peas

500g potato, cubed (or, omit and serve with brown rice)

75g curry paste

1.5 cup chicken stock

1tsp conflour


Method

  1. Heat half the oil in a large, deep frypan. Add vegetables and cook, stirring, for 5 minutes until softened. Remove from pan and set aside in a large bowl.
  2. Heat remaining oil and brown chicken. Add vegetables back to pan and stir to combine.
  3. Combine stock and curry paste in a jug.  Pour into chicken and vegetables. Bring to boil, cover, and reduce heat to low. Simmer for 20 minutes.
  4. Remove lid, and sprinkle cornflour into the curry. Stir well, increase heat to medium, and cook, stirring for a further 5-10 minutes, until thickened.
  5. Serve with naan, or over steamed brown rice.
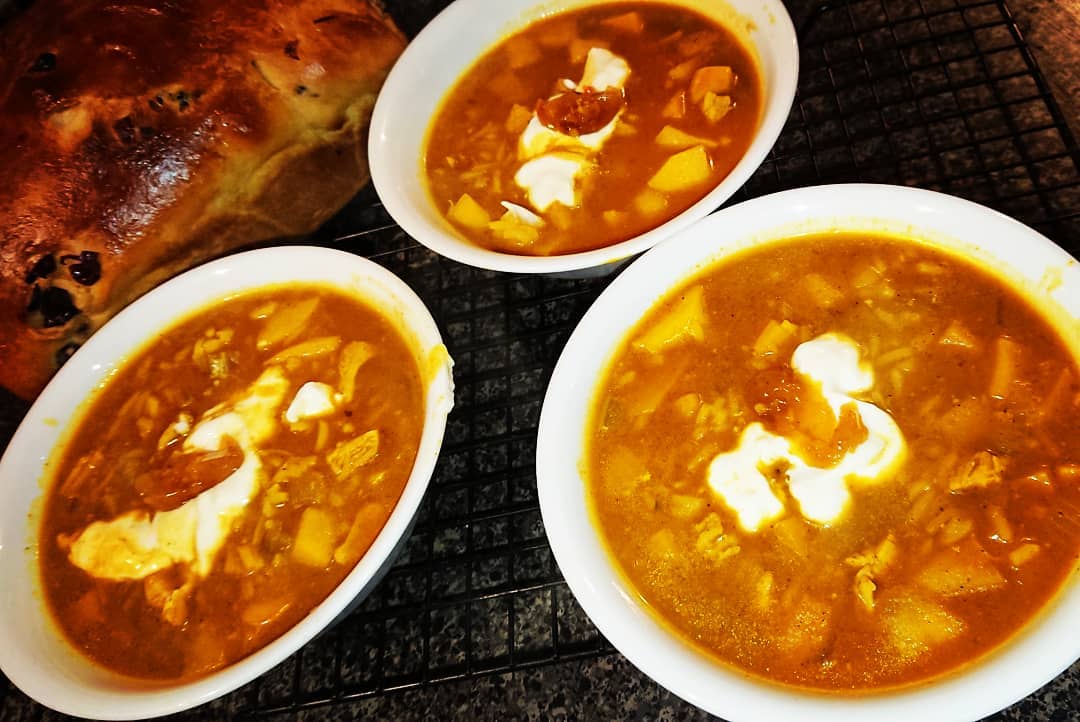
Facebooktwitterredditpinterestlinkedinmail

Vegetable, Feta and Sun-Dried Tomato Muffins

Savoury muffins are a bit of a crapshoot, I’ve come to realise. They’re either really good, or really… not. I need my savoury muffins the same as I need my sweet muffins: moist, flavourful, and with a good crumb. I don’t want dry, hard cakes with a bit of zucchini shoved in there. I want my muffin to be worth it!

The best thing about these muffins in that they tick all the boxes above, and are still relatively healthy. They come in at 130 calories per muffin, and within them lay an abundance of goodness. They’re pretty filling – they certainly meet the 3pm munchies head on, and could no doubt make for a damn fine light lunch, especially if you were to split them open and spread them with cottage cheese (and especially if, like me, you have a slight addiction to the stuff). They freeze amazingly well, and are incredibly easy to make, so for just 15 minutes of your Sunday, you can have a freezer of hunger-busters to get you through the work week.

Actually, they’re so easy, that I didn’t really make them at all – these are largely the work of my little apprentice, Miss 7. Obviously, I oversaw operation and did the lion’s share of the chopping, but like most  muffins, you add your wet ingredients to your dry ingredients, mix a little (but not too much!), stick them in the oven, and go about your merry way. Just the way cooking should be – maximum results for minimal heartache. And, just as they’re easy as can be, they’re incredibly forgiving and versatile – you can swap and change veggies, cheeses and flours to your heart’s content! However, I love them exactly the way they are presented here.

Serves 12

Ingredients

1 cup wholemeal self raising flour

60g butter, chopped

1 medium-large zucchini, grated

40g baby spinach, chopped

100g feta, crumbled

30g grated cheddar

80g sun-dried tomato, coarsely chopped

1 egg

125g milk

Method

  1. Preheat oven to 180, and line a 12-hole muffin pan with paper cases.
  2. Place flour and butter in a bowl. Use your fingertips to combine until mixture resembles coarse breadcrumbs.
  3. Add zucchini, cheeses, spinach and sun-dried tomatoes to the flour. Stir.
  4. Combine milk and egg, and lightly beat. Pour into mixture and stir gently until just combined. Do not overmix, or your muffins will become tough.
  5. Spoon mixture evenly into paper cases. Bake for 25 minutes, or until a skewer comes out clean. Cool on a wire rack.


Facebooktwitterredditpinterestlinkedinmail