Warm Turkey and Rice Salad

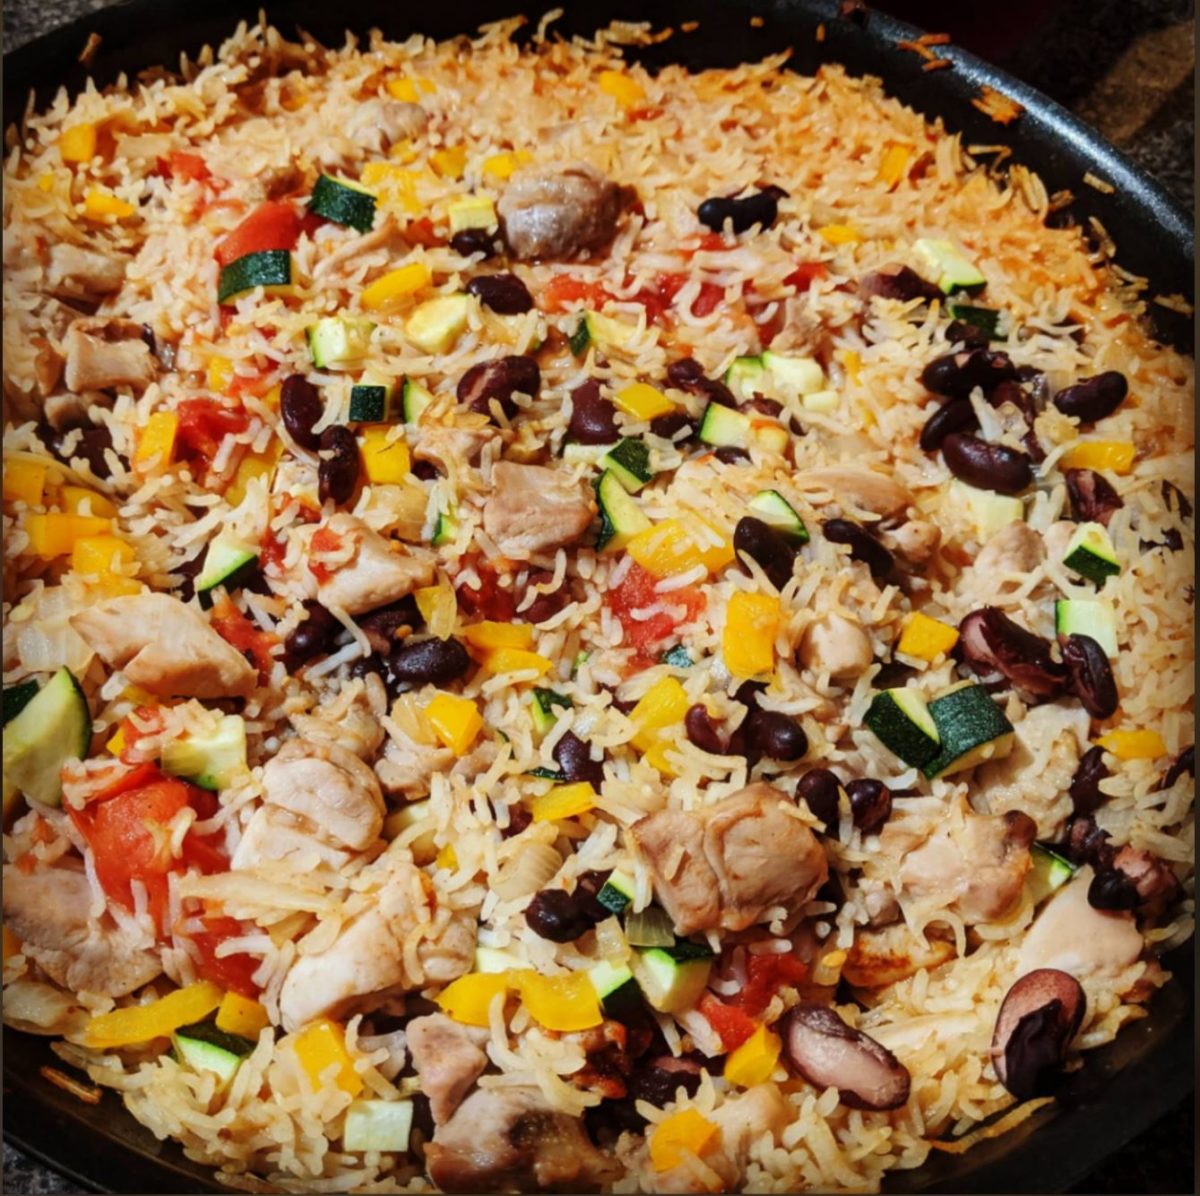
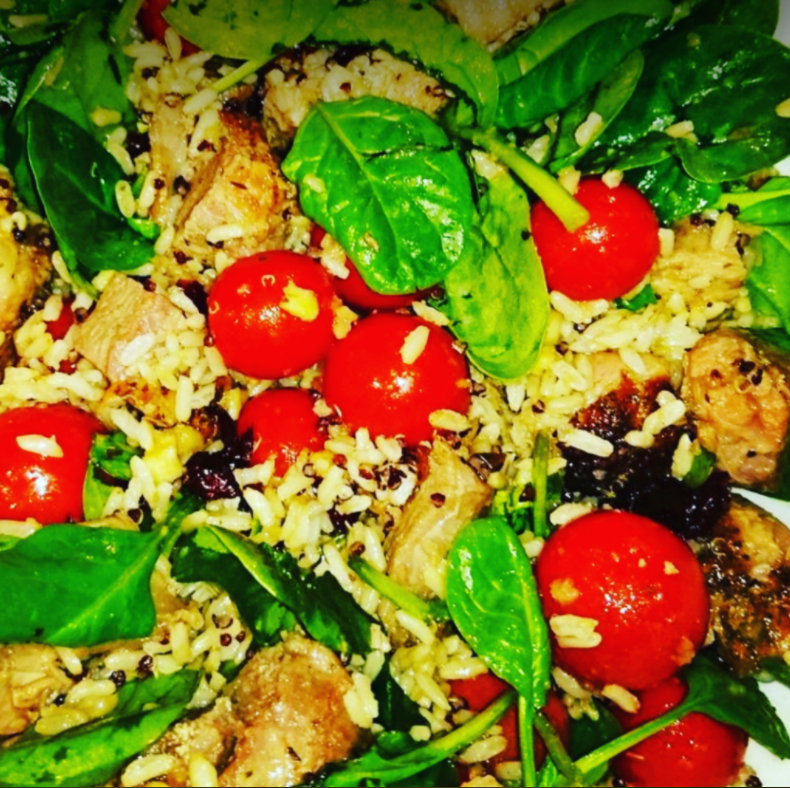
I found a stuffed turkey roast for $2.83 today. The cheapskate in me was beyond thrilled, and suffice to say, tonight was destined to be a winner winner turkey dinner.

The beauty of this recipe – which I’ve had in my back pocket for many years now – is that it is so hands off and easy. Sure, the turkey takes over an hour to roast, but you cook it in the container it’s sold in, and while it does its thing, you’re free to do as you please. Then, with all of 5 minutes of active cooking time, which you can do any time within the next 24 hours (although if your bird cost you less than 3 dollars, I recommend cooking and eating it immediately!), the most simple ingredients become something truly wonderful. It’s a 500 calorie dinner that fills you up and feels like it should be a whole lot naughtier, and still yields leftovers for the next day (or to be fought over by the husband and nearly-teenager, as is so often the case in my house now).

Of course, you can cook the rice from scratch… but you do lose a little of that lazy-dinner feel in doing so. And sometimes, we all need a lazy dinner!

Ingredients

900-1.1kg stuffed turkey roast (my favourite one to use is the Ingham Turkey Thigh roast with apple stuffing)

450g microwavable brown rice

200g cherry tomatoes, halved

1 medium zucchini, diced

60g baby spinach

1/3 cup craisins

Method

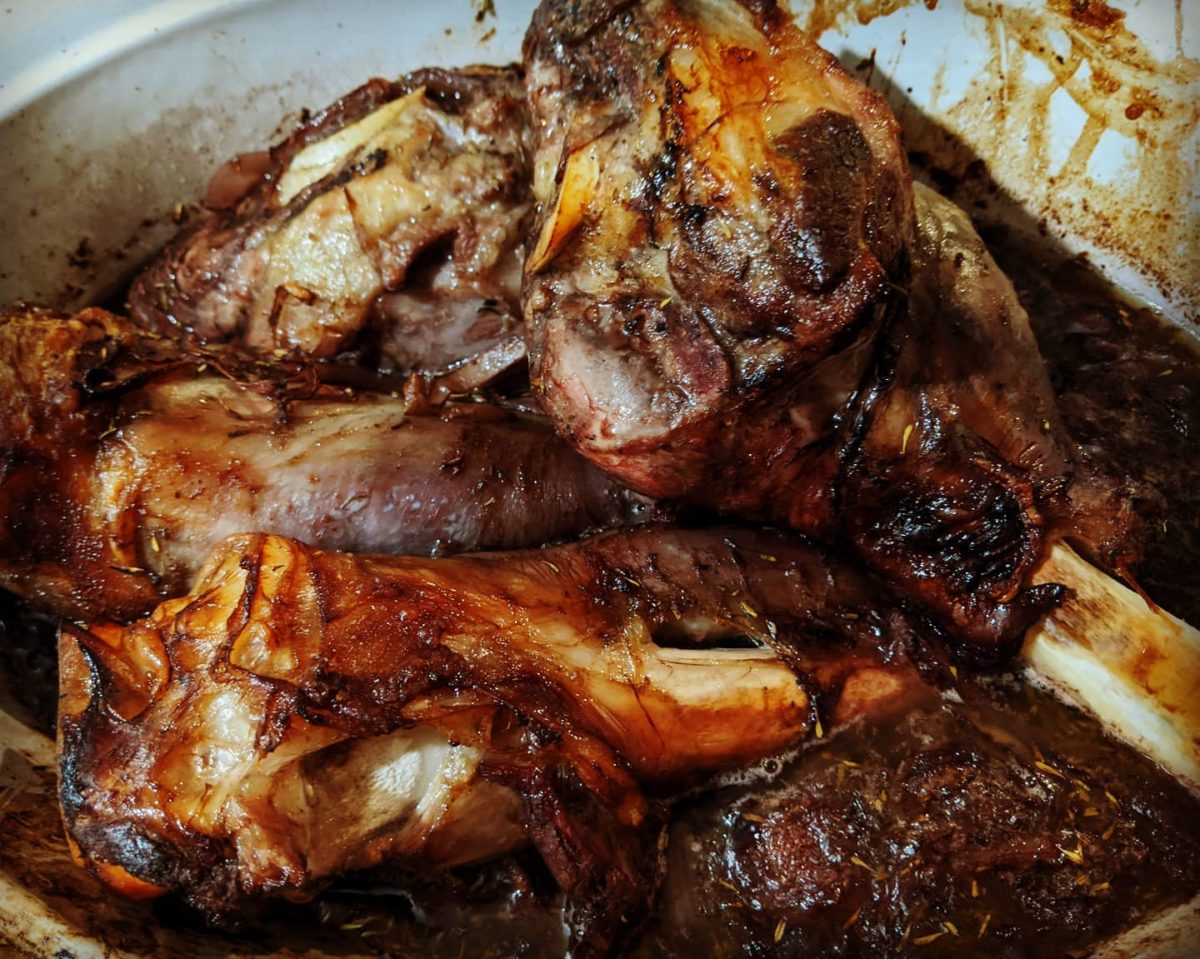
  1. Cook turkey to package instructions – expect about an hour and a half. Rest for 30 minutes, and either refrigerate until required or continue to step 2.
  2. Microwave rice to package instructions. Allow to cool.
  3. Meanwhile, roughly chop turkey and stuffing into bite sized pieces, and set aside in the pan juices.
  4. Heat a frypan over high heat, spray lightly with oil. Using tongs or a slotted spoon, add turkey to pan and cook to heat through.
  5. Add zucchini and tomatoes, and cook for 2-3 minutes until starting to soften.
  6. Add the rice, and mix to combine and heat through.
  7. Remove from heat and stir through craisins and spinach. Allow spinach to wilt, then serve.

Facebooktwitterredditpinterestlinkedinmail

Cauliflower and Apple Soup with Charred Brussels Sprouts

When I told the kids we were having cauliflower soup with brussels sprouts for dinner, they laughed. Often, they’ll ask what’s for dinner, and I’ll respond along the lines of “poop on toast” or “banana and fish casserole” , and I suspect they thought I was joking tonight, too. Even my brussels sprouts loving 9 year old looked a little crestfallen when I actually did pull out the head of cauliflower and started making soup.

I’ll admit, it doesn’t quite scream ‘kids will go crazy over this’, but they did clean their plates, because this creamy yet light soup from the Australian Women’s Weekly is nothing short of delicious. The apple provides a child-quietening sweetness to the dish, while the cream and parmesan adds depth and complexity. The sprouts are certainly not to be skipped – they’re the star, and that slightly charred, nutty flavour elevates a humble soup into something absolutely wonderful. Copious amounts of pepper is also highly, highly recommended here, for the same reason.

The recipe yields 5 serves at 350 calories a serve, and is somewhat accidentally vegetarian: the stock I usually have in the cupboard happens to be vegetarian “chicken style” stock by Massel, and the parmesan I buy also just happens to be vegetarian (yep, I am aware that renders it not truly Parmesan. I am cool with this). These are actually budget decisions, not dietary, but don’t you just love happy accidents?

Ingredients

Spray oil

1 medium cauliflower, roughly chopped

1 onion, chopped

2 Granny Smith apples, peeled, cored and chopped

2 cloves garlic, diced or minced

5 cups chicken or vegetable stock

1tsb lemon juice

1/3 cup parmesan (style) cheese

1/3 cup thickened cream

1tbs olive oil

5 brussels sprouts, trimmed and quartered

1tbs almond meal.

Salt and pepper, to serve

  1. Heat oil in a large saucepan over medium heat. Add onion, cauliflower, apple and cook for 10 minutes, until starting to soften and colour.
  2. Add stock and bring to the boil. Reduce to a simmer, cover, and cook for 25 minutes until everything is very soft.
  3. Remove from heat to cool.
  4. Meanwhile, heat olive oil in a small fry pan and saute sprouts until just starting to char – around 3 minutes. Sprinkle almond meal over the sprouts, toss to combine, and remove from heat.
  5. Use a stick or regular blender to process until smooth (I don’t mind a few little pieces of cauliflower). Stir in lemon juice, cheese and cream.
  6. Ladle soup into bowls and top with sprouts. Season well, and serve with ciabatta or other crusty bread (not included in a calorie count).

Facebooktwitterredditpinterestlinkedinmail

One Pot Chicken, Bean and Veg Rice

Now that I’m back at uni (and doing it so slowly that I’ll be here for about 5 years, which is vaguely horrifying!), while still teaching full time, raising kids, maintaining a marriage, pretending to have a social life,
spoiling a high-maintenance dog, playing sport, making noises about work-life balance (hahahahaha) and trying to stay sane through it all*, I’m relying harder than ever on quick meals that are nutritious, delicious, cheap, and require no mental energy to prepare.

I’m rather fond of this one-pot wonder, which is very tasty, allows the throwing in of whatever you have on hand, can absolutely be made the night before, is basically begging you to use pre-cooked rice (but is still a one-pot cinch if you cook it from scratch) if you’re feeling particularly rushed, and is full of veggies and protein. We use brown rice most of the time, so there is some wholegrain goodness going on there, too. It takes all of 15 minutes in front of the stove, and is an absolute treasure on those evenings when you’re pulled from pillar to post after a long day at work, but want dinner to consist of something decent (does anyone else have those nights when you don’t even have time for takeout? We call them Thursdays around here).

As if this wasn’t already the dinner that keeps of giving, it’s relatively low calorie, with 1/4 serve consisting of 400 calories. I routinely eat 1/5, and it’s more than enough for me, but I generally don’t eat huge meals at night. One day, I’m sure I’ll use barley instead of rice, but that kind of defeats the quickness of the whole thing.


*Note to self: don’t list it all out like that again in black and white if you want a snowball’s chance of that last one!

Ingredients

1 tsp olive oil

1 onion, diced

1 clove garlic, minced

1 yellow capsicum, diced

500g chicken thigh fillet, cubed

400g tomatoes, diced (quartered cherry tomatoes are particularly nice, but regular sized tomatoes are completely fine)

375g microwavable rice (or 3/4 cup rice, cooked however you please. I steam mine, leaving it just underdone)

200g chicken stock

400g red kidney beans, drained

1 zucchini, diced

pinch cayenne, to taste

Salt and pepper, to taste

Method

  1. preheat oven to 180C. Heat oil in an oven-proof skillet over low heat, and cook onion, garlic and capsicum until softened.
  2. Increase heat to medium-high and add chicken, cooking for five minutes, until well browned.
  3. Add remaining ingredients, and stir to combine and coat rice with juices. Ensure that the rice has separated, as it sometimes comes out of the pack in clumps.
  4. Bake for 15 minutes until golden.

Facebooktwitterredditpinterestlinkedinmail

Plum and Red Wine Lamb Shanks

Every school holidays, I spend a fair bit of time with my dad, and one of the little things we do together is go to nice cafe in Windsor (Simon’s), hit up the lolly store opposite while Dad has a conniption over the price of old fashioned sweets that he loved as a kid and bought with currency that was removed from circulation in 1966, then drive up to M & A Butchery in Wilberforce to buy meat while Dad has a conniption over me doing things like spending $20 on a rabbit to cook “for fun”, when he was forced to eat it as a child due to being so poor. I’m not too sure how or when this tradition came to be, but I really do treasure it so.

An extension of this tradition is that I buy and cook lamb shanks on “abattoir day”, largely because the shanks from this place are large, meaty and relatively cheap, unlike what I usually see in the supermarket. I have many recipes for shanks due to a number of old cookbooks that say infuriating things like “try lamb shanks for a cheap and tasty meal”, which pairs beautifully with my dad’s third conniption of the trip: “I can’t believe the price! I used to feed these to Jedda (a dog who died long before my birth) because they were so cheap!” This plum and wine recipe, however, is the Official Family Shank – a firm favourite by far. The sweetness of the jam complements the richness of the lamb, and the peppery undertones bring it all together. Which brings me to the wine: I prefer to use a shiraz, to cut through the sweet, but have made it with several types of wine, and never had a bad experience. Whatever you do, make it a good one, because you really can taste it. It’s worthy of a decent wine, anyway. It’s a crowd pleaser (although for economics, it’d best be a small crowd!) and I often pull it out for dinner guests, and occasions like Quarant-Easter, which was spent in lockdown but still deserved a little pomp and circumstance. I tried to work out the calories, but there are a lot of variables: the size of shanks aren’t standardised and you don’t actually consume all of the sauce, so the best I can come up with, is that with mash and veg, you probably are eating about 700 calories. Not an everyday dish, that’s for sure, but not too bad for a special treat.

Oh, and the leftovers. The best sammich I’ve ever had. Seriously.

Ingredients

4 Frenched lamb shanks

4tbs flour

2 tbs olive oil

1 onion, thinly sliced

1tsp dried rosemary leaves

1tsp dried thyme leaves

1 cup red wine

1 1/2 cup chicken stock

2tbs worcestershire sauce

1 cup plum jam

Pepper, to taste

Mashed potato and steamed veggies, to serve

Method

  1. Preheat oven to 160C.
  2. Dust shanks with flour, and shake off excess.
  3. Heat 1tbs oil in a large, flameproof casserole dish over medium heat. In batches (depending on size of shanks and dish), brown shanks all over, and transfer to a plate.
  4. Heat remaining oil and cook onions for five minutes, until translucent. Add wine and bring to boil. Add stock, herbs, jam, worcestershire sauce, and pepper (generously), and cook for one minute.
  5. Return shanks to the dish. Cover and transfer to oven. Cook for one hour. Remove from oven, baste, and continue cooking uncovered for 30 minutes.
  6. Serve with mashed potatoes and vegetables.

Facebooktwitterredditpinterestlinkedinmail

Apple, Spinach and Chorizo Frittata

Ahhh, frittatas. So easy, so delicious, so good at making a meal out of the most basic ingredients.

This particular frittata, for example, is so stupidly easy, yet the flavour is almost undeservingly wonderful. Such marvelous results for such little effort or need for cooking expertise. I mean, isn’t that the best kind of cooking? All the results for little effort? In my busy, lazy world it is.

This frittata is so versatile, too. You can make it the night before, which is perfect for Thursday nights when the daughter and I both have netball training, the son has baseball, and the husband has a killer commute. It’s a meal in itself, but light enough for those nights when you don’t want a full dinner. And, best of all, while doesn’t last long in my house as everyone loves it, if I can keep it away from snacky, sneaky hands, it lasts two or three days for a great work lunch. A larger serving (1/4) is only 360 calories, and a smaller serving (1/6) is 240. Add some veggies or a salad, and you’re absolutely good to go – and it’s more filling than just the larger serve.

Ingredients

2tsp olive oil

180g chorizo sausage, sliced into coins

1 red onion, thinly sliced

1 red apple, thinly sliced

100g baby spinach

9 eggs

60g milk

Salt and pepper, to taste

Method

  1. Preheat oven to 180C.
  2. Heat oil in an ovenproof frying pan over medium heat. Cook chorizo for five minutes, or until golden. Add onion and cook for 3 minutes, until softened. Transfer both to a bowl, but keep oil in the pan.
  3. Place apple slices in pan and cook for 5 minutes, turning occasionally, until golden and starting to soften. Remove to a separate plate or bowl.
  4. Add spinach and stir briefly until just wilted. Return onion and 3/4 of the chorizo to the pan, and distribute evenly in the pan.
  5. In a clean bowl, whisk eggs and milk until combined. Pour into pan, over the spinach mixture.
  6. Arrange remaining chorizo and apple slices over the egg. Season with salt and pepper. Cook for 3-4 minutes, shaking occasionally, until eggs just start to set. Transfer to oven, and bake for 12-15 minutes until egg is golden and cooked though.

Facebooktwitterredditpinterestlinkedinmail

Pork and Mushroom Udon Soup

Silly me, I called out a dangerous sentence in my household this morning. I should have known better, or stopped myself when I felt it coming on, but nonetheless, “I’m doing a shopping list, what do we want for dinner?” fell out of my mouth. Such a question will result in one of two responses: a shrug of the shoulders and non-committal grunt of “I don’t know”, or a very excited, specific request.

Today, I got the latter. The 12 year old Japanophile piped upped almost instantly, “Ramen!” and of course, he didn’t mean the cheap, quick 2 minute noodle style (thankfully, because I really don’t care for those). I tried to point out that even in Japan, people don’t make ramen at home, they go to a noodle house. He saw right through that, and I found myself at the huge Asian supermarket not too far from my house.

As grumpy as I sound, I am of course, quite pleased with the outcome. I cook a lot of soup, even a lot of Asian style soups, but I think this might have been the best yet. I got a little inspiration from Nigella Lawson, a little from the Japan cookbook by Nancy Singleton Hachisu, and a little from years of eating ramen and never coming across one I didn’t love. I won’t claim pure authenticity, but I will claim deliciousness. And healthfulness – it’s pretty wholesome at only 450 calories a serve.

Ingredients

20g dried, sliced shiitake mushrooms

5 cups dashi or chicken stock

2tsp minced ginger

2tsp white miso paste

2 radishes, thinly sliced

1tbs soy sauce

2tsp olive oil

300g pork loin, thinly sliced and seasoned with salt and pepper

4 eggs

400g udon noodles

2 bok choy, shredded, or 100g baby spinach

8 slices narutomaki

scallions, sliced thinly, to serve

1 small chilli, sliced thinly, to serve.

Methods

  1. Place mushrooms, stock, miso and ginger in a large saucepan and bring to the boil over high heat. Reduce to low, cover and simmer for 15 minutes. In the last 3 minutes, add radishes and soy sauce. Meanwhile, continue with the following steps.
  2. Saute the pork in the oil over high heat until just cooked through, Set aside.
  3. Boil eggs for 6.5-9 minutes, until set to your preference. We like a 6.5 minute egg, where it’s hard around the outside of the yolk and still slightly soft toward the middle. When done, remove with a slotted spoon, reserving the water, and run under cold water, peel and set aside.
  4. Place udon in the water from the eggs and cook for 4 minutes, or to package instructions. Drain and rinse.
  5. To assemble, place noodles in bowls. Add spinach/bok choy and pork, then ladle in soup. Top with narotmaki, scallions and chilli.
Facebooktwitterredditpinterestlinkedinmail

Sweet Chilli Dumpling Stir Fry

Why did I never think to do this?! Why did I inhabit this planet for 33 years without this?!

I LOVE stir fry, we eat some version of it weekly. I LOVE dumplings. My whole family would subsist on nothing but pot stickers, xiao long bao and wontons, given half the chance. Combining the two was so obvious. So perfect. So… not something I’d ever considered until I came across a recipe from taste.com.au. I’ve made it a couple of times, and never the same way twice: different dumplings, different veggies, different ratios. The sauce is amazing, and that always stays the same, but the beauty of stir fry is that you use what you have. So this recipe is a guideline, a serving suggestion at best. But a truly delicious suggestion that I urge everyone to make their own. I’ve made these with various flavours, shapes and styles of dumplings with success, but find pot stickers are the hardiest, and therefore, best to toss around. But substitute away… it’s all good. One day I’ll be super smug and use homemade dumplings (I went to a funky class months ago, and so far have done nothing with that experience), but I’m absolutely not above throwing in some good quality frozen pieces.

This meal serves 4, and is about 350 calories per serve. Of course, that’s hard to gauge when you change everything each time, but if you stick to the spirit of the recipe, it’s a safe bet.

Ingredients

1.5 tbs peanut oil

400g dumplings of your choice – I’m partial to prawn or pork

100ml water

1 onion, thinly sliced

200g mushrooms, sliced

1 small handful of baby capsicum, sliced (or 1 regular pepper)

4 heirloom carrots, peeled and cut into matchsticks

1 small head broccoli or 3 bunches broccolini, cut florets and stalks thinly sliced

100g beans or snow peas, trimmed

400g can baby corn, drained

3 cloves garlic, minced

1tsp minced ginger

1/4 cup oyster sauce

2tbs sweet chilli sauce

1/4 cup Shaoxing wine

Large handful baby spinach

Method

  1. You’ll want everything ready to go before you start. Chop all vegetables and place in one large bowl. Combine oyster sauce, sweet chilli sauce and Shaoxing wine in a jug and set aside.
  2. In a large frypan with a lid, heat 1tbs oil over medium heat. Add dumplings and cook one side without turning or stirring. Carefully pour water into pan (it will sizzle like mad… I often turn the heat down to low because it freaks me out a little), cover with lid and steam for 5 minutes. Transfer to a plate with slotted spoon and keep warm (this is a quick method – throwing a clean teatowel over it should do the trick).
  3. Heat remaining oil in a hot wok (you can use a frypan, in fact I have most of the times I’ve cooked this, but since getting one recently, I cannot recommend a wok highly enough!) and add all the vegetables, ginger and garlic. Stir constantly for about 5 minutes, until veggies are tender but not mushy.
  4. Pour the sauce over the veggies and give a good stir.
  5. Add the spinach and dumplings and turn gently until the dumplings are coated with sauce and the spinach is wilted.

Facebooktwitterredditpinterestlinkedinmail

Sweet Chilli Chicken and Corn Soup with Pumpkin Scones

Oh, look! Another soup! It’s cooling down here now, and I’m swapping my salads for soups as my seasonal staples. I’ve been making this soup for years, and it’s an absolute winner. I mean, chicken and corn soup isn’t anything overly special, but the sweet chilli sauce – such a simple addition to such a simple dish – makes such a difference to the versions I ate growing up. Adding a pumpkin lemonade scone for dipping makes this a delightfully delicious light meal that will leave you feeling like you’ve partaken in something special. Yet, it’s a cinch to make, and so very budget friendly. A serve of each sits right at 400 calories, making it the perfect winter warmer.

Sweet Chilli Chicken and Corn Soup

Serves 4 at 300 calories per serve

Ingredients

1.25 litres chicken stock

2 garlic cloves, minced

1tsp minced ginger

1 onion, finely diced

420g can creamed corn

200g sweetcorn kernels

300g chicken thigh fillets, skin removed

2tsp soy sauce

1tbs sweet chilli sauce

2 eggs whites, beaten

Salt and pepper, to serve

Method

  1. Bring stock to the boil. Add garlic, ginger, corn, onions and chicken to the stock, cover, and reduce heat to medium. Simmer for 10 minutes, or until chicken is mostly cooked through.
  2. Remove chicken from the stock, and using two forks, shred meat. Return to stock and resume simmering (uncovered) for five minutes or until cooked through.
  3. Stir through the soy and sweet chilli sauces. In a thin stream, slowly pour in the egg whites, whisking the soup to incorporate evenly. Cook for another minute, then serve with a generous crack of black pepper and salt to taste

Pumpkin Scones

makes 16 at 100 calories each (they freeze really well)

Ingredients

300g pumpkin (weight without skin and seeds)

2 1/2 cups flour

1/4 teaspoon maldon salt flakes

1/2 cup lemonade (Schweppes works well as it’s not too sweet)

1/2 cup thickened cream

1tbs milk

Method

  1. Steam pumpkin until very tender, drain and cool.
  2. Preheat oven to 220C and prepare a tray with non-stick baking paper (I give it a little spray with oil anyway, because I have trust issues).
  3. Sift the flour and salt into a large bowl.
  4. Combine cream and lemonade. Pour into flour, and using a flat blade knife, mix to combine. Don’t overmix, but do ensure the flour is incorporated. The dough will be rather wet and sticky.
  5. Using a tablespoon or, better yet, a soup spoon, dollop spoonfuls of mixture on the prepared trays, shaping them into neat rounds with only a few millimetres of space between them.
  6. Brush with milk and bake for 12-15 minutes. Remove from oven and allow to cool slightly on the tray. Serve with soup as they are, or spread with just a little butter or (as I tend to do) cottage cheese.

Facebooktwitterredditpinterestlinkedinmail

Stuffed Sweet Potatoes and Leftover Bubble & Squeak

I love a good two for one deal, and in this case, it’s a delicious deal that I’ll be keeping on rotation. Fluffy baked sweet potatoes with the flesh scooped out and put aside for tomorrow morning, topped with a concoction of tomatoes, beans, and smoked ham, baked to perfection under a sprinkle of cheese – yes please! And the next day, taking the scooped flesh, mixing it with the leftover bean mixture, frying it to gnarly goodness and topping it with a runny egg is the best way to start any day – especially during the blah-ness of Covid-19 quarantine.

I have served this with almond-crusted beef schnitzel for a more decadent dinner, but it seriously is delicious and filling enough to work as a meal on its own. As a stuffed potato, this recipe is 327 calories. The bubble and squeak with 2 runny eggs clocks in at 340 calories. Very reasonable for a superb breakfast!

Serves 4, with enough to make a B&S to serve 2-3 (calories counted at 3 serves)

Ingredients

2 sweet potatoes (about 600g total)

1tbs + 1tsp olive oil

1 red onion, diced

1 carrot, peeled and diced

2 cloves garlic, minced

400g diced tomatoes (tinned or fresh)

1tbs barbecue sauce (a smoky one is great here!)

2tsp dijon mustard

chilli powder, to taste

400g can 3 bean mix, drained

100g ham, chopped

1/4 cup grated cheese

fried eggs, to serve with bubble and squeak

Method – stuffed potatoes

  1. Preheat oven to 230.
  2. Wash and halve sweet potatoes lengthways, prick with a fork and rub with one tablespoon of olive oil. Place on baking tray, cover with foil, and bake for 45 minutes, or until tender.
  3. Meanwhile, heat remaining oil in a pan over low heat. Add onions and carrots and sweat for 8 minutes until softened. Add garlic and cook for one minute.
  4. Stir tomatoes, mustard, sauce and chilli into onion mixture and cook for 5 minutes. Add 1/2 cup water if drying out too much, although this rarely happens over a low heat.
  5. Stir in beans and ham, and cook for 10 minutes, allowing mixture to thicken.
  6. Remove cooked potatoes from oven (do not turn oven off), and allow to cool enough to handle. Scoop flesh into a bowl (cool and refrigerate for later), leaving a 1cm thick layer of flesh in the skin.
  7. Fill potato shells with tomato mixture (reserve and refrigerate the leftovers).
  8. Sprinkle with cheese and bake for 5 minutes, or until cheese has melted and turned golden.

Method – Bubble and squeak

  1. Bring potatoes and tomato mixture leftovers out of fridge and rest to remove the chill. Combine into one mixture
  2. Heat 1tsp olive oil in a frypan. Upturn mixture into pan and flatten into a giant patty. Cook for 5 minutes, and flip. Don’t stress if it breaks… this isn’t a pretty dish anyway! Cook underside for 5 minutes, until slightly charred, gnarly bits form.
  3. Meanwhile, fry eggs to your liking.
  4. Using a spatula, cut the bubble and squeak into 2 or 3 serves, and slide onto warmed plates. Top with fried eggs, season liberally with salt and pepper and serve.

Facebooktwitterredditpinterestlinkedinmail

Risoni Vegetable Bolognese

I had every intention of making a tomato and meatball soup today, I really did. But when push came to shove, I just could not be bothered rolling meatballs. Besides, right now, the idea of squishing other peoples’ food around in my hands sounds tone deaf, all things considered. But really, I just couldn’t be bothered, let’s be honest.

Instead, I dumped everything in one pot, at the advice of Nagi at Recipe Tin Eats. This isn’t her exact recipe – I upped the veggie intake, and cut back on the risoni a little, but the spirit of her recipe is there. And it’s perfect for those CBF kinds of nights. The whole ordeal took maybe 20 minutes, it’s made on staples/stuff I found in my fridge and cabinets (again, perfect for Corona-geddon), was tasty and comforting, and was gobbled up by everyone. It’s not like usual bolognese recipe, but the benefit of that is that you could pretty much throw anything into it and have it come up a winner. It’s one of those magical recipes. So I’m writing it down so that I don’t forget it!

Nagi’s recipe clocked in at 484 calories; mine is 400. Either way, it’s better than takeaway!

Ingredients

1 brown onion

2 cloves garlic, crushed

200g mushrooms, sliced

500g lean mince

700ml passata

2tbs Worcestershire sauce

3 cups chicken stock

2tsp dried parsley

2tsp dried oregano

1tsp dried thyme

1tsp dried basil

1tsp sweet paprika

cayenne pepper, to taste

1 medium zucchini, diced

1 cup risoni/orzo

60g baby spinach

salt and pepper, to taste

Grated parmesan cheese, to taste

Method

  1. Add onion, garlic and mushrooms to a non stick pan over medium heat. Cook, stirring, for 5 minutes or until vegetables are soft and golden.
  2. Brown mince with onion mixture, breaking it up as it cooks.
  3. Stir in passata, herbs, Worcestershire sauce, stock and zucchini. Bring to a simmer, add risoni and stir to distribute evenly.
  4. Cook for 10 minutes, stirring occasionally to prevent the risoni from sticking to the bottom. As you get closer to the ten minute mark, you may need to stir more frequently.
  5. Take off heat, stir in spinach.
  6. Serve, topped with parmesan and seasoned with salt and pepper.

Facebooktwitterredditpinterestlinkedinmail