Bulgogi Beef Bowl

Okay, kids, confession time. There is very little about this dish that is authentic. Well, it does have beef, so I guess that’s a start…

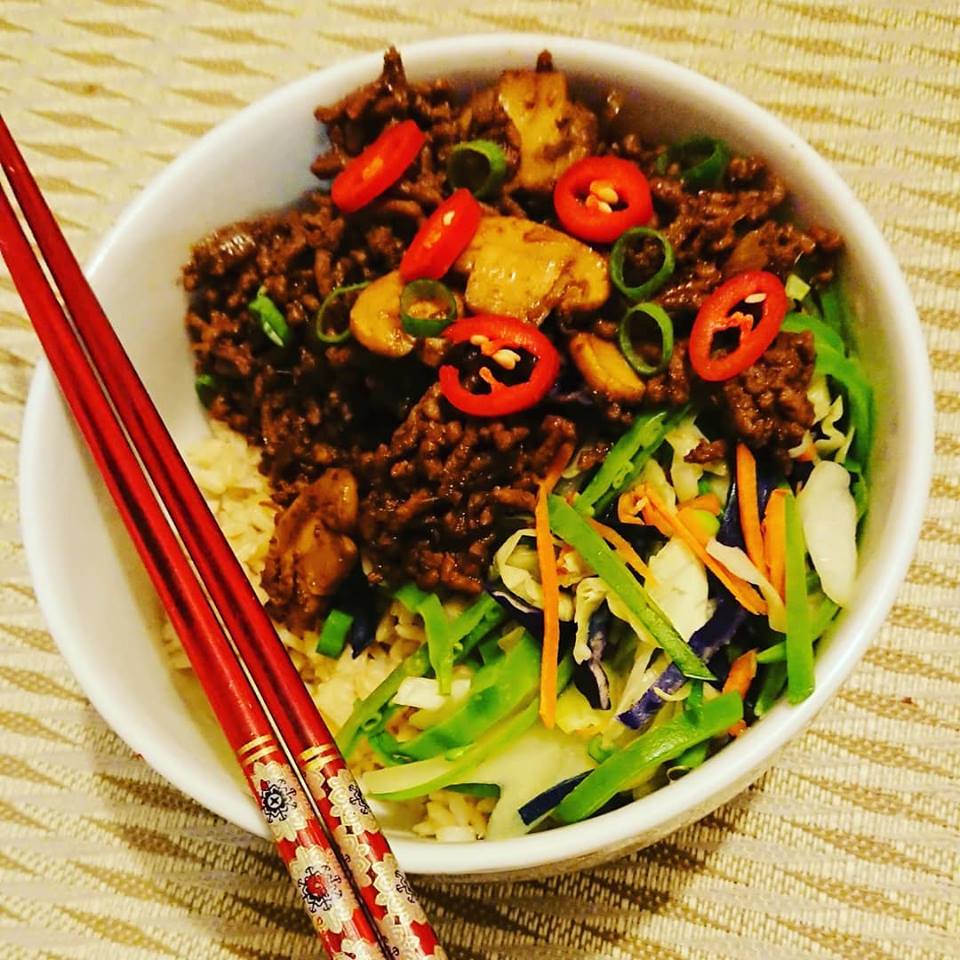
But you know what? It might take 15 minutes to cook, call microwavable rice, and be as far from authentic Korean as humanly possible, but nobody complained tonight about that. In fact, things almost came to blows when it came to calling dibs on leftovers for lunch tomorrow.

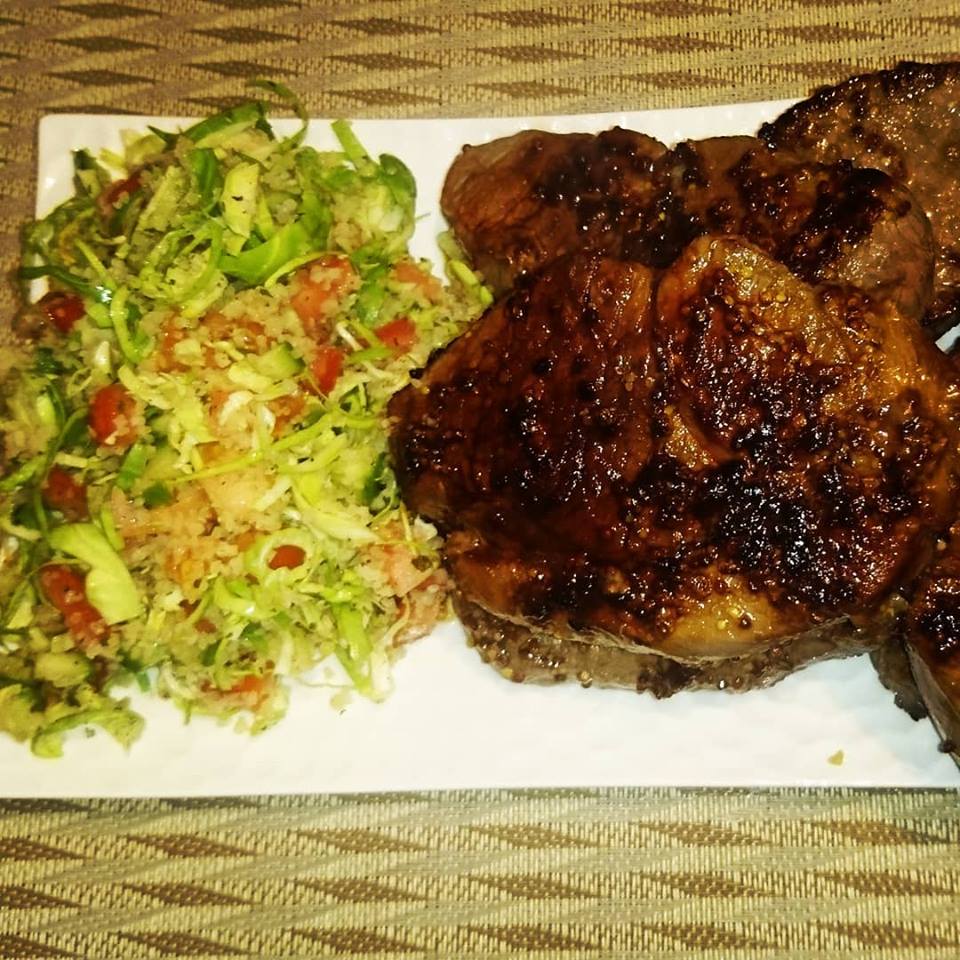
It’s stupidly simple, but more importantly, it’s just really, really tasty. The meat is sweet and warming, the veggies are crunchy and delicious, the rice offers a carby hug that reaches your soul, and the chilli gives everything a nice kick. Of course, the chilli is entirely optional, but it gives a balance that I personally wouldn’t want to mess with. At less than 400 calories a serve, it’s a great comfort meal without going nuts. It’s full of veggies and good stuff, and you absolutely can omit the brown rice if you so desire (although, happiness for me is knowing that I don’t have to anymore!) without sacrificing the flavour.

Serves 4

Ingredients

1/2 tbs olive oil

1 brown onion, thinly sliced

200g mushrooms, sliced

2tsp minced ginger

1tsp minced garlic

500g lean beef mince

2tbs honey

3tbs soy sauce

2tbs rice wine vinegar

1/4 green cabbage, shredded

1/4 red cabbage, shredded

2 carrots, grated

150g snow peas, thinly sliced

250g microwave brown rice (or 250g cooked brown rice, of course. But the instant rice  is just too convenient for me to ignore for a recipe as quick and easy as this!)

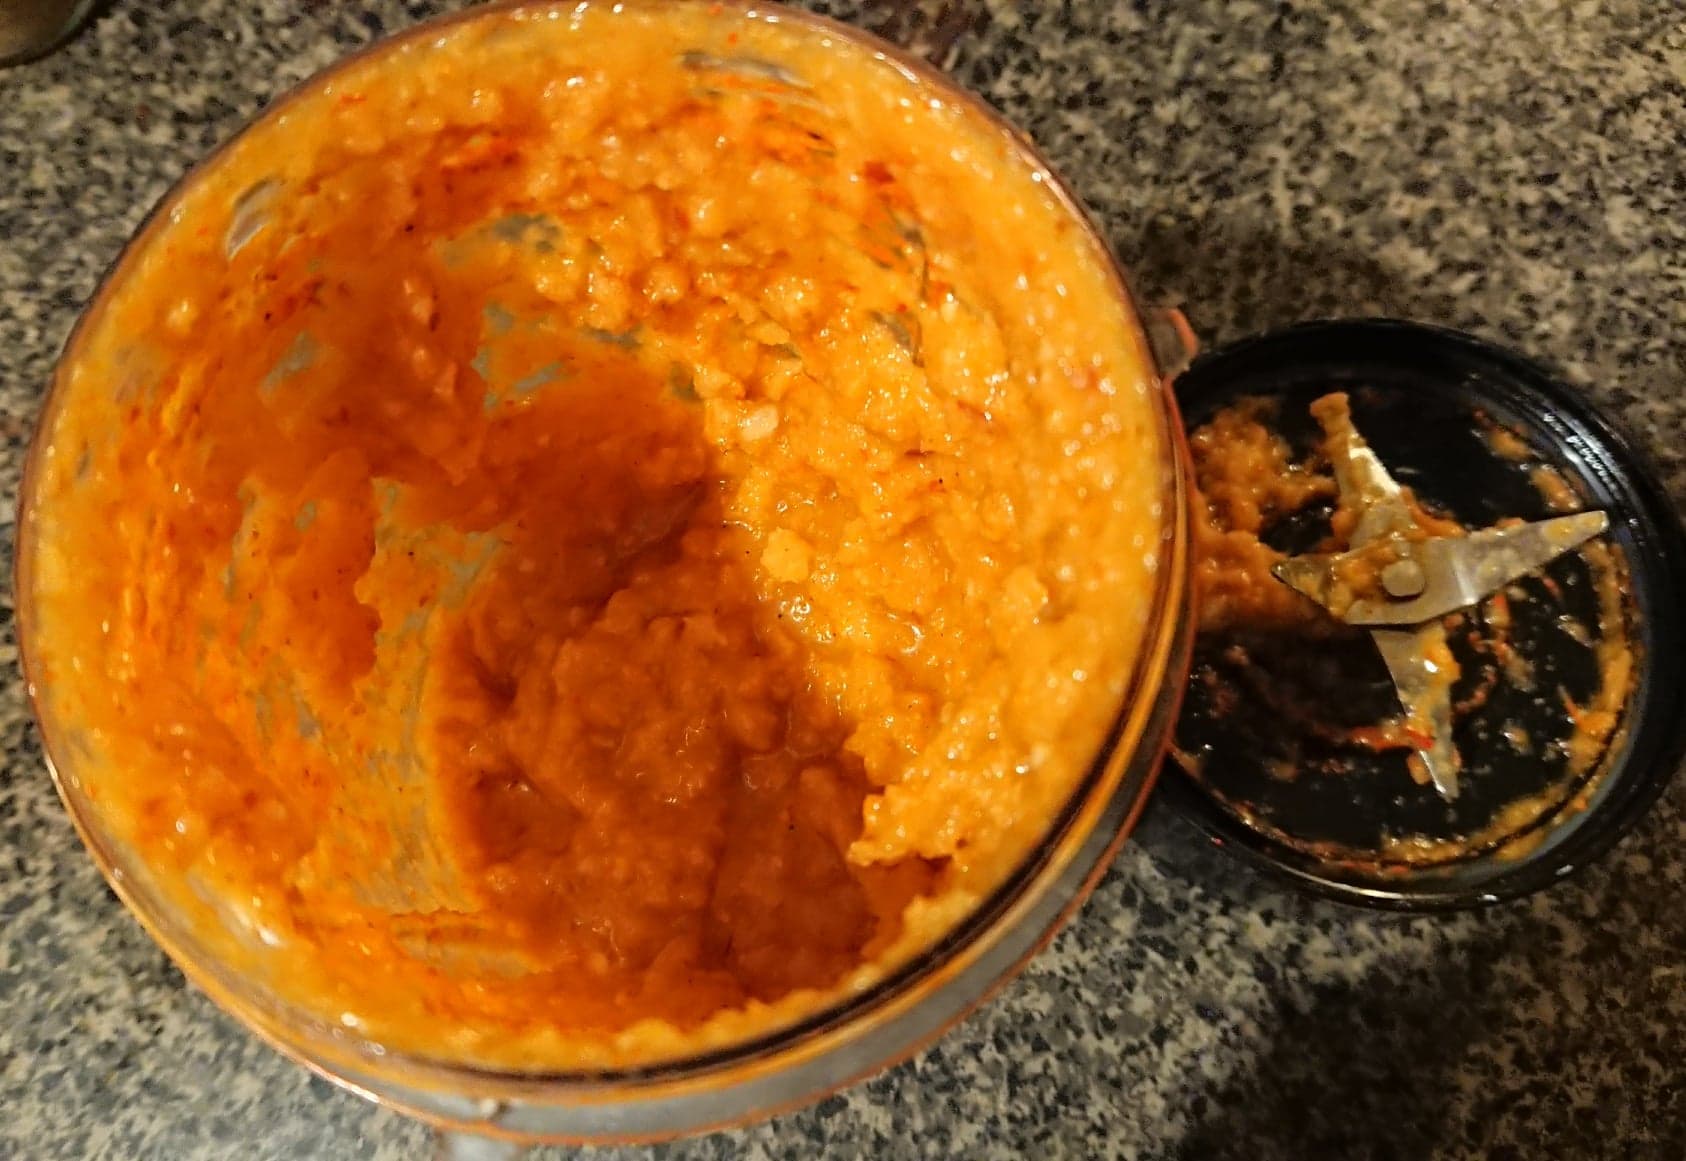
1 small, thinly sliced chilli, to serve

1 spring onion (shallot), thinly sliced, to serve.

Method

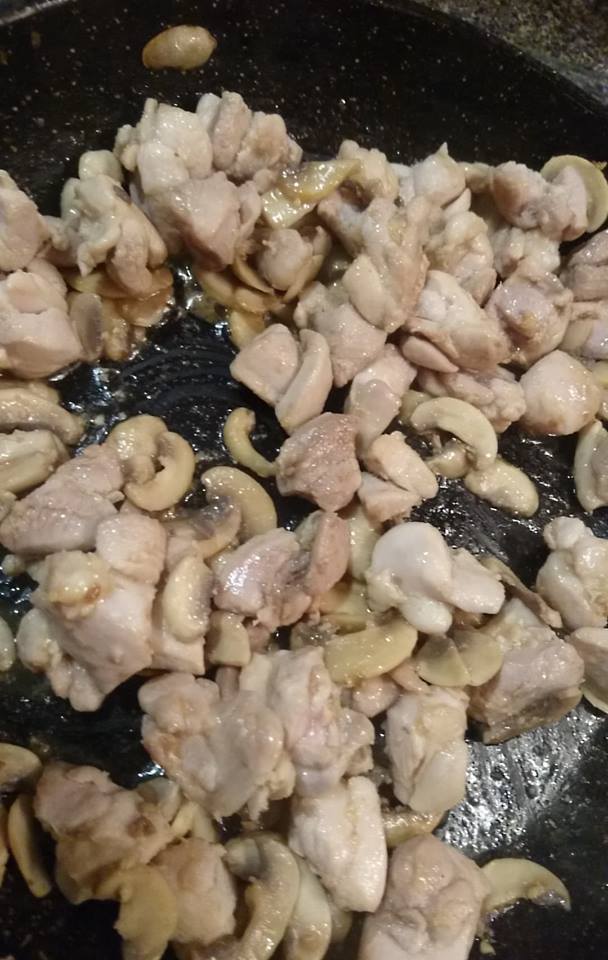
  1. Heat oil in a frypan over low-medium heat. Add onions and mushrooms and cook, stirring occasionally, for 5 minutes until softened.
  2. Add garlic, ginger and mince to pan and brown for 5 minutes, stirring often to break up meat and cook evenly.
  3. Stir in honey, soy and vinegar. Reduce heat to low, and cover.
  4. In a clean frypan, sauté cabbage, carrots and snow peas for 2 minutes, until starting to wilt but not completely soft.
  5. Meanwhile, cook rice according to packet directions (begin cooking raw rice at the very start of this recipe if not using microwave rice).
  6. Divide rice into bowls. Top with meat and vegetables, and garnish with chilli and spring onions.


Facebooktwitterredditpinterestlinkedinmail

Cherry Berry pie

A dear friend on My Fitness Pal once told me, “there’s no point working hard for a better lifestyle if you are too scared of eating to have any lifestyle at all”, and it really struck a chord with me. I love food, and while I’m happy to be strict with my diet and exercise 90% of the time, I really enjoy that 10%, when I can enjoy something decadent or wicked without a care in the world that it puts me past my daily calorie goal, because tomorrow is a new day, and one dessert isn’t going to undo any of my hard work. Even when that dessert is 500 calories and change. No apologies. Totally worth it.

Working with dough or pastry of any sort is always cathartic to me – making something so delightful out of the most basic ingredients is a simple joy that often makes me wish I had the courage and talent to cook for a living (and when I say that, I mean having a career where I’m paid to cook what I want, when I want, which I’m sure is not how any of this works).

There are a million pie recipes out there, and the basis of a lot of your fruit pie recipes are pretty similar. It’s a basic dessert, but really, who doesn’t love pie? It’s an essential recipe to have under your hat, and mine is an amalgamation of so many recipes I’ve come across. Even so, it’s probably exactly the same as somebody else’s, and eerily similar to many more. I can’t even begin to credit all my sources here – it’s a complete mongrel of a recipe. Especially when you start adding different fruits in here. Which work so well, especially if those fruits are apples, just to bulk it up. Actually, this makes for a sensational apple pie if you replace all the fruit with 7 Granny Smith Apples and do everything else exactly as written. In fact, I did exactly this tonight to take to my in-laws’. It’s a winner.

Word of warning – do not try to make this in an Australian Summer. It’s pretty much impossible to work with. This is a pastry that likes to be cold! If the pastry does get a bit warm and unworkable, just stick it back in the fridge for a few minutes, it’s pretty resilient, as long as the room temperature isn’t too high.

Serves 8. Or 4. Who am I to judge?

Ingredients

Pastry

1 1/3 cup plain flour

1/2 cup self raising flour

1/4 cup custard powder

1/4 cup caster sugar

150g butter, chopped

1 egg, beaten

2-3tbs water

2tbs milk

2tbs raw sugar


Filling

50g butter

1/2 cup caster sugar

400g can pitted cherries, drained

400g frozen berries, defrosted

2 Granny Smith apples, peeled, cored and chopped

1tbs lemon juice

1/2 tsp cinnamon

1/2 tsp nutmeg

1/4 tsp ground cloves

Method

  1. Process butter, custard powder, flours and sugar until mixture resembles fine breadcrumbs.
  2. Add egg and 2tbs water. Process until mixture comes together into a ball. If it remains too dry, add extra water and process again.
  3. Turn dough onto a clean, dry surface and knead for 30 seconds until smooth. Flatten into a disc and wrap tightly in cling wrap. Refrigerate for 30 minutes.
  4. Meanwhile, melt butter and sugar for filling in a large saucepan over medium heat. Allow sugar to caramelise a little. Add fruit, lemon juice and spices, and mix well. Cook, stirring occasionally for 10 minutes, or until apples have softened but not collapsed. Remove from heat and allow to cool.
  5.  Roll out 2/3 of the pastry between 2 sheets of baking paper so that it is large enough to line base and side of prepared dish (test by ensuring that there is an inch or so around the circumference when you place the dish upside down over the pastry). Rewrap the reserved pastry in cling wrap.
  6. Remove one sheet of baking paper and carefully line the dish with pastry. When it is fitted in, remove the second sheet of paper. Smooth gently with clean hands. Using a sharp, small knife, trim the sides of the dish.Roll excess pastry with the reserved pastry. Allow some slight overhang – the pastry shrinks as it cooks. Refrigerate for 15 minutes.
  7. Preheat oven to 180C and grease a 20cm x 5cm deep pie dish.
  8. Meanwhile, roll out second ball of pastry so that it fits comfortably over the edges of the pie dish (you may have a little excess pastry left over). Cut into strips and press into the edges of the pie base to create a lattice pattern. Conversely, you could just roll the dough large enough to fit over the filling and press into the pastry bae, to make a full a full lid.
  9. Carefully brush pastry lid with milk and sprinkle with sugar. Bake for 45 minutes. Cool for at least 15 minutes before serving with a scoop of vanilla ice cream.
Facebooktwitterredditpinterestlinkedinmail

Miso Barley Soup

I’m sure I’ve waxed lyrical plenty of times about how much I love soup, but oh my God, I LOVE soup. Scrap that – I love hearty, warming, sticks-to-your-ribs soup. You’re extremely unlikely to catch me with a thin, watery cup of powdered soup anywhere near my lips, but if I could swim in a thick homemade soup, I would happily dive in.

I also have this weird obsession with pearl barley. Is it weird to have a favourite grain? It’s chewy, tasty, filling, low calorie, healthy and lends a sense of nostalgia that makes absolutely no sense, seeing as though I don’t remember ever eating it as a child. I guess it’s just comforting.

This miso barley soup combines three of my very favourite foods. And while it takes a while to cook, the most labour intensive part of it is chopping the vegetables. It’s a forgiving, undemanding recipe that’s perfect for those cold winter nights where you have plenty of time, but don’t want to spend it slaving over the stove.

I was a little shy about this recipe, although I have no idea why. So, I made chicken to go with it. I’m usually of the opinion that soup is a meal unto itself, but there was something holding me back. Perhaps concern that my family would find it unfilling, or bland? Neither was the case, however, a couple of honey soy roasted chicken drumsticks absolutely lifted this soup to a whole new level. Eaten separately, or thrown into the soup – either ways works a complete treat. Sans chicken, the soup is a diet-friendly 246 calories, and assuming that you’re using regular chicken legs and those of not some mutant giant bird, you can allow for about 103 calories per drumstick.

Ingredients

2tsp olive oil

3 celery sticks, diced

2 large carrots, diced

1 brown onion, diced

3tsp minced garlic

1tbs minced ginger

1/2 cup pearl barley

5 cups water

2tbs white miso paste

400g edamame beans, podded

2tsp soy sauce

Method

  1. Heat oil in a large, heavy based saucepan (a cast iron pot is perfect!) over low heat. Add diced vegetables and cook, stirring occasionally, for 5 minutes until softened and onions are sweating.
  2. Add garlic and ginger, and stir for 1 minute until fragrant.
  3. Mix in barley. Add water and miso paste, and stir well to combine paste.
  4. Increase heat to high  to bring to the boil. Reduce to medium low, cover and cook for 45 minutes. Stir occasionally to prevent grains from sticking to the bottom.
  5. Add edamame and soy sauce, cover, and cook for a further 8 minutes.


Facebooktwitterredditpinterestlinkedinmail

Vegetable Coconut Curry

  It’s meal prep Monday!

I’ve always asserted that any luck (ha! I wish it was luck!) I’ve had with weightloss and this journey can be attributed to the fact that I plan meticulously. I plan what I’m going to eat and when I’m going to eat it, how it fits into the rest of the day in terms of both calories and nutrition, and how the week will look overall. I’m organised and I’m prepared. Funnily enough, being this meticulous allows for some unexpected flexibility and splurging without messing anything up, which is probably why I like it so much.

If it sounds boring, it’s because it probably is. But it works! And after 10 months of this, it really doesn’t take up a lot of time or mental energy anymore. It’s second nature now, and I’m grateful for that. It means that a) I’ve been successful in changing my lifestyle for the better, and b) it’s completely sustainable. Fortunately, being prepared and drinking the meal-prep Kool-Aid works really well with my love for cooking. Work lunches are now a great opportunity to find new recipes that might not appeal to the rest of my family for dinner, and to up my veggie intake. Don’t get me wrong – there are plenty of weeks where I survive the work day on salad and salmon, or brown rice and tuna for days on end, but when I do have my act together, I much prefer something a little more exciting. 

Like this vegetable curry. It’s quick to make, spicy and warming, healthy, delicious, cheap, and freezes beautifully. It’s the stuff meal prep dreams are made of!  It’s the perfect way to use up those sad looking vegetables populating the bottom of your crisper, and gives you something to look forward to on boring mornings. At only 200 calories per serve, there’s plenty of opportunity to carb it up with roti, brown rice or freshly made bread (or sliced, I won’t judge), but you can definitely get away without any extras, too.

Serves 5

Ingredients

1 large onion, chopped roughly

3tsp minced garlic

2 tsp minced ginger

3tsp sambal oelek

1tsp garam marsala

2tsp ground cumin

1/2 tbs olive oil

2 tomatoes, chopped

1/2 cup light coconut milk

1/2 cup chicken or vegetable stock

400g can chickpeas, drained

300g pumpkin

1/2 head cauliflower, cut into florets

200g baby green beans

1 small birds eye chilli, thinly sliced (optional)


 Method 

  1. Place onion, garlic, ginger, sambal oelek and spices into a food processor, and process into a paste.
  2.  Heat oil over medium heat, and add paste. Cook, stirring, for one minute, until highly fragrant.
  3.  Add tomatoes and cook, stirring, for 1 minute until softened.
  4. Add stock and coconut milk, and stir to combine. Simmer for 30 seconds, and add chickpeas, caulifl
    ower and pumpkin. Stir to coat, cover, and simmer for 15 minutes. Add beans and cover for a further 5 minutes.
  5. Serve topped with chilli.
Facebooktwitterredditpinterestlinkedinmail

Choc-Orange Bliss Balls

I’ve always avoided bliss balls for 2 reasons:

1. They just seemed like calorie bombs – for all that people swore they were healthy (mostly because I couldn’t see myself being able to stop at one).

2. The term bliss balls makes me giggle because I am an immature 12 year old.

But now that I have magically gained some willpower, at least the first problem is solved. As for the second problem, well, I’m beyond help. At least I can be immature with some bliss balls, now.  And with chia seeds, almonds, dates and orange and just enough dark chocolate to feel like a treat, they’re both nutritious and absolutely delicious!

Honestly, I barely even adapted this recipe. It’s pretty much straight from Taste.com.au. But, as this blog is to show case the recipes I used to lose weight and maintain a healthy lifestyle (as opposed to showcasing recipes I’ve developed myself… I’m not a chef!), I don’t actually feel bad about this.

One thing I did change was the size of the balls. Rather than yielding 18 balls, I shape mine to yield 28. They’re perfectly bit sized this way, and less crumbly. The smaller balls are 103 calories, and the larger size are 137. Either way, they’re pretty guilt free. A little calorically dense for what they are, perhaps, but full of goodness and filling enough as a morning tea or 3pm pick me up.

Yields 28

Ingredients

2tbs Macro black and white chia seeds

1/4 cup fresh orange juice (juice from one small orange)

85g almonds

2tsp orange rind

200g dates

1/2 cup desiccated coconut

2tbs cocoa powder

150g Lindt 70% dark chocolate

Method

  1. Line two baking trays with non stick baking paper.
  2. Combine chia seeds and orange juice, and soak for 10 minutes.
  3. Process the almonds in a food processor until coarsely ground. Move to a mixing bowl, clean processor and use to coarsely chop dates. Add all ingredients except the chocolate and process until combined.
  4. With damp hands, press level teaspoons of the mixture into balls and place onto prepared trays. Refrigerated for 15 minutes.
  5. Break chocolate into pieces and place in a dry, clean bowl. Microwave at 15 second intervals, stirring with a dry metal spoon until chocolate is melted and smooth.
  6. Place one ball in the chocolate, and use a spoon to roll until evenly coated. (Do not be tempted to use a fork to dip the ball into the chocolate, as it will fall apart. Trust me.). Return to lined pan and place in the fridge for 5 minutes.
  7. Store in an airtight container. Room temperature is fine, but they do freeze very well, too.
Facebooktwitterredditpinterestlinkedinmail

Chicken and Vegetable Pesto Pasta

I’m sure we all have that weeknight that we dread because we’re expected to be in 4 places at once, and behave like fully functional adults in the process. For me, that’s Thursdays (I never could get the hang of Thursdays…). It’s my afternoon meeting day at work, from which I rush to get Miss 7 to her sport training, from which I rush to get the kids to any one of three relatives’ homes (yep, I’m blessed) and then rush myself to roller derby training. I leave work at 4 and get home just after 9.

This recipe is made for days like these. Not only is it super quick if you can squeeze dinner into your afternoon, it is also amazing if you make it the day before, stick it in some Tupperware and offer it as a bribe for those kind enough to watch your offspring while you repeatedly push into people and fall to the ground (sometimes on purpose!) while wearing roller skates.

Now, neither carby spaghetti nor oily pesto are the poster children for weightloss and healthy eating, but there is no overemphasising how little that has stopped me from cooking this dish. I’ve eaten this at least once a month for the past 10 months, and lost the equivalent of both my children. For me (and I speak for me alone, your experiences are totally valid, too!), I refuse to cut out any one particular food group, or deprive myself, because that’s when I start to feel I’m losing control and missing out, so I concentrate on portion control and balancing it out with the rest of the day’s food choices. A serve will set you back 447 calories (with parmesan cheese, because cheese is life), but it will keep you going through a hectic training session and into the next morning. Besides, during Winter, it’s like a warm hug. Total comfort food, but very nutritious, too. Win win!

Serves 4

Ingredients

250 gram spaghetti (wholemeal works fantastically here)

2-3 second spray olive oil

500g chicken thigh fillet, cubed

2tsp minced garlic

200g mushrooms, sliced

190g pesto (store bought, definitely! This is a time-saving recipe!)

200g cherry tomatoes, halved

1 medium zucchini, diced

Parmesan cheese, to serve

Pepper, to serve


Method

  1. Cook spaghetti in boiling water to packet instructions, until al dente. Drain pasta.   
  2. Meanwhile, spray large fry pan with oil. Heat pan over medium heat, and add garlic, mushrooms and chicken. Stir, increase heat and cook for 4-5 minutes until mushrooms are golden and chicken has browned all over.
  3. Add pesto, cover pan and adjust heat to low. Swirl a tablespoon of water in the jar to loosen any pesto, and add to pan. Cook, stirring occasionally, for 5 minutes or until chicken is mostly cooked through.
  4. Add tomatoes and zucchini pan, cover again, and cook for 3 minutes or until vegetables have softened.
  5. Add spaghetti and toss gently to combine. Serve into bowls and top with parmesan cheese and pepper.
Facebooktwitterredditpinterestlinkedinmail

Brussels Sprout Salad

Miss 7 is a strange child, in that she – who is the least adventurous eater in our family – has a weird obsession with Brussels sprouts. Hubby and I are more than happy to cook and eat them (as long as they’re sauteed not boiled, because boiled sprouts are sad and awful), but poor Master 10 is a lot less enthusiastic about them.

As such I went on a quest to find fun ways to serve this poor, misunderstood vegetable, and as always, Taste.com.au came to the rescue – this time, with this awesome salad.

I’ve mentioned before that I don’t love when salads (or anything, really) are drowning with oil. I appreciate the health benefits of a good quality virgin olive oil, but I still don’t love the taste or texture of super oily food. And the husband doesn’t like couscous, so as always, I’ve changed things to meet my family’s needs and preferences, and urge you to do the same (so, add the extra oil if you desire). Recipes should be guidelines, not gospel. Unless we’re baking. Then, I’m too scared to stray too far!

As the recipe on this blog stands, you end up with a very generous side dish for 72 calories. I like to serve it with a dice barbecued or grilled meat (such as the pictured honey mustard lamb) and some steamed potatoes for a simple dinner, but a serve of the salad mixed with a tin of tuna makes for an incredibly healthy and yummy lunch on a busy work day, too. It should keep in an air tight container until at least the next day – I’ve never had any left over past that!

Serves 4-5

Ingredients

1/2 cup bulgur wheat

1/2 cup boiling water

1tbs extra virgin olive oil

1 1/2 cups fresh flat-leaf parsley, chopped

1 cup fresh mint, chopped

200g Brussels sprouts, trimmed and thinly sliced

200g cherry tomatoes, halved

1 Lebanese cucumber, finely diced

2tbs lemon juice

Method

  1. Place wheat in a heatproof bowl. Add boiling water and let sit for 5 minutes. Liquid will have been completely absorbed. Fluff with a fork to separate grains and allow to cool completely.
  2. Combine wheat, herbs, Brussels sprouts, tomato and cucumber in a large bowl.
  3. Combine lemon juice and oil and evenly pour over salad. Mix well and serve.
Facebooktwitterredditpinterestlinkedinmail

Egg, Vegetable and Feta Pots

Lazy Sunday mornings are for brunch, but after overhauling my lifestyle over the past year, brunch makes me a bit nervous. So many of my former g0-to recipes easily took up half of my daily caloric goal, and were so full of fat and sugar, it’s really little wonder that I ended up so unhealthy (especially considering these were not just a once-a-week splurge, but an extension of an already crappy diet).

I honestly feel that part of the reason I’ve found this journey to be so easy is that I haven’t looked at food in terms of “I can’t eat that”, but in terms of “I can’t wait to try this new recipe” or “how can I eat a little of that and still come in under my goals for the day”, incorporating better choices and a new way of eating into my already established love of food and cooking. It’s been a fun revamp of my cooking repertoire, not a deprivation of the most basic pleasures of life.

This one is a firm favourite of mine – a nice change from an omelette, these egg pots are fluffy and hearty, and delicious enough for the whole family to enjoy. I am happy enough to forego the side of toast, as it really is quite filling, but it’s excellent to know it’s there if I’m particularly hungry. Without the toast, it’s a nice 274 calorie brunch- add another 85 calories or so for a slice of whole meal toast with cottage cheese.

Serves 2

Ingredients

5ml spray oil

1tsp olive oil

125g sweet potato, grated

50g red capsicum, diced

40g baby spinach

1tsp minced garlic

4 eggs, beaten

30g Greek feta

tbsp dried parsley

Method

1. Preheat oven to 180C, and spray two ramekins lightly with oil

2. Heat oil in large frypan over medium heat. Cook sweet potato and capsicum, stirring, for 5 minutes until softened.

3. Add baby spinach and stir to wilt. Remove from heat and allow to cool slightly.

4. Combine eggs, feta and herbs in a large bowl. Add vegetable mixture and mix well.

5. Divide mixture between ramekins and bake for 25 minutes. Serve with toast, as desired.


Facebooktwitterredditpinterestlinkedinmail

Mustardy Chicken with Roast Vegetable Salad

I love salad. Perhaps even more than soup. Maybe. Perhaps it’s equal. Either way, it’s a lot.

Salads generally gets me through the hot, disgusting Sydney summers, and then when it turns bitterly cold, I invariably feel a sense of loss. And then I realised the glory that is a warm salad!

Like most of it’s ilk, this recipe is extremely versatile and forgiving – it’s really just roasted veggies and some chicken. But tossed together with the right dressing, it is so much more. It’s complex, and warming, and filling, and makes you feel a little smug because look how healthy it is!

It’s barely adapted from Taste, but the addition of cauliflower was due to having less broccoli than I thought, and was a more than welcome addition to the mix. I also use a lot less oil than the original, because I don’t enjoy the taste of food that is drowning in oil – even the healthy, high quality oils.

Ingredients

500g chicken tenderloin, breast or thigh (I used a bit of breast and thigh)

2tbsp olive oil

1tsp mince garlic

1tsp dried basil

500g sweet potato, cubed

200g  broccoli, cut into large florets

200g califlower, cut into large florets

200g mushrooms, sliced

1 quarter red cabbage

1tbs red wine vinegar

1tsp brown sugar

1tbs wholegrain mustard


Method

  1. Preheat oven to 200C.
  2. Slice chicken into tenderloin-sized strips, if using breast or thigh. Combine 1/2tbs oil, garlic and basil and rub over chicken. Cover and set for 15 minutes.
  3. Meanwhile, combine broccoli, caulifower and sweet potato with 1tbs oil. Arrange on a baking tray in a single layer, and roast for 25 minutes on the bottom level of oven.
  4. Heat frypan over medium high heat, and cook chicken for 10 minutes, turning every few minutes. Remove from pan and cover with aluminium foil to rest.
  5. In the same pan, add cabbage and mushrooms. Combine well and cook over medium heat for 4 minutes, until mushrooms have softened.
  6. In a small jug, combine remaining oil, vinegar, sugar and mustard.
  7. Combine chicken and vegetables in a salad bowl. Pour over dressing and toss to combine.


Facebooktwitterredditpinterestlinkedinmail

Risoni Meatball Soup

So, I mentioned in the last post that there are some days where I just can’t be bothered. Well, I’m having a week of it. Everything seems a chore, and I’m just exhausted. More mentally than physically, but it definitely has an impact on how much I want to do when I get home from work.

In the olden days – when I was 46 kilos heavier and infinitely more depressed – it’d mean a week of takeout and excuses. I’m not above the odd takeout these days, but I’m certainly more judicious about it, in terms of both quality and frequency, so having an arsenal of Can’t Be eFfed meals is important.

Which is where this rockstar of a soup shines. It’s so easy, so quick, so tasty, and so filling. At 381 calories (for a smaller serving, but it’s more than enough), it’s pretty low-cal, too. All boxes for a good dinner ticked! And call me crazy, but there’s something cathartic about rolling meatballs with music blaring the stresses of the day away.

You know what, also? As great as this is at the end of a long, crappy day, it’s also a fantastic way to celebrate a good day or lift a neutral day into good day territory.

Adapted from the Taste website, as so many of my day-to-day recipes are.


Serves 4-6

Ingredients

500g lean mince

1/4 cup dried breadcrumbs

1/4 cup grated parmesan cheese

1tsp minced garlic

700ml passata

4 cups good quality chicken stock

1/2 cup risoni pasta

1tbs olive oil

1 large zucchini, diced

1tsp parsley

1tsp basil

parmesan cheese, extra, to serve

Method

  1. Combine mince, breadcrumbs, cheese, garlic and egg. Roll teaspoons of the mixture into tight meatballs, cover and rest in the fridge for 20 minutes.
  2. Bring stock and passata to the boil in a large saucepan, then reduce heat slightly. Add herbs and risoni, and stir frequently to prevent pasta from sticking to the bottom of the pan.
  3. Meanwhile, heat oil in a frypan. When hot, add meatballs, turning frequently to cook evenly.
  4. When cooked through, gently add meatballs and zucchini to soup. Cook, still stirring, for two minutes.
  5. Ladle into bowls and serve with extra parmesan.


Facebooktwitterredditpinterestlinkedinmail