Pistachio Craisin Cookies

It’s that time of year again – less than 6 weeks until Christmas! And while it takes me by surprise every year, this year is all the more jarring – how could 2021 go soooooo slooooowly, yet fly by? I’m still wrapping my head around 2020, and it’s nearly 2022??

Anyway, in light of having just over a month to organise the Christmas Chaos, AND an assignment to procrastinate, it’s the perfect time to test bake. I will, of course, be making my famous pfeffernusse, but I like to make something different, too. And these are delightful! The aroma of bashed pistachios is intoxicating, and the tart lemon icing and craisins make a great contrast for all the chocolatey, sweet delights available.

The only regret I have for these is that I made a small batch because I didn’t know how they’d go. I’ll keep the ratios as I made them, because my waist really doesn’t need double the amount, but trust me, double the quantity wouldn’t be unwelcome.

Makes 15

Ingredients

1/4 cup butter

1/2 cup white sugar

1/3 cup brown sugar

1 egg

2tbs milk

1tbs orange juice

1.5 cups self raising flour

1 cup craisins, chopped

1/2 cup pistachios, crushed (I use a mortar and pestle, or a ziplock bag and a rolling pin).

Icing

1/4 cup butter

1 cup icing sugar

1tsp vanilla

1tbs milk

1tbs lemon juice

Method

  1. Preheat oven to 180°C. Prepare a silicone or other bake trays.
  2. Cream butter and sugars until fluffy and pale.
  3. Combine egg, milk and juice in a small bowl. Add to creamed butter mixture and continue to mix until incorporated.
  4. Gently fold in flour until well combined. Add craisins and crushed nuts and mix.
  5. Drop tablespoonfuls of the batter onto prepared tray, leaving about 5cm between cookies. Bake for 12-15 minutes, until golden brown.
  6. Cool completely on wire racks.
  7. Carefully melt butter for icing in the microwave. Cool for 5 minutes, them beat in the rest of the ingredients until smooth. Dip each cookie into the icing and allow to set.

Facebooktwitterredditpinterestlinkedinmail

Mediterranean Scrolls

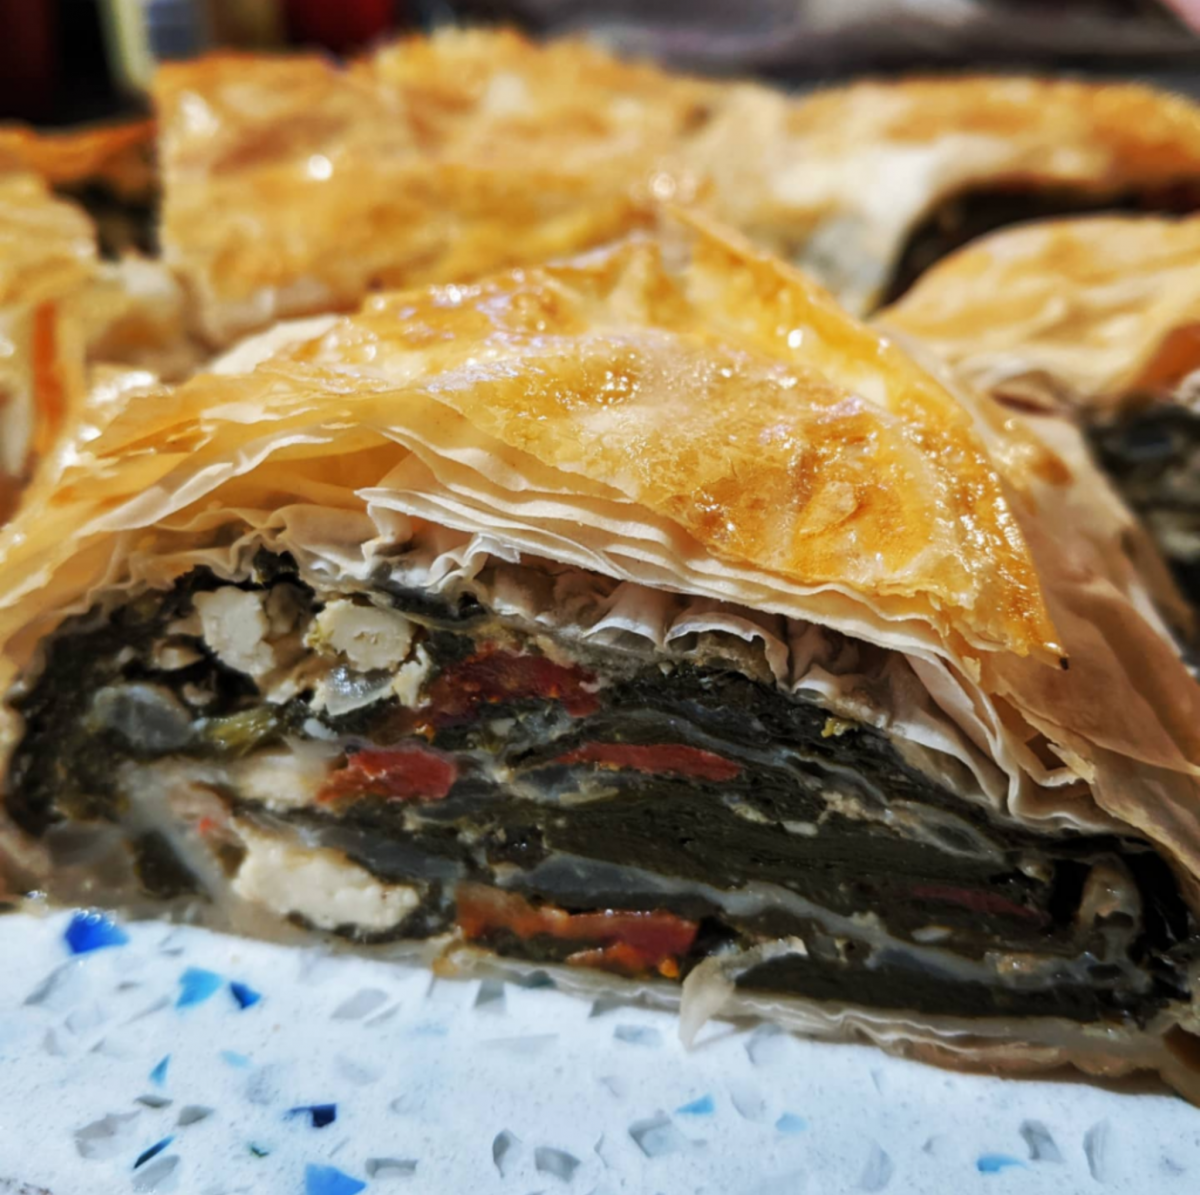
Now that lockdown is slowly relaxing and picnics are the activity du jour, I felt the need to make something delicious and portable for a reunion with my in laws. Unfortunately, the crappy weather had other plans, but I’d already made these scrummy scrolls, so in the interest of looking for silver linings, at least I can say dinner was delicious and super easy tonight!

I adapted this recipe from Jamie Oliver’s Veg, making just a few substitutions. Miss 10 doesn’t love olives, so I substituted semi dried tomatoes, forgot the couscous (accidentally but we didn’t miss it), upped the artichokes a bit because I love them but so rarely eat them, and failed the spiraled snake shape so did a crescent. And it was gooooooood. The look, smell, taste, smug satisfaction of a vegetarian dinner… it was all awesome.

All in all, it comes to a very respectable 350 calories a serve, and while a salad on the side goes very nicely, it stands on its own just as well. Perfect for lunch, premade for a quick dinner, or – should the stars ever align – a great picnic option.

Ingredients

1 brown onion, diced

2 cloves garlic, minced

1 tbs olive oil

50g sundried tomatoes, roughly chopped

500g baby spinach

200g jar baby artichoke hearts, drained

250g red peppers in brine

Salt and pepper to taste.

6 sheets filo pastry + 1 sheet for repairs

Spray oil or 1 tsp olive oil.

100g Greek feta

2 eggs, beaten

1 egg, beaten separately for egg wash.

Method

  1. Preheat oven to 180°C and position the shelf low in the oven.
  2. Heat oil in a large, deep frypan over medium heat. Add onions, and cook for 3 minutes until softened. Add the tomatoes, spinach, artichokes and peppers, and cook down for 5-8 minutes, until the spinach has wilted. Season to taste (I like a lot of pepper in this) and allow to cool for 10 minutes.
  3. Meanwhile, lay three sheets of filo pastry, slightly overlapping, on a very clean, large surface,. You may need to stick the sheets together with a little (very little!) water. Spray or brush lightly with oil, then place another three sheets over the top to create a double layer.
  4. Once the vegetable mixture has cooled, crumble in the feta and add the two beaten eggs. Stir gently to combine well.
  5. Spoon the mixture evenly along the long edge of the pastry. Roll it gently into a log. If it tears a little, use your spare sheet to patch it, sticking it to the roll with a little water.
  6. Bring into a crescent or spiral shape and gently place on an oiled baking sheet or silicone mat. I use a silicone mat, but you might want a tray or something firm when transporting to the oven, for support.
  7. Brush gently with egg wash, taking care not to tear the pastry.
  8. Bake for 50 minutes. Allow to cool for 10 minutes before cutting.
  1. Heat oil in a large, deep frypan over medium heat. Add onions, and cook for 3 minutes until softened. Add the tomatoes, spinach, artichokes and peppers, and cook down for 5-8 minutes, until the spinach has wilted. Season to taste (I like a lot of pepper in this) and allow to cool for 10 minutes.
  2. Meanwhile, lay three sheets of filo pastry, slightly overlapping, on a very clean, large surface,. You may need to stick the sheets together with a little (very little!) water. Spray or brush lightly with oil, then place another three sheets over the top to create a double layer.
  3. Once the vegetable mixture has cooled, crumble in the feta and add the two beaten eggs. Stir gently to combine well.
  4. Spoon the mixture evenly along the long edge of the pastry. Roll it gently into a log. If it tears a little, use your spare sheet to patch it, sticking it to the roll with a little water.
  5. Bring into a crescent or spiral shape and gently place on a baking sheet or silicone mat. I use a silicone mat, but you might want a tray or something firm when transporting to the oven, for support.
  6. Brush gently with egg wash, taking care not to tear the pastry.
  7. Bake for 50 minutes on a lower shelf of the oven. Allow to cool for 10 minutes before cutting, for structural integrity. If you’re serving it cold, cutting it after it’s completely cool is the best option.

Facebooktwitterredditpinterestlinkedinmail

Mocha Pfeffernüsse bread

Chocolate – check

Pfeffernüsse spice – check

Coffee – check

Bread – check

With all the good things in life checked off here, it’s of little wonder that this bread is sooooo good! It makes for an awesomely decadent treat (breakfast?) with a latte, and makes the whole house smell like heaven
before you even pop it in the oven. I’ve missed baking so much (stupid busy lifestyle!), and this was the perfect way to get back into the swing of it. It was inspired by the Spiced Choc Coffee Loaf in the Woolworths Fresh magazine, and the fact that while I’d run out of mixed spice, I’ve got a whole stash of pfeffernüsse spice in my kitchen. I haven’t made the original, but my spice mix brings so much to the party that I won’t be omitting it.

The caveat is that it’s, um, nearly 500 calories a slice. But it’s legitimately bread, not cake, and although decadent, it is also filling. And it’s certainly a special occasion kind of recipe, so it’s not like you’d be adding it to your regular diet. And if you are, I kind of envy you!

Ingredients

Dough

3/4 cup milk

7g sachet yeast

1/3 cup caster sugar

3 1/3 cups plain flour

3 eggs, beaten

125g butter (I use salted – if yours is unsalted, add 1/2 tsp sea salt flakes), cubed

Filling

250g dark chocolate

50g butter

1/2 cup packed brown sugar

1tbs pfeffernüsse spice

Icing

30 mls espresso (I used Nespresso Vanilio)

1 1/2 cups icing sugar

Method

  1. Combine milk, yeast and sugar, and rest for 10 minutes.
  2. Place yeast mixture, flour and eggs into a bowl. Knead for 3 minutes until smooth (or 3 minutes in a stand mixer).
  3. While continuing to knead, add butter one piece at a time, incorporating each into the dough before adding another. Knead for 10 minutes after the final piece, until smooth, glossy and elastic.
  4. Place dough in a clean bowl. Cover with a clean tea towel and allow to rise for 1 hour, or up to 24 hours.
  5. Preheat oven to 200°C and line a loaf pan with greased baking paper.  
  6. Melt chocolate and butter, and add sugar and spice mix. Stir to combine.
  7. Divide dough in half. On a lightly floured surface, roll each half into a 35x40cm rectangle. Spread with chocolate mixture and roll into logs from the short edges.
  8. Cut each log lengthways (use a very sharp knife for this or it will tear the dough). Twist two halves into one log, and then repeat with the remaining two logs.
  9. Plait the two twisted logs into one large log and fold the edges underneath. Fit into the loaf pan, squishing the edges in if necessary, but aiming not to lose the twisted appearance.
  10. Bake for 45 minutes. Stand for 15 minutes then remove from pan.
  11. Combine the icing ingredients and drizzle over the loaf.

Facebooktwitterredditpinterestlinkedinmail

Pfeffernüsse

Growing up, one of the memories I have of staying with a Great Aunty was drinking tea and eating iced biscuits whose name I didn’t know. I only ever ate these biscuits at this one Aunty’s house, and I thought they were so very special. It was only when I was much older – well into my twenties – that I found them in the supermarket. Pfeffernüsse, that was them! And they were only a dollar a bag! I immediately brought some, and my dad and I agreed that these were the biscuits we both remembered.

Then I got a wild idea last year that I should make them myself. I came across The Daring Gourmet’s Best Authentic Pfeffernüsse, and she is not exaggerating! They’re so good that my daughter begged for a pfeffernüsse tower instead of a birthday cake this March, despite my insistence that these should be saved for December so they stay special. Everyone seems to love them, and even though most people won’t tell you to your face if they don’t love your cooking, they seem pretty enthusiastic about this recipe. I’ve tried a few other recipes, for science, but none of them come even close to these. I won’t take any credit for these beautiful gingerbread cookies, because I barely deviate from the original recipe, but I do find the website a little unwieldly, especially juggling two pages for the biscuit and the spice mix, so I’m putting it all together, here.

The spice mix recipe makes enough for at least two batches of
pfeffernüsse, but it lasts a long time in a dark cupboard, and you’ll probably be reaching for it a few times, so go to town! The recipe takes a bit of forethought and planning, so having the spices ready to go makes life a lot easier.

Calories? Well, technically 150 per pfeffernüsse, but I’m yet to meet the person who can stop at one.


Pfeffernüsse Spice

Ingredients

2 1/2 tablespoons ground cinnamon

2 teaspoon ground cloves

1/2 teaspoon ground allspice

1/2 teaspoon ground coriander

1/2 teaspoon ground cardamom

1/2 teaspoon ground ginger

1 star anise, ground

1/4 teaspoon ground mace

1/4 teaspoon ground nutmeg

Method

  1. If purchasing spices already ground, combine all ingredients in a cool, dark cupboard for up to 12 months. If your spices are whole, use a grinder or mortar and pestle (I’ve even resorted to a ramekin and a wooden rolling pin) to grind them as fine as possible. Discard any woody bits of star anise that don’t grind enough.


Pfeffernüsse

Ingredients

2 1/4 cups self raising flour

1/4 teaspoon salt

3-4 teaspoons pfeffernüsse spice

1/4 teaspoon finely ground white pepper

1/4 cup almond meal

1/2 cup packed brown sugar

1/3 cup honey

5 tablespoons butter

3 tablespoons thickened cream

1 large egg

For the Glaze:

2 1/2 cups icing sugar

1tsp vanilla essence

3 tablespoons hot water

Food colouring (optional – white is traditional)

Method

  1. In a mixing bowl, combine the flour, salt, pfeffernüsse spice, white pepper and almond meal. Stir well.
  2. In a small saucepan, combine brown sugar, honey, butter and cream. Melt over medium heat until smooth and combined. Cool slightly, about 5 minutes.
  3. Pour melted butter mixture into dry ingredients and beat until very well combined. Add egg, and stir until the mixture is completely combined and has a nice shine. It will seem very wet and sticky – it dries out as it rests.
  4. Tear off a large piece of cling film and double wrap, very tightly. Refrigerate overnight, or for up to 48 hours.
  5. Preheat the oven to 180°C and line two baking trays with baking paper.
  6. Remove dough from fridge and roll two teaspoons worth into balls, placing 2-3 cm apart, as they do spread a little. Bake for about 15 minutes: they should be firm but not hard or darkened.
  7. Remove from oven and allow to cool completely.
  8. Combine the ingredients for the glaze in a bowl and mix to combine. You want the consistency to be thick enough to hold on, but not so thick as to rip the fragile biscuit.
  9. Dip each biscuit into the glaze, place on a wire rack with baking paper underneath, and allow to set completely.

Facebooktwitterredditpinterestlinkedinmail

Chicken Pesto Gnocchi Bake

For me, gnocchi brings a little more baggage than little round balls of potato should. They’re riddled with guilt: I know how to make it from scratch, but I almost never do; the husband eats it but doesn’t necessarily love it, so I always feel a little bad for throwing it into the menu plan; I always feel like I bastardise it by creating a mongrel of a recipe with all sorts of random things thrown it.

But, guilt be damned. I don’t have much time in the evenings, and I need easy, filling, budget friendly meals that have some sort of nutrition involved, without eating the same things over and over. Yes, the gnocchi comes from a packet. Yes, husband would probably prefer wheat pasta. Yes, I’m making it up on the fly instead of following a recipe from 5 generations of women who lovingly pass it down from daughter to daughter. But we all do what we can to keep our families fed, right? Despite it’s flaws, this recipe ticks all my boxes, and is tasty, to boot (although it’s just over 500 calories, which is slightly higher than my usual weekday meals – still, better than takeout, right?). Vive la packet pasta!

Serves 4

Ingredients

500g gnocchi

2tsp olive oil

1 brown onion, diced

200g mushrooms, sliced

1 garlic clove, minced

500g chicken breast, diced

70g sundried tomatoes, finely diced

1 medium zucchini, diced

400g tinned tomatoes

190g pesto

3tbs parmesan cheese, grated

50g grated cheddar cheese

Method

  1. Preheat oven to 180C.
  2. Heat oil in a deep ovenproof frypan over medium heat. Add onion and mushrooms and cook for 5 minutes until golden. Add garlic and stir for 30 seconds.
  3. Add chicken and cook for 5 minutes until browned all over, stirring occasionally. Add sundried tomatoes and zucchini and mix well.
  4. Meanwhile, cook gnocchi in a large saucepan of salted water, to packet instructions. Remove and drain about a minute early.
  5. Stir in tinned tomatoes and pesto, and combine very well.
  6. Remove from heat and sprinkle over both cheeses.
  7. Bake for 15 minutes until golden and bubbly.

Facebooktwitterredditpinterestlinkedinmail

Breakfast muffins

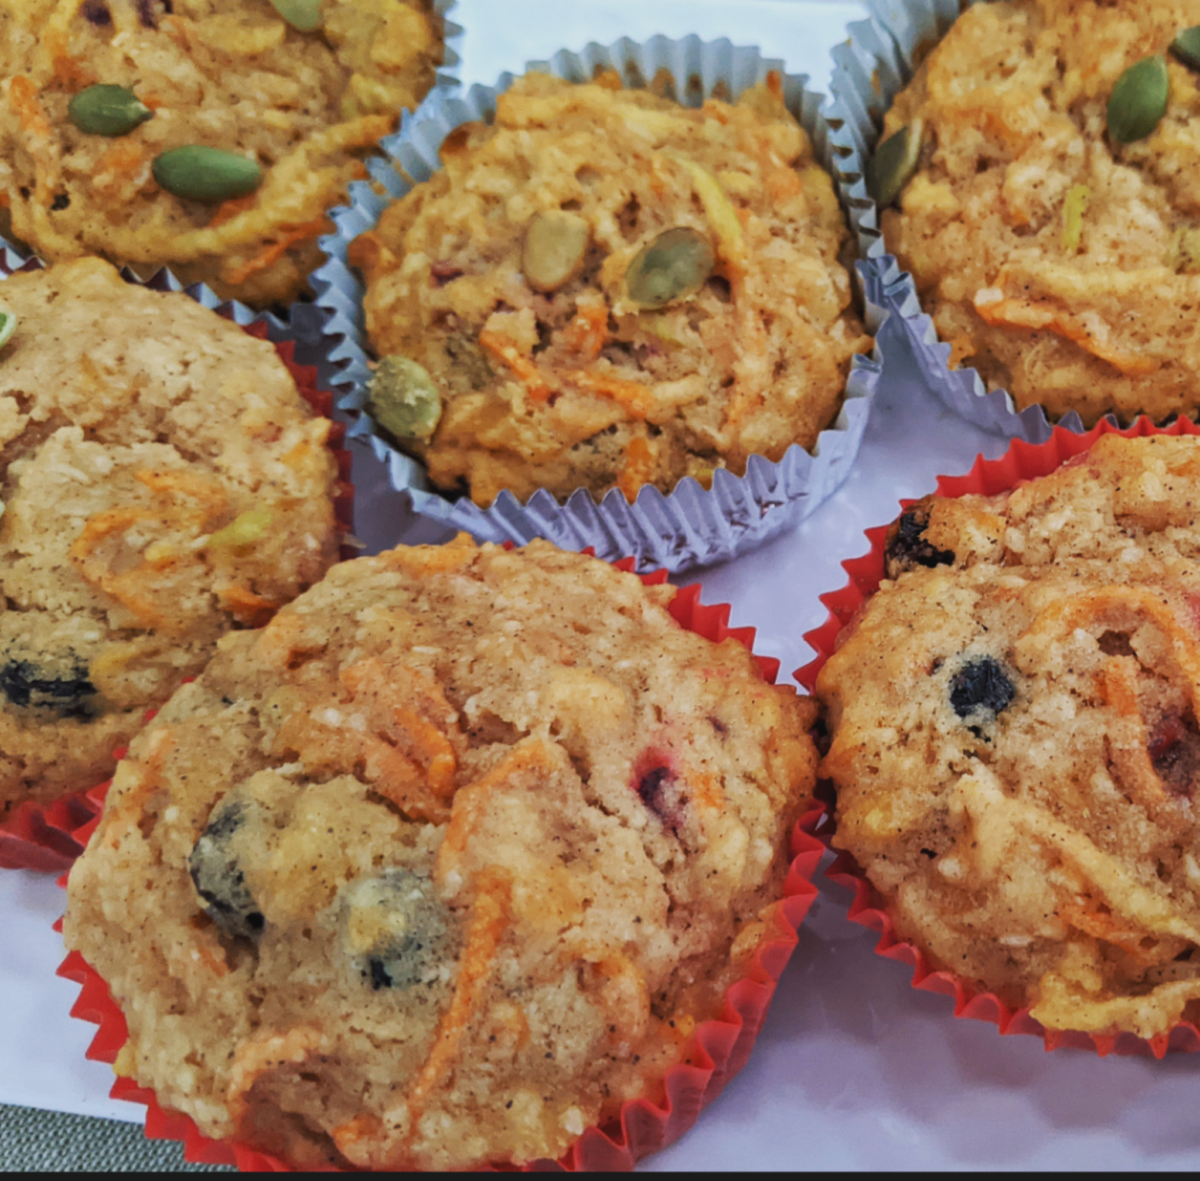
Can you believe there are 9 fruits and vegetables stuffed into these little muffins? Let me tell you, that fact makes it soooo easy to justify cake for breakfast! But they’re amazingly delicious, pretty filling, and only 191 calories each – so not a terrible option for something sweet and decadent, or breakfast on the run. A big shout out to Smitten Kitchen for the recipe – mine is an adaptation of an adaptation, which is pretty much the joy of cooking: no one does things exactly the same, and that diversity is beautiful. 

This recipe yields 16 small muffins, which is perfect for me because I have one with coffee an hour or so after a bowl of Weetbix and berries, but making 8 larger muffins to have as a full breakfast is a viable option, as well. Just adjust the cooking time, and start checking on them afyer about 30 minutes. They’re a super moist muffin, but a skewer should still come out clean.

Ingredients

1.5 Granny Smith apples, grated 

1 large carrot, grated 

225g can crushed pineapple, drained well

1/3 cup dessicated coconut

1/4 cup dried fruit (I used a mix of dried apple, beetroot, craisins, blueberries and sultanas)

Finely grated zest of 1 lemon

2/3 cup raw sugar

2/3 cup vegetable oil

2 large eggs

1/2 teaspoon ground cardamom

1/2 teaspoon ground ginger

1/2 teaspoon ground cinnamon

3/4 teaspoon salt

1 1/4 cups self raising flour

2 tablespoons  pepitas

Method

  1. Preheat oven to 180C. Line a 12 hole muffin tin with paper cases.
  2. Place apple, carrot, pineapple, coconut, dried fruit, lemon zest, sugar, spices and oil in large bowl. Add eggs, and stir to combine.
  3. Add flour, and mix very gently.
  4. Fill paper cases to about 3/4 capacity, and sprinkle with pepitas, making sure to save some for the next batch.
  5. Bake for 20 minutes, or until an inserted skewer comes out clean. Let cool in pan for 5 minutes, and transfer to a wire rack. Repeat with remaining batter and pepitas, remembering that cooking time will be slightly less due to a smaller amount of muffins being cooked in the pan the second time around
Facebooktwitterredditpinterestlinkedinmail

Warm Potato Salad with Roasted Cream Cheese

Hands up who knew you could roast Philadelphia cream cheese into crispy little chunks? Me either! But you can, and they add a novel saltiness to a warm potato salad, making any meal a little different. Shout out to the Simply Heaven Philly cookbook that I stole from my sister for the idea!

Ingredients

3 medium potatoes, diced

2tbs white wine vinegar

2tbs olive oil

1tsp wholegrain mustard

1/2 tsp sugar

125g block cream cheese, broken into 2cm pieces

1 bunch asparagus, sliced

200g green beans, trimmed

250g cherry tomatoes, halved

100g baby capsicum, sliced

1 bunch broccolini, trimmed

Salt and pepper, to serve

Method

  1. Combine oil, vinegar, mustard and sugar and mix well.
  2. Preheat oven to 200C. Line a baking tray with foil, spread out potatoes and drizzle with half of the oil mixture. Roast for 20 minutes on top rack.
  3. Arrange remaining ingredients on another prepared tray and drizzle with the remaining oil. Roast for a further 20 minutes.
  4. Remove vegetables from oven and carefully combine in a large bowl. Season well and serve.

Facebooktwitterredditpinterestlinkedinmail

Smoked Salmon and Veggie Rice Bake

As you can see, I’m a big fan of the rice bake – it’s a great way to get dinner ready quickly, and boy, is that the name of the game lately! We’re up to four days of sports practice for the kids, and of course, they all start at 6pm. So anything I can make quickly… or better yet, the night before, after I’ve run around all evening, is relatively cheap AND is healthy, holds a special place in my heart. Taste.com is a little hit or miss sometimes, but this is definitely a hit!

This bake is a prime example. It’s full of kale, broccoli and capsicum, as well as eggs and salmon for a nice protein hit. And because it’s so flavourful, having used marinated capsicum and Australian mustard to up the ante, you only need a small amount of salmon, keeping it so much more budget friendly than most seafood dishes. Personally, I’d love to swap the kale out and use baby spinach, but after 3 years of me living off the stuff, the husband is begging for something a bit different!

Taste has this recipe yielding six serves, but for once, I go a bit bigger, and have it feed four. It’s still only 485 calories, which is absolutely reasonable, and you can bask in the knowledge that if you don’t need quite so much, you can enjoy a dinner just under 400 cals. Which is handy when you’re eating on the run… and these days, that’s pretty much the only way we eat dinner anymore.

Ingredients

1 tbs olive oil

1 brown onion, diced

2 garlic cloves, minced

Zest of 1 lemon

1 small bunch kale, chopped roughly

300g broccoli, cut into small florets.

8 eggs

2-3 tsp Australian mustard

1/2 cup Greek yoghurt

290g jar marinated grilled capsicum, drained and diced

250g microwavable brown rice (no need to microwave it)

150g hot smoked salmon, flaked

2tsp dried dill

Salt and Pepper, to serve

Method

  1. Preheat oven to 180C.
  2. Steam broccoli in the microwave for 2 minutes until tender, but not mushy. Drain and allow to cool while completing next steps.
  3. Heat oil in an ovenproof skillet over medium heat. Add onion and cook for 5 minutes until softened. Add garlic and lemon and cook for 1 minute.
  4. Stir in kale, cooking until just wilted. Add broccoli and break up larger pieces. Stir to combine, then remove from heat.
  5. In a clean bowl, whisk eggs, mustard, yoghurt, capsicum, rice and salmon until fully combined. Season with salt, pepper and dill, and pour over kale mixture. Combine well and smooth the top.
  6. Bake for 20-25 minutes. Allow to cool for 2-3 minutes, and serve.

Facebooktwitterredditpinterestlinkedinmail

Warm Turkey and Rice Salad

I found a stuffed turkey roast for $2.83 today. The cheapskate in me was beyond thrilled, and suffice to say, tonight was destined to be a winner winner turkey dinner.

The beauty of this recipe – which I’ve had in my back pocket for many years now – is that it is so hands off and easy. Sure, the turkey takes over an hour to roast, but you cook it in the container it’s sold in, and while it does its thing, you’re free to do as you please. Then, with all of 5 minutes of active cooking time, which you can do any time within the next 24 hours (although if your bird cost you less than 3 dollars, I recommend cooking and eating it immediately!), the most simple ingredients become something truly wonderful. It’s a 500 calorie dinner that fills you up and feels like it should be a whole lot naughtier, and still yields leftovers for the next day (or to be fought over by the husband and nearly-teenager, as is so often the case in my house now).

Of course, you can cook the rice from scratch… but you do lose a little of that lazy-dinner feel in doing so. And sometimes, we all need a lazy dinner!

Ingredients

900-1.1kg stuffed turkey roast (my favourite one to use is the Ingham Turkey Thigh roast with apple stuffing)

450g microwavable brown rice

200g cherry tomatoes, halved

1 medium zucchini, diced

60g baby spinach

1/3 cup craisins

Method

  1. Cook turkey to package instructions – expect about an hour and a half. Rest for 30 minutes, and either refrigerate until required or continue to step 2.
  2. Microwave rice to package instructions. Allow to cool.
  3. Meanwhile, roughly chop turkey and stuffing into bite sized pieces, and set aside in the pan juices.
  4. Heat a frypan over high heat, spray lightly with oil. Using tongs or a slotted spoon, add turkey to pan and cook to heat through.
  5. Add zucchini and tomatoes, and cook for 2-3 minutes until starting to soften.
  6. Add the rice, and mix to combine and heat through.
  7. Remove from heat and stir through craisins and spinach. Allow spinach to wilt, then serve.

Facebooktwitterredditpinterestlinkedinmail

Grilled Capsicum and Barley Salad

It’s a cruel trick that the universe likes to play; one week, I’m bored and feel I have nothing to do in my life, the next, I’m run off my feet working, studying, mumming, wifeing and existing. I never seem to hit a happy medium. Of course, on those busy weeks, meal planning becomes all the more important (once you work out where to squeeze it in, that is), otherwise it’s the perfect storm for falling back into some reaaaaalllllly bad habits that are best left back in 2017.

As such, Sunday afternoons are for meal prep. I long ago worked out that the best antidote for a case of The Mondays is a killer work lunch, and this salad, adapted just a little from my current cuisine-crush Ottolenghi, is just that. If you’re after something to look forward to, take your pick from the nuttiness of the barley, the sweetness of the onions and capsicum, the tartness of the lemony dressing, the saltiness of the feta, the sharpness of the olives… the list goes on. Every mouthful is just a little bit different, and while it’s 6.30 on a Sunday night, and I won’t be eating it for another 18 hours (and 2 meals!) from now, I’m already looking forward to it.

At 355 calories a serve, this is slightly higher than my usual lunches (but much less than Ottolenghi’s, as he uses 5(!) tablespoons of oil) , however it’s so wholesome and real, that it won’t leave you reaching for the cookie jar at 3pm. It’s very much worth the extra 50-80 calories to me. It’s just disappointing that I didn’t double the recipe – it only yields 2 serves, and I fear my husband will steal my Tuesday lunch!

Ingredients

100g raw pearl barley

2 cups vegetable stock

200g capsicum (I like to use yellow and orange baby capsicum), sliced into strips about 2cm thick.

3tbs black olive slices, drained (or 10 black olives, sliced)

1 onion, thinly sliced

Spray oil

Dressing

1tbs olive oil

1tbs honey

1tbs lemon juice

1tsp oregano

1/2 tsp allspice

1/2 tsp paprika

1 small clove garlic, minced

Salt and pepper

20g feta, to serve

Method

  1. Add stock and barley to a medium sized saucepan and bring to the boil. Reduce to a simmer and cook, stirring occasionally, for 40 minutes, until the water has been absorbed and the barley is tender but still has some bite.
  2. Meanwhile, heat the grill/broiler on high. Line the rack of the grill/broiler with aluminium foil, spray lightly with oil, and spread capsicum in a single layer over the top. Grill for about 15 minutes, until softened and charred to your liking (a little smokiness is wonderful, here).
  3. While the capsicum are grilling, spray a small frypan with oil, and cook onions over a low heat until soft – it should take about the same time as the peppers.
  4. When everything is done, combine in a bowl. Stir in the olives.
  5. To make the dressing, combine remaining ingredients (except for the feta) in a jug. Slowly pour over the barley, and mix well to combine.
  6. Top with feta and season with lots of black pepper.

Facebooktwitterredditpinterestlinkedinmail