Mediterranean Scrolls

Now that lockdown is slowly relaxing and picnics are the activity du jour, I felt the need to make something delicious and portable for a reunion with my in laws. Unfortunately, the crappy weather had other plans, but I’d already made these scrummy scrolls, so in the interest of looking for silver linings, at least I can say dinner was delicious and super easy tonight!

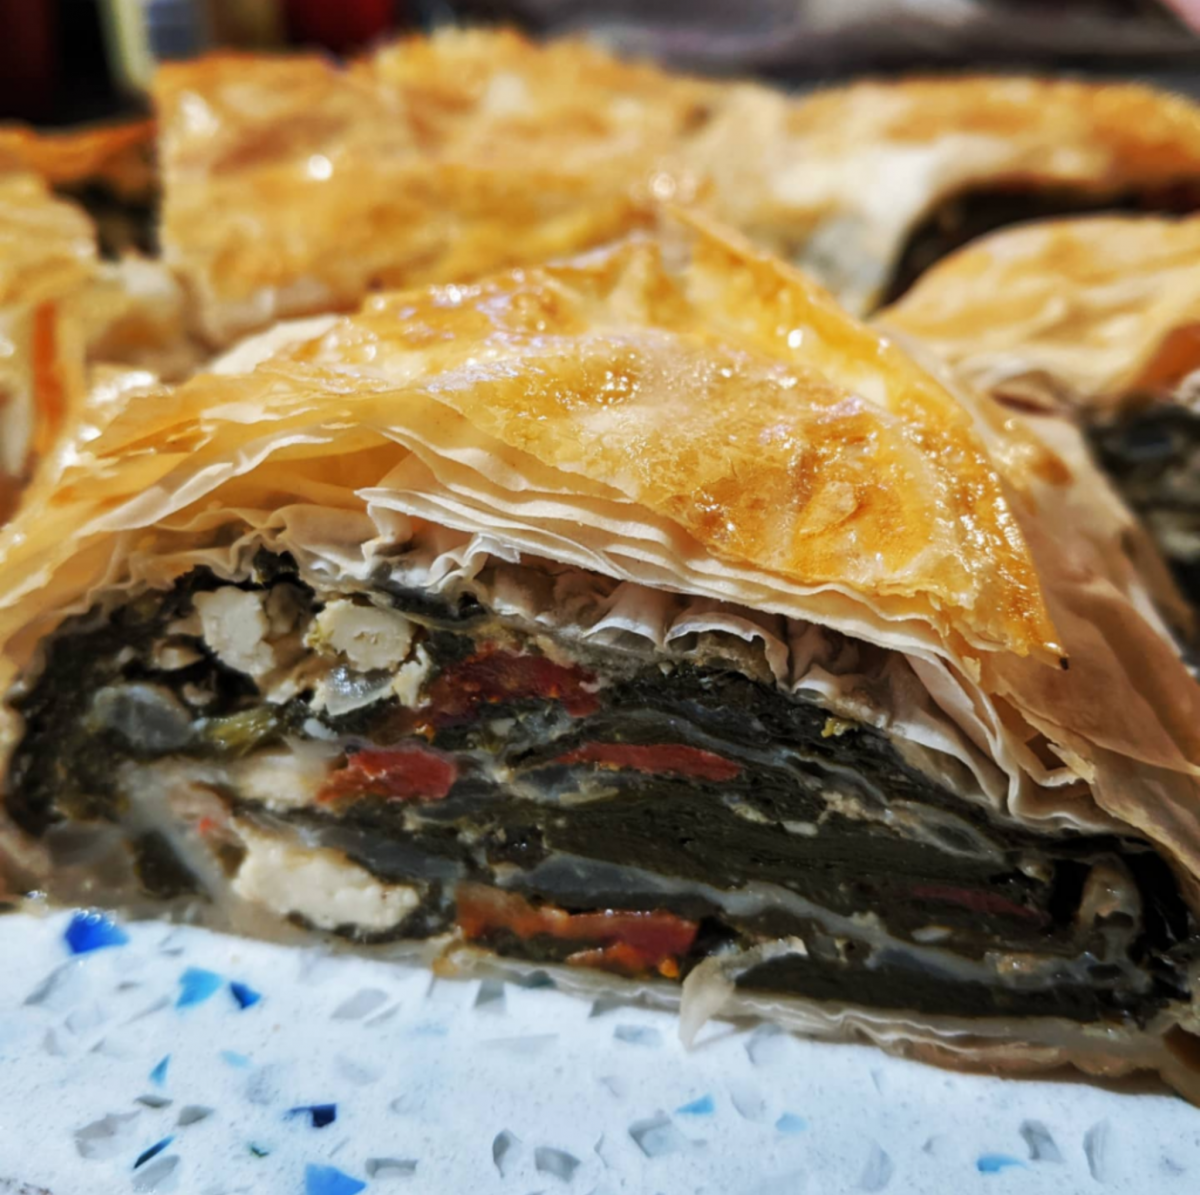
I adapted this recipe from Jamie Oliver’s Veg, making just a few substitutions. Miss 10 doesn’t love olives, so I substituted semi dried tomatoes, forgot the couscous (accidentally but we didn’t miss it), upped the artichokes a bit because I love them but so rarely eat them, and failed the spiraled snake shape so did a crescent. And it was gooooooood. The look, smell, taste, smug satisfaction of a vegetarian dinner… it was all awesome.

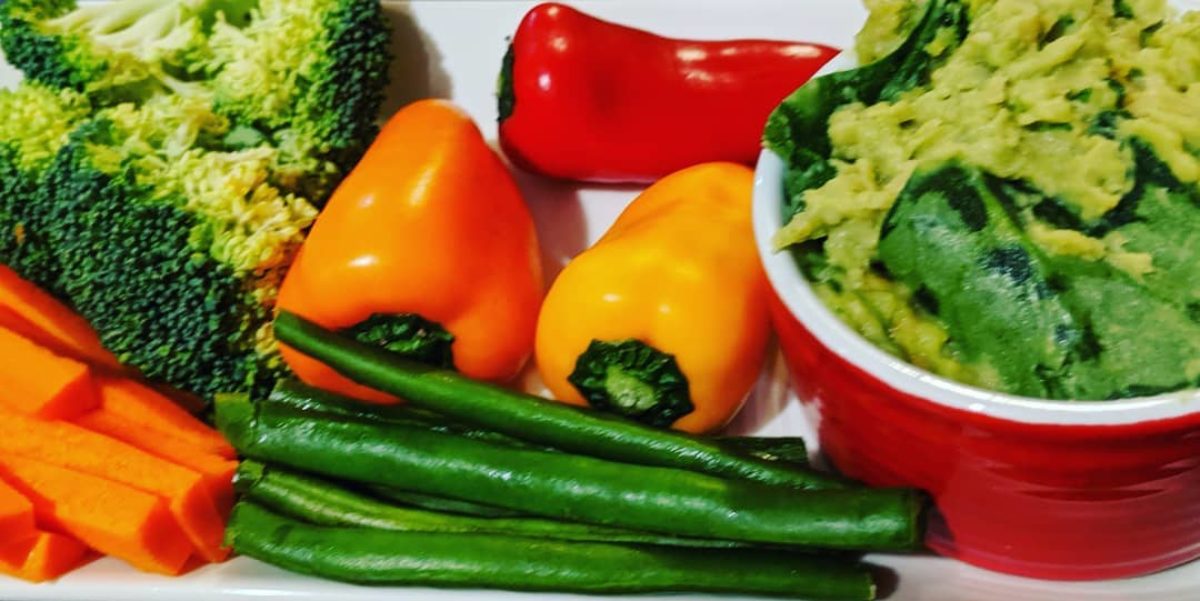
All in all, it comes to a very respectable 350 calories a serve, and while a salad on the side goes very nicely, it stands on its own just as well. Perfect for lunch, premade for a quick dinner, or – should the stars ever align – a great picnic option.

Ingredients

1 brown onion, diced

2 cloves garlic, minced

1 tbs olive oil

50g sundried tomatoes, roughly chopped

500g baby spinach

200g jar baby artichoke hearts, drained

250g red peppers in brine

Salt and pepper to taste.

6 sheets filo pastry + 1 sheet for repairs

Spray oil or 1 tsp olive oil.

100g Greek feta

2 eggs, beaten

1 egg, beaten separately for egg wash.

Method

  1. Preheat oven to 180°C and position the shelf low in the oven.
  2. Heat oil in a large, deep frypan over medium heat. Add onions, and cook for 3 minutes until softened. Add the tomatoes, spinach, artichokes and peppers, and cook down for 5-8 minutes, until the spinach has wilted. Season to taste (I like a lot of pepper in this) and allow to cool for 10 minutes.
  3. Meanwhile, lay three sheets of filo pastry, slightly overlapping, on a very clean, large surface,. You may need to stick the sheets together with a little (very little!) water. Spray or brush lightly with oil, then place another three sheets over the top to create a double layer.
  4. Once the vegetable mixture has cooled, crumble in the feta and add the two beaten eggs. Stir gently to combine well.
  5. Spoon the mixture evenly along the long edge of the pastry. Roll it gently into a log. If it tears a little, use your spare sheet to patch it, sticking it to the roll with a little water.
  6. Bring into a crescent or spiral shape and gently place on an oiled baking sheet or silicone mat. I use a silicone mat, but you might want a tray or something firm when transporting to the oven, for support.
  7. Brush gently with egg wash, taking care not to tear the pastry.
  8. Bake for 50 minutes. Allow to cool for 10 minutes before cutting.
  1. Heat oil in a large, deep frypan over medium heat. Add onions, and cook for 3 minutes until softened. Add the tomatoes, spinach, artichokes and peppers, and cook down for 5-8 minutes, until the spinach has wilted. Season to taste (I like a lot of pepper in this) and allow to cool for 10 minutes.
  2. Meanwhile, lay three sheets of filo pastry, slightly overlapping, on a very clean, large surface,. You may need to stick the sheets together with a little (very little!) water. Spray or brush lightly with oil, then place another three sheets over the top to create a double layer.
  3. Once the vegetable mixture has cooled, crumble in the feta and add the two beaten eggs. Stir gently to combine well.
  4. Spoon the mixture evenly along the long edge of the pastry. Roll it gently into a log. If it tears a little, use your spare sheet to patch it, sticking it to the roll with a little water.
  5. Bring into a crescent or spiral shape and gently place on a baking sheet or silicone mat. I use a silicone mat, but you might want a tray or something firm when transporting to the oven, for support.
  6. Brush gently with egg wash, taking care not to tear the pastry.
  7. Bake for 50 minutes on a lower shelf of the oven. Allow to cool for 10 minutes before cutting, for structural integrity. If you’re serving it cold, cutting it after it’s completely cool is the best option.

Facebooktwitterredditpinterestlinkedinmail

Grilled Capsicum and Barley Salad

It’s a cruel trick that the universe likes to play; one week, I’m bored and feel I have nothing to do in my life, the next, I’m run off my feet working, studying, mumming, wifeing and existing. I never seem to hit a happy medium. Of course, on those busy weeks, meal planning becomes all the more important (once you work out where to squeeze it in, that is), otherwise it’s the perfect storm for falling back into some reaaaaalllllly bad habits that are best left back in 2017.

As such, Sunday afternoons are for meal prep. I long ago worked out that the best antidote for a case of The Mondays is a killer work lunch, and this salad, adapted just a little from my current cuisine-crush Ottolenghi, is just that. If you’re after something to look forward to, take your pick from the nuttiness of the barley, the sweetness of the onions and capsicum, the tartness of the lemony dressing, the saltiness of the feta, the sharpness of the olives… the list goes on. Every mouthful is just a little bit different, and while it’s 6.30 on a Sunday night, and I won’t be eating it for another 18 hours (and 2 meals!) from now, I’m already looking forward to it.

At 355 calories a serve, this is slightly higher than my usual lunches (but much less than Ottolenghi’s, as he uses 5(!) tablespoons of oil) , however it’s so wholesome and real, that it won’t leave you reaching for the cookie jar at 3pm. It’s very much worth the extra 50-80 calories to me. It’s just disappointing that I didn’t double the recipe – it only yields 2 serves, and I fear my husband will steal my Tuesday lunch!

Ingredients

100g raw pearl barley

2 cups vegetable stock

200g capsicum (I like to use yellow and orange baby capsicum), sliced into strips about 2cm thick.

3tbs black olive slices, drained (or 10 black olives, sliced)

1 onion, thinly sliced

Spray oil

Dressing

1tbs olive oil

1tbs honey

1tbs lemon juice

1tsp oregano

1/2 tsp allspice

1/2 tsp paprika

1 small clove garlic, minced

Salt and pepper

20g feta, to serve

Method

  1. Add stock and barley to a medium sized saucepan and bring to the boil. Reduce to a simmer and cook, stirring occasionally, for 40 minutes, until the water has been absorbed and the barley is tender but still has some bite.
  2. Meanwhile, heat the grill/broiler on high. Line the rack of the grill/broiler with aluminium foil, spray lightly with oil, and spread capsicum in a single layer over the top. Grill for about 15 minutes, until softened and charred to your liking (a little smokiness is wonderful, here).
  3. While the capsicum are grilling, spray a small frypan with oil, and cook onions over a low heat until soft – it should take about the same time as the peppers.
  4. When everything is done, combine in a bowl. Stir in the olives.
  5. To make the dressing, combine remaining ingredients (except for the feta) in a jug. Slowly pour over the barley, and mix well to combine.
  6. Top with feta and season with lots of black pepper.

Facebooktwitterredditpinterestlinkedinmail

Cauliflower and Apple Soup with Charred Brussels Sprouts

When I told the kids we were having cauliflower soup with brussels sprouts for dinner, they laughed. Often, they’ll ask what’s for dinner, and I’ll respond along the lines of “poop on toast” or “banana and fish casserole” , and I suspect they thought I was joking tonight, too. Even my brussels sprouts loving 9 year old looked a little crestfallen when I actually did pull out the head of cauliflower and started making soup.

I’ll admit, it doesn’t quite scream ‘kids will go crazy over this’, but they did clean their plates, because this creamy yet light soup from the Australian Women’s Weekly is nothing short of delicious. The apple provides a child-quietening sweetness to the dish, while the cream and parmesan adds depth and complexity. The sprouts are certainly not to be skipped – they’re the star, and that slightly charred, nutty flavour elevates a humble soup into something absolutely wonderful. Copious amounts of pepper is also highly, highly recommended here, for the same reason.

The recipe yields 5 serves at 350 calories a serve, and is somewhat accidentally vegetarian: the stock I usually have in the cupboard happens to be vegetarian “chicken style” stock by Massel, and the parmesan I buy also just happens to be vegetarian (yep, I am aware that renders it not truly Parmesan. I am cool with this). These are actually budget decisions, not dietary, but don’t you just love happy accidents?

Ingredients

Spray oil

1 medium cauliflower, roughly chopped

1 onion, chopped

2 Granny Smith apples, peeled, cored and chopped

2 cloves garlic, diced or minced

5 cups chicken or vegetable stock

1tsb lemon juice

1/3 cup parmesan (style) cheese

1/3 cup thickened cream

1tbs olive oil

5 brussels sprouts, trimmed and quartered

1tbs almond meal.

Salt and pepper, to serve

  1. Heat oil in a large saucepan over medium heat. Add onion, cauliflower, apple and cook for 10 minutes, until starting to soften and colour.
  2. Add stock and bring to the boil. Reduce to a simmer, cover, and cook for 25 minutes until everything is very soft.
  3. Remove from heat to cool.
  4. Meanwhile, heat olive oil in a small fry pan and saute sprouts until just starting to char – around 3 minutes. Sprinkle almond meal over the sprouts, toss to combine, and remove from heat.
  5. Use a stick or regular blender to process until smooth (I don’t mind a few little pieces of cauliflower). Stir in lemon juice, cheese and cream.
  6. Ladle soup into bowls and top with sprouts. Season well, and serve with ciabatta or other crusty bread (not included in a calorie count).

Facebooktwitterredditpinterestlinkedinmail

Baked Beans with Pumpkin

As a kid, I always hated the little tins of baked beans that sat in our pantry at all times, and for the longest time I just assumed I hated beans. It didn’t really take up much mental real estate, as we didn’t really eat beans, and there was never a situation where tinned baked beans were the only acceptable option. They were never forced down my throat, as Mum doesn’t like any beans, so I didn’t, either.

Or at least, that’s what I thought for the first 30 or so years of my life. As it turns out, I LOVE beans of all shapes and sized, I just don’t like the weirdly sweet sauce that smothers tinned baked beans (or tinned spaghetti, for that matter). I eat beans weekly, in some form or another, and haven’t found one I don’t like yet.

I’ve still been a little gun shy to make my own baked beans. 6 hours? Overnight soaking, just so I can forget they’re there? Nah. I survived 30 years without them, I can go a little longer, right? But then, I found a recipe in a Women’s Weekly vegetarian cookbook that used tinned beans and took maybe 5 minutes of hands-on time, and 30 minutes total. That, I would try. And, boy, was I rewarded handsomely for my investment. For 30 minutes of work and maybe 5 bucks in ingredients, this recipe yielded a thick, spicy, stew-like dish held together with just enough cheese to feel special, that fills you up for 410 calories per serveand makes you rethink everything you ever thought about baked beans.

In case you can’t tell, I’m a total convert.

Serves 5

Ingredients

500g kent pumpkin, cut into wedges

Spray oil

1 onion, diced

3 x 400g cans 4 bean mix, drained and rinsed

400g can chickpeas, drained and rinsed

2tbs barbecue sauce

1tbs honey

1tsp dijon mustard

2tbs tomato paste

700g passata

Cayenne pepper, to taste

Salt and pepper, to taste


130g grated cheddar

Method

  1. Preheat oven to 220°C. Spray a roasting tray lightly.
  2. Cut pumpkin into large-ish chunks, place on tray and spray lightly again. Roast for 15 minutes, until softened and starting to colour.
  3. Meanwhile, in an ovenproof skillet, cook onion over medium heat for five minutes, until softened. Add beans and chickpeas.
  4. Stir in barbecue sauce, honey, mustard, and tomato paste. Stir to combine and coat the beans and onion.
  5. Add the passata and cayenne, and season well. Boil for five minutes, until thickened slightly.
  6. Add pumpkin to the sauce, and gently stir to cover with sauce. Sprinkle cheese over the top, and bake for 15 minutes until thick and golden.

Facebooktwitterredditpinterestlinkedinmail

Spiced Cauliflower Soup

Like so many others – if social media is anything to go by – I’m somewhat struggling to eat well during this time of social isolation and lack of routine. This week was particularly hard for a multitude of reasons, but while those reasons are understandable (a crash of emotions, a huge change to my routine, or what passes for one these days, into one that is significantly more stressful, and one which I find even more challenging than it’s predecessor… my husband’s birthday… finally being allowed out to see people… the list goes on), they’re irrelevant. The fact of the matter is, I feel so much better both mentally and physically when I eat well and exercise. The dog helps me with the latter, but I have to take responsibility for the former. Of course, that’s not about restricting food, it’s just about upping the plants and being mindful of what I’m eating and how it’s affecting me. This week I’ve felt slumpy and grumpy, and at least some of that feeling like crap is related to the fact that I’ve been eating like crap. There’s a chicken/egg element to it, too, but it’s a cycle that isn’t too hard to break once you identify it.

Which brings me to this soup. Not an atonement (because I didn’t do anything wrong – food isn’t a moral compass), not a punishment (food is a blessing, NEVER a punishment!!), just a step back into what makes my tastebuds, mind and body feel good: simple, delicious, nutritious food. A kickstart out of the doldrums and back into mindfulness to all aspects of my life. Adapted from Smitten Kitchen, it is a bowlful of flavour and comfort that tastes divine, fills you up, makes your house smell like heaven, and brings some sensory interest to a very strange yet boring world. All for 10 minutes of easy prep, 20 minutes of simmering away, and a handful of really simple, nourishing ingredients that you probably have stashed already (you can definitely use frozen cauliflower for this). At 211 calories a bowl, it’s also a very low calorie option, perfect if (again, like me) you’re leaning on bread for a little emotional support right now. I can attest that an English Muffin with just a smear of cottage cheese is a perfect companion to this soup.

Serves 4, rather generously

Ingredients

1 tablespoon olive oil

1/2 teaspoon whole cumin seeds

1/2 teaspoon whole fenugreek seeds

1 medium onion, peeled and diced

2 baby chat potatoes (about 200g), washed and diced

2 teaspoons minced ginger

2 cloves garlic, peeled and chopped

1/2 tsp dried chilli flakes (more to taste)

2 teaspoons ground coriander

1 teaspoon ground cumin

1/4 teaspoon ground turmeric

1 small cauliflower

400g tinned tomatoes

3 cups vegetable stock

Salt and pepper, to taste (I ditched the salt and went to town with the pepper)

Yoghurt (coconut if you’re keeping it vegan) to serve

Method

  1. Heat oil in a large pot over medium heat. Add cumin and fenugreek seeds, and wait a few seconds for them to pop.
  2. Immediately add onion and potato, and stir to coat with seeds. Stir in garlic and ginger and cook for 5 minutes.
  3. Reduce heat to low and add cauliflower and spices. Cook, stirring, for a further 5 minutes, ensuring the vegetables are evenly coated.
  4. Stir in stock and tomatoes, season, and bring to the boil. Reduce back to low, cover, and simmer for about 20 minutes, until everything is very tender. Remove from heat and allow to cool slightly.
  5. Use a stick blender to blitz to desired consistency. I like to blend about half way to smooth – I like some texture, so ensure that tiny bits of florets and at least a few small cubes of potato are left intact.
  6. Ladle into bowls and season. Top with yoghurt, if using, and serve.

Facebooktwitterredditpinterestlinkedinmail

Spicy Cauliflower and Potato (Aloo Gobi)

In the interminable search for vegetarian lunches, I have found yet ANOTHER spicy roasted cauliflower dish. Who’d ever have thought that I’d be tripping over myself to roast cauliflowers constantly? Sometimes, I don’t even recognise myself. But as with most veggies, roasting cauliflower to sweet perfection is the most wonderful way to avoid the soggy blandness that comes from steaming (or gods forbid, boiling!) them. I wish I’d learned this earlier, I was choking cauli down until I was 30. Now I can’t get enough of it!

I’m really hesitant to call this Aloo Gobi: the spirit is there, but I don’t think we’re talking authenticity here. However, what we ARE talking is a delightfully fragrant bowlful of vegetable goodness that keeps you satisfied both physically and emotionally, and makes your little corner of the world smell like heaven. AND IT’S VEGAN, so we can all feel a little smug on this coolish Meatless Monday. Or not. The vegan-ness isn’t really a selling point for me, and I didn’t even bother mentioning it to the husband. At any rate, it’s healthy and delicious. And low calorie – 250 calories per serve, and chock full of nutrition. Winner winner vegan dinner!

Serves 4 (smallish, but not ridiculously so, serves)

Ingredients

1 head cauliflower, cut into small florets
600g baby chat potatoes, diced
1/2 teaspoon cumin seeds
1/2tbs olive oil

1 medium onion, finely chopped
2 garlic cloves, crushed under the heel of a knife
2 teaspoons minced chilli
2 teaspoons minced ginger
1 teaspoon ground cumin
1/2 teaspoon ground coriander
1/4 teaspoon turmeric
1/2 cup water

Parsley, to serve.

Method

  1. Preheat oven to 200C. Spray two baking trays with oil.
  2. Arrange cauliflower and potatoes on trays, spray with oil and sprinkle with cumin seeds. Season.
  3. Roast vegetables, turning halfway through, for about 30 minutes until until cauliflower is tender and browned in spots (just a little char isn’t a bad thing) and potatoes are just cooked.
  4. Meanwhile, cook onion, garlic, chilli, and ginger in olive oil over low heat in a medium sized pan for 8 minutes or until it begins to turn golden and soft. Stir frequently.
  5. Add ground cumin, coriander, turmeric, cayenne, and cook, stirring constantly for a minute or so. Stir in water, scraping any caramelised bits from the pan. Allow to thicken slightly
  6. Stir in roasted vegetables, turning to coat in the spice mixture.
  7. Serve, sprinkled with parsley.

Facebooktwitterredditpinterestlinkedinmail

Vegetable Nuggets

I’ll just come out and say it… Vegetable nuggets > chicken nuggets.

Yeah, you heard me. Not a sentence I was expecting, either. However, not only are they absolutely delicious, they’re packed full of nutrients and are only 40 calories each. Throw 5 or 6 into a container, add a salad and some salsa you’re good to go with a fabulous work lunch in all of 5 seconds flat. And they’re so cheap and easy to make. You probably don’t have to buy a single thing from the store.

I could go on and on. Suffice to say, these are awesome. Which is a pleasant surprise, because while I was cooking them, I was sure they’d be a disaster. I got the recipe from Taste.com, but found the mixture too wet to roll in egg and breadcrumbs, so I just dumped them into the mixture, and then I worried that they’d fall apart while frying in oil, so I baked them first, then finished them off in a nonstick frypan. Bonus: they’re healthier this way!

This recipe yields 30 nuggets, but I think they’d be great as larger rissoles, too. Maybe as veggie burger patties?

Ingredients

1 brown onion, peeled

1 zucchini, trimmed

1 carrot, peeled and trimmed

2 x 400g can cannellini beans, rinsed, drained

35g Mexican style cheese

1 egg, beaten

1 3/4 cups dried breadcrumbs

Salt and pepper to taste.

Method

  1. Preheat oven to 180°C. Lightly spray two baking trays with oil.
  2. In a food processor, pulse zucchini, carrot and onion until finely chopped. Scrape into a large mixing bowl.
  3. Pulse beans and add to vegetable mixture. Add cheese, egg and breadcrumbs, and season well. Mix to combine.
  4. Roll mixture into 30 balls, place on trays, and bake for 20 minutes. Remove from trays and allow to cool and firm up.
  5. Heat a non-stick pan over medium-high heat. Spray with oil. Add half the balls and fry until golden brown. Remove from pan and repeat with second half. Allow to cool.
  6. Serve with salsa and salad.
Facebooktwitterredditpinterestlinkedinmail

IDGAF Rice

We’ve all had those days, haven’t we, where you just don’t give a f&*k anymore. About anything, least of all dinner. Stuff it. Popcorn and icecream is totally a balanced meal, yeah? Corn’s a vegetable AND a grain, ice cream’s a dairy, and if there happens to be boysenberries rippled through it, there’s your fruit! Done. Surely it works that way?!

I’ve touched on the fact that this year hasn’t been my best – I had a car accident that we were (thankfully) able to walk away from, but my anxiety disorder shot through the roof, and it took a good two or three months to calm myself down and be a functional human again. I’m glad to say that through this really stressful time – made worse by the fact that poor mental health can be so invisible… I look like I have my wits about me, and I really didn’t have too much to be anxious about, but that fact just made the anxiety worse because it compounded the guilt of daily panic attacks – I didn’t emotionally eat too badly, didn’t gain any weight, and managed to get nutritious food on the table for my family most nights (although I phoned it in waaaaay more than normal). I credit this very low bar of success to already having a strong arsenal of healthy recipes at the ready at all times, and I really wanted to give credit due to this particular recipe, which got me through a particularly rough day. I cooked and ate this, cried in the shower for 15 minutes, then fell asleep for 15 hours. I was DONE. But my kids didn’t have Weetbix for dinner, and I clung to that win like you would not believe.

Even if you’re not having the day from hell, this speedy rice is a wonderful take on fast food. It’s pretty nutritious, clocks in at 351 calories per serve, and is so flavourful for such a throw-on meal. The perfect antidote to a lazy mood, a warm hug on a bad day, or a decent meal when things get busy, this bowl is here for you when you don’t – or can’t – have any more effs to give.

Serves 4

Ingredients

450g microwaveable rice

2 x 3 second spray of olive oil

150g sliced mushrooms

1 brown onion, sliced

1tsp minced garlic

1/2 tsp dried chilli flakes

1/2 head of broccoli, cut into small florets

Handful of baby spinach

4 eggs

for the dressing

1tbs white miso paste

2tbs mirin

1tbs kecap manis

1tsp minced ginger

Method

  1. Microwave rice according to packet instructions. Set aside to cool slightly to avoid it going mushy.
  2. Whisk all the dressing ingredients together and set aside.
  3. Place broccoli in a microwave-safe container and cover with water. Microwave for 2 minutes. Drain.
  4. Heat one spray of oil in a medium sized fry pan over medium heat. Add mushrooms and onions and cook for 5 minutes.
  5. Add garlic and chilli and cook for 1 minute until aromatic.
  6. Transfer broccoli to onion mixture and stir to combine. Add soy sauce and allow to cook on medium-low heat.
  7. Meanwhile, heat remaining oil over a clean frypan over high heat. When oil is hot, reduce to medium hear and crack eggs into pan. Lower heat to lowest setting and cook until the whites have set but the yolks are still runny.
  8. Add rice to vegetable mixture, and stir well to combine. Stir in spinach and dressing and transfer to four bowls. Top with an egg and season to serve.

Facebooktwitterredditpinterestlinkedinmail

Dal Makhani

Weeknights are such a balancing act – I won’t bore you with the laundry list of things that need to be done (including the actual laundry), but like every one else, there’s always something that needs to be done, or somewhere we need to be. Between myself, two active kids, an active dog, and a husband who works long hours with a long commute, you can usually find me from the hours of 4-8pm Monday-Friday in some degree of hectic rush. Now, I’m not complaining, not really. I’m grateful to have a job I love, even if it doesn’t always “finish at 3” (ugh). I’m grateful that my kids are active and social, and have found sports and activities that they love, and that hubby and I are in a position to let them explore those interests. I’m grateful to have a puppy I adore, and that we can both exercise together – I don’t know who enjoys his walkies more, McCartney or me. Actually… probably Mac; I don’t recall peeing in excitement over the prospect. And I’m incredibly grateful to be married to a wonderful man who works hard and makes a lot of sacrifices for the wellbeing of our family.

But, man, dinner time can be a challenge. I’ve taken to cooking dinner the night before the more hectic nights, and so I’m constantly on the look out for meals that keep really well, are nutritious and delicious, and are quick/easy to make in the first place, because often, these make ahead meals are the second dinner I’ve cooked that night, after a busy day of work/kid wrangling. Once again, I find myself very grateful that my kids aren’t fussy eaters… I’d go mad if the options were limited even further!

This dal recipe ticks almost all my boxes – it’s healthy, cheap, easy, and it doesn’t just keep well… it’s better the next day! It’s not exactly quick, but that’s only because it simmers away for an hour – it does it’s own thing on a low heat, and needs very little attention (the bare minimum of stove safety ought to cover it), so it’s definitely easy. It’s probably not the most authentic dal – the recipe from which I adapted it is, but I changed it to be quicker and more straight forward, because that’s what I need it to be. So please forgive the tinned beans and commercial chapatis… the aim of the game is to be nourished and warmed quickly and without delay – fiddling around making my own bread isn’t possible on dal day! But what it lacks in authenticity, it makes up for in rich taste. I was surprised at the nutritional breakdown: despite two different types of butter and some cream, it only clocks in at 335 calories per serve, which leaves just enough room for you to justify the chapati, because at least in my view, carbs are life.

Serves 4

Ingredients

1 tbs ghee

2 tbs butter

1 brown onion, diced

1/2 cup passata

1 clove garlic, minced

2 tsp minced ginger

400g can lentils, rinsed and drained

400g can red kidney beans, rinsed and drained

1/2 tsp garam masala

1/2 tsp ground chilli (I used cayenne)

1/2 tsp ground cumin

1 pinch Maldon salt flakes

1.5 cups water

1/4 cup Philadelphia light cream for cooking

1tbs butter, extra

Method

  1. Melt ghee and 2tbs butter in a large heavy based saucepan over medium heat. Add onions and cook for 10 minutes until golden brown.
  2. Add ginger and garlic, and stir for 1 minute, until fragrant.
  3. Mix in the passata and stir until it is fully combined.
  4. Stir in the lentils and kidney beans – it’s okay if some of them are mashed into the sauce.
  5. Add spices, stir well.
  6. Pour in 1/2 cup of water, and stir. Reduce heat to low, and simmer (uncovered) for 45 minutes. Stir every 10 minutes or so to prevent sticking. Add the remaining water in increments throughout the simmering time – I added a quarter cup every time I stirred.
  7. After the dal has simmered for 45 minutes, stir in sugar, cream and another tablespoon of butter. Stir to combine, and simmer for a further 10 minutes. Serve immediately with rice and chapati (neither are counted in the calorie calculation – I skip the rice altogether) or allow to cool, then refrigerate and let the flavours do their thing.

Facebooktwitterredditpinterestlinkedinmail

Butter Bean and Spinach Smash

Image may contain: food

I never thought I’d be the kind of person to own a book called “The Detox Bible”. I don’t believe in detox diets – namely because I feel our bodies are perfectly capable of doing all the detoxification that they need, and don’t need magical juices or powders to help them along. I also don’t believe in “bad” foods that must be avoided at all costs, unless of course, you have an allergy. Nevertheless, when a local bookshop was having a sale on cookbooks and slashing prices by 75%, I’m willing to be more open to things.

I have to say, this book pleasantly surprised me. It’s wheat, refined sugar and dairy free (all of which I happily ignore when it suits me), but really, it’s pretty well balanced. It’s more often a case that these recipes are naturally free of these devil ingredients, than a case of the authors moving heaven and earth to swap these perfectly fine ingredients with ridiculous substitutions. I appreciate such common sense approaches, even if I don’t subscribe to the core philosophy.

Anyway, I digress. This dip is why I bought the book. It’s the first page I opened to when I was flicking through it at the store, and I was immediately sold. I love beans. Like, LOVE beans. My family aren’t quite as enthusiastic, so while I use them regularly, I rarely make them the star of the dish… Until now. Combined with an array of crudités, this dip makes an extremely healthy, delicious, filling and cheap work lunch that will make you feel like some kind of nutritionally superior god/dess for only 240 calories (it’s 170 by itself). Did I mention it’s delicious?! Because, seriously, even I was taken aback with just how GOOD this is. Off a spoon, with crackers, as a bed for your egg – it just works with everything, and my new addiction.

Serves 2

Ingredients

2 handfuls of baby spinach (about 25g)

400g butter beans, drained and rinsed (butter beans are lima beans – I had no idea!)

1tsp olive oil

1tbs lime juice

Salt and pepper to taste

1 cup chopped raw vegetables to serve

Method

  1. Place all ingredients except the crudités into a blender and pulse into a chunky consistency (you can make it completely smooth if you prefer. I like it chunky – the butter beans are creamy enough to provide a lovely texture). If it won’t break down, add a teaspoon of water to help it along.
  2. That’s it. It couldn’t be easier.

Facebooktwitterredditpinterestlinkedinmail