Cauliflower and Apple Soup with Charred Brussels Sprouts

When I told the kids we were having cauliflower soup with brussels sprouts for dinner, they laughed. Often, they’ll ask what’s for dinner, and I’ll respond along the lines of “poop on toast” or “banana and fish casserole” , and I suspect they thought I was joking tonight, too. Even my brussels sprouts loving 9 year old looked a little crestfallen when I actually did pull out the head of cauliflower and started making soup.

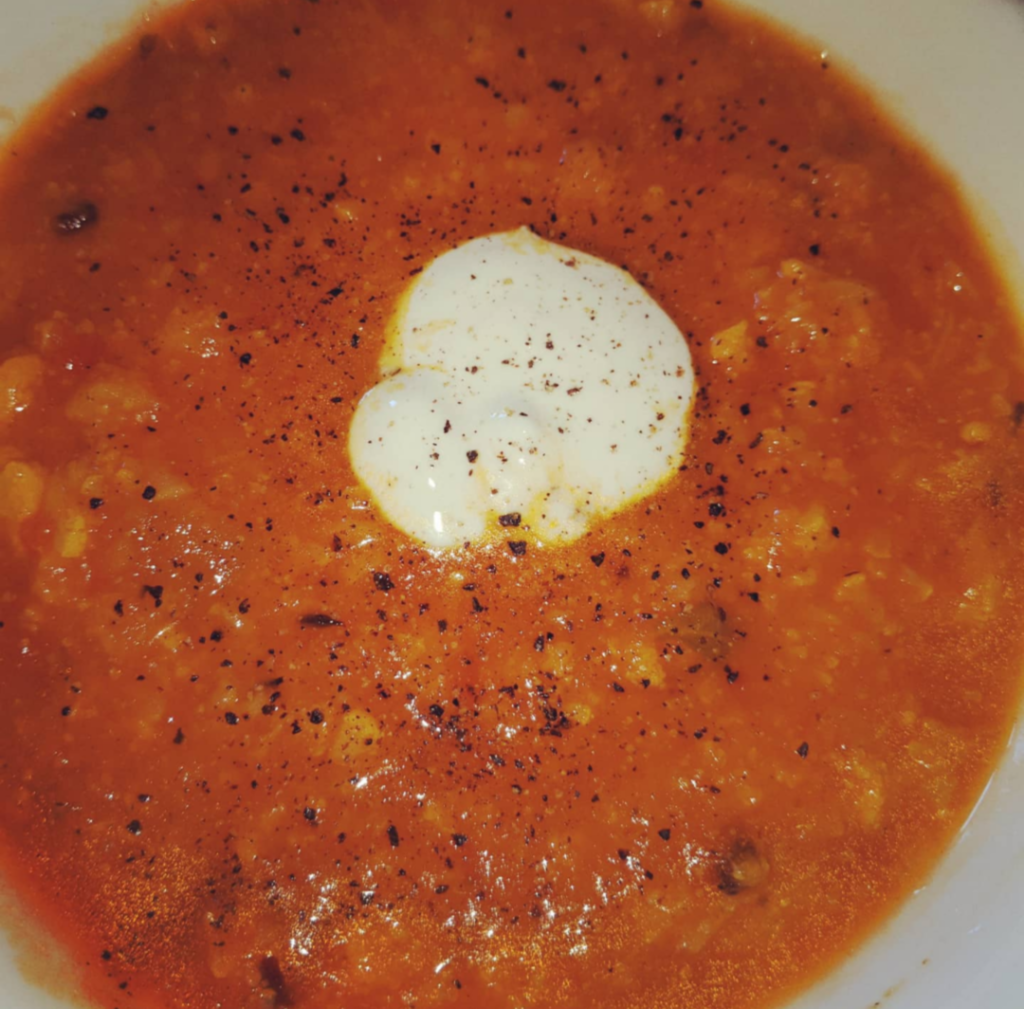
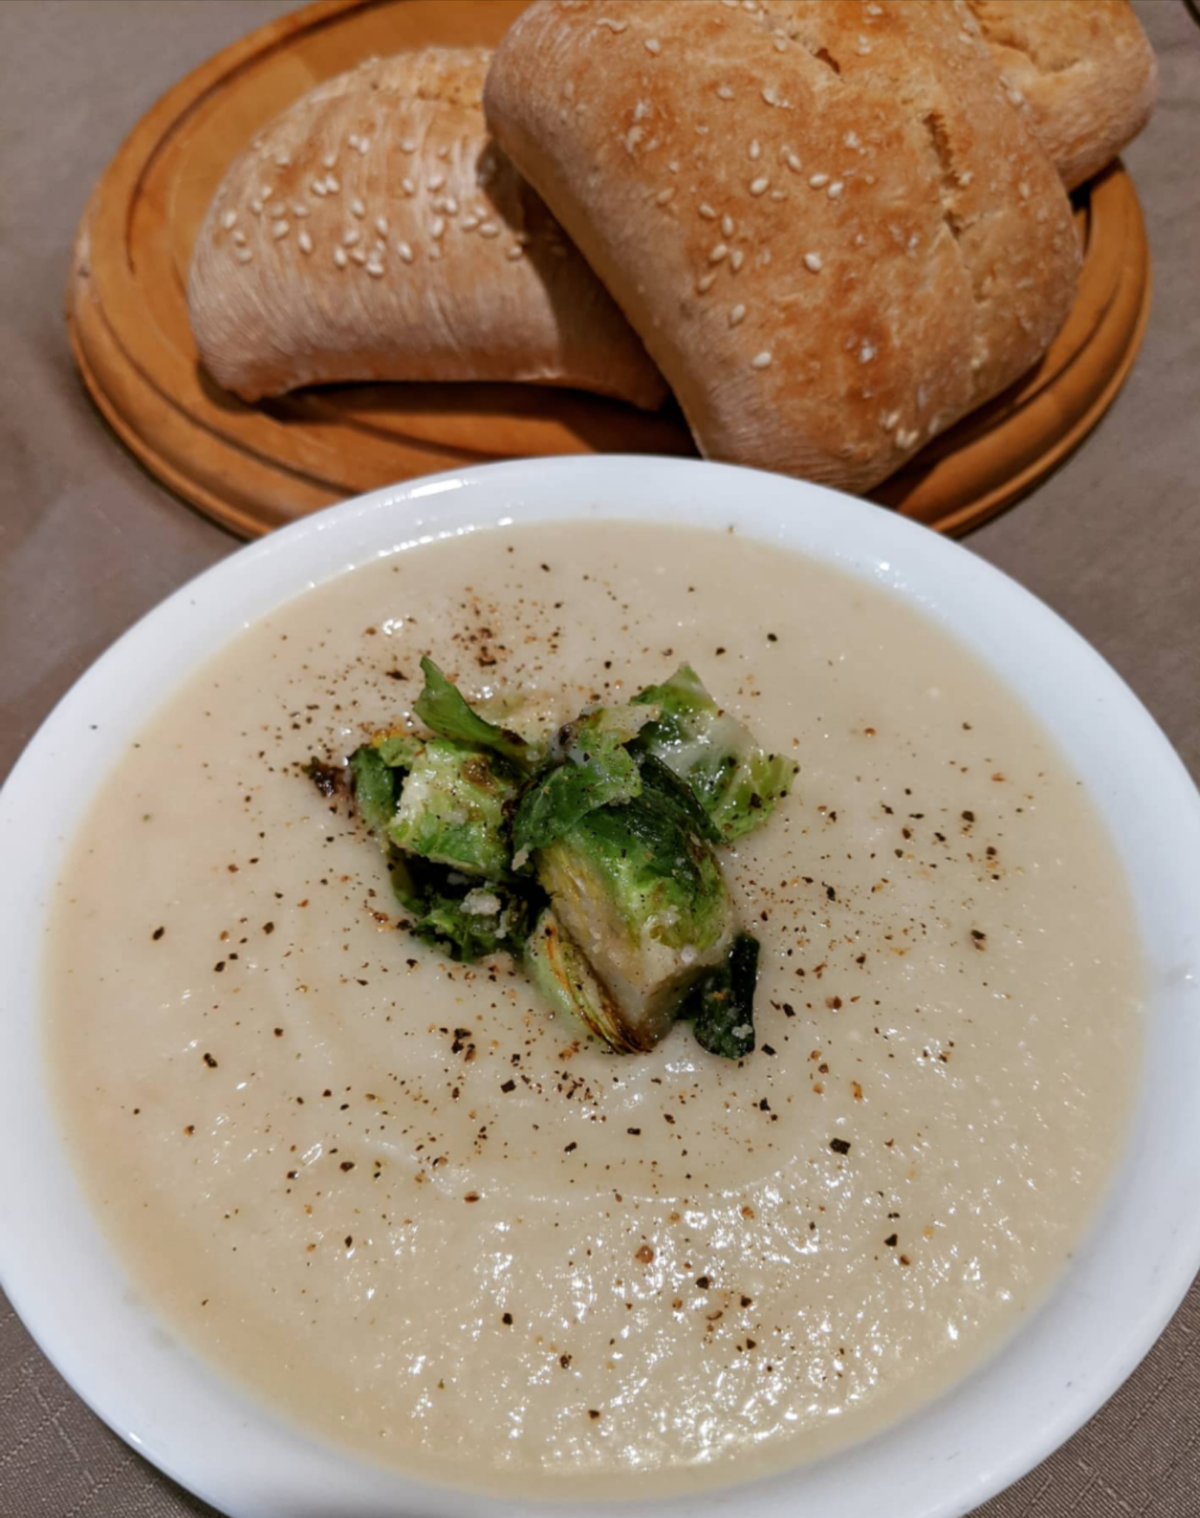
I’ll admit, it doesn’t quite scream ‘kids will go crazy over this’, but they did clean their plates, because this creamy yet light soup from the Australian Women’s Weekly is nothing short of delicious. The apple provides a child-quietening sweetness to the dish, while the cream and parmesan adds depth and complexity. The sprouts are certainly not to be skipped – they’re the star, and that slightly charred, nutty flavour elevates a humble soup into something absolutely wonderful. Copious amounts of pepper is also highly, highly recommended here, for the same reason.

The recipe yields 5 serves at 350 calories a serve, and is somewhat accidentally vegetarian: the stock I usually have in the cupboard happens to be vegetarian “chicken style” stock by Massel, and the parmesan I buy also just happens to be vegetarian (yep, I am aware that renders it not truly Parmesan. I am cool with this). These are actually budget decisions, not dietary, but don’t you just love happy accidents?

Ingredients

Spray oil

1 medium cauliflower, roughly chopped

1 onion, chopped

2 Granny Smith apples, peeled, cored and chopped

2 cloves garlic, diced or minced

5 cups chicken or vegetable stock

1tsb lemon juice

1/3 cup parmesan (style) cheese

1/3 cup thickened cream

1tbs olive oil

5 brussels sprouts, trimmed and quartered

1tbs almond meal.

Salt and pepper, to serve

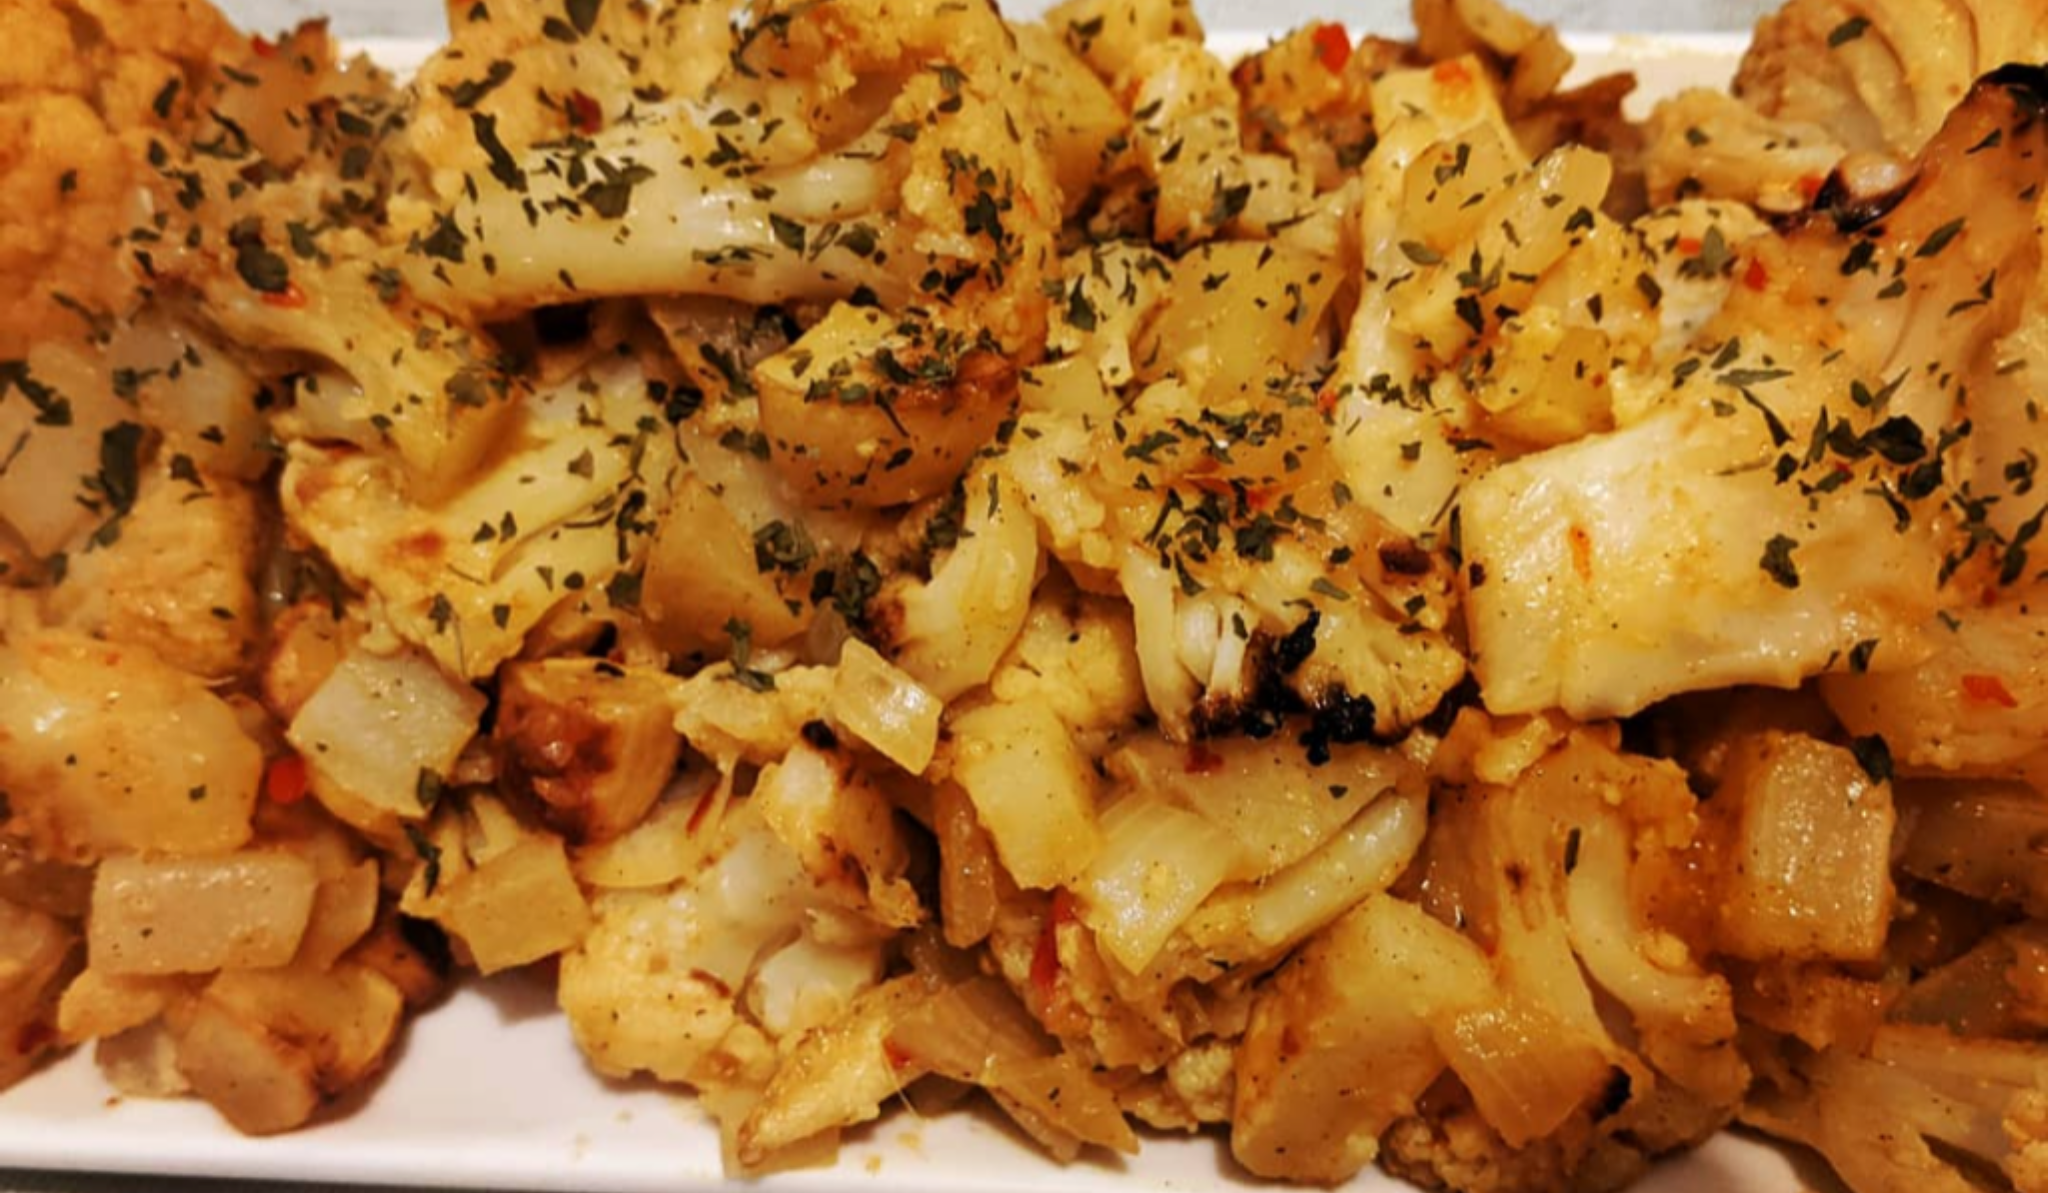
  1. Heat oil in a large saucepan over medium heat. Add onion, cauliflower, apple and cook for 10 minutes, until starting to soften and colour.
  2. Add stock and bring to the boil. Reduce to a simmer, cover, and cook for 25 minutes until everything is very soft.
  3. Remove from heat to cool.
  4. Meanwhile, heat olive oil in a small fry pan and saute sprouts until just starting to char – around 3 minutes. Sprinkle almond meal over the sprouts, toss to combine, and remove from heat.
  5. Use a stick or regular blender to process until smooth (I don’t mind a few little pieces of cauliflower). Stir in lemon juice, cheese and cream.
  6. Ladle soup into bowls and top with sprouts. Season well, and serve with ciabatta or other crusty bread (not included in a calorie count).

Facebooktwitterredditpinterestlinkedinmail

Baked Polenta Chips (Scagliozzi)

Polenta is not something I really grew up eating, and because I was unfamiliar with it, it took a fair bit of time to work out exactly how to cook it. I remember trying to cook it for my son when he was a baby, and was left confused by the resulting gluggy weirdness and how the hell I was supposed to cut it into fingers.

Clearly, I was still learning, and managed to find some really vagueless recipes that offered little guidance to the still-learning-how-to-cook new mother desperate to raise a good eater (I did manage to succeed in that, despite my complete ignorance of cooking cornmeal). Thankfully, over the past 12 years, I’ve learned how to find and evaluate good recipes, and combine them into something that works for me.

Which brings me to my spin on baked polenta chips. I’m thrilled to report that my son DOES in fact love them (sorry for the delay, dude!)… as did my daughter and husband. I did too. I know that traditionally, scagliozzi is fried, but on top of preferring a lower calorie side dish, I’ve never really been a big fan of deep fried food (except for really good chips). However, when baked, these are a cheesy, tasty treat that the whole family will gobble up. Prepared this way, 1/5 of the recipe is only 250 calories, and considering how filling it is, that’s pretty good! Some lean meat and steamed veggies, and you’ve got yourself and amazing meal.

Do keep in mind that you need to make the polenta the night before (or up to two days ahead), but even though it’s a 2 part recipe, neither part takes very much time or effort.

ingredients

250g instant polenta

1 litre chicken stock

1tbs butter

Spray oil (or 1.5 tbs olive oil, but the spray oil makes it easier)

Salt and pepper to taste

4tbs grated parmesan

Method

The night before

  1. Line a large, shallow baking dish with baking paper and spray lightly, or brush with half a tablespoon of the oil.
  2. Bring stock to the boil in a medium sized saucepan. In a very slow stream, and whisking vigorously all the while, pour the polenta into the stock.
  3. Continue whisking for about 5 minutes, or until the polenta easily moves from the side of the pan when stirring.
  4. Remove from heat and stir the butter in until completely melted.
  5. Pour into prepared dish and spread until about 1cm thick. Allow to cool, then refrigerate (uncovered) overnight or up to two days.

45 minutes before serving

  1. Preheat oven to 210C. Remove dish from fridge and cut polenta into fingers. Allow the dish to come to room temperature for about 10 minutes.
  2. Sprinkle polenta with salt, pepper and parmesan, then spray/drizzle with oil.
  3. Bake for 30 minutes, until golden. You may wish to check after 20 minutes.
  4. Remove from oven and allow to rest for a few minutes before serving.

Facebooktwitterredditpinterestlinkedinmail

Apple, Spinach and Chorizo Frittata

Ahhh, frittatas. So easy, so delicious, so good at making a meal out of the most basic ingredients.

This particular frittata, for example, is so stupidly easy, yet the flavour is almost undeservingly wonderful. Such marvelous results for such little effort or need for cooking expertise. I mean, isn’t that the best kind of cooking? All the results for little effort? In my busy, lazy world it is.

This frittata is so versatile, too. You can make it the night before, which is perfect for Thursday nights when the daughter and I both have netball training, the son has baseball, and the husband has a killer commute. It’s a meal in itself, but light enough for those nights when you don’t want a full dinner. And, best of all, while doesn’t last long in my house as everyone loves it, if I can keep it away from snacky, sneaky hands, it lasts two or three days for a great work lunch. A larger serving (1/4) is only 360 calories, and a smaller serving (1/6) is 240. Add some veggies or a salad, and you’re absolutely good to go – and it’s more filling than just the larger serve.

Ingredients

2tsp olive oil

180g chorizo sausage, sliced into coins

1 red onion, thinly sliced

1 red apple, thinly sliced

100g baby spinach

9 eggs

60g milk

Salt and pepper, to taste

Method

  1. Preheat oven to 180C.
  2. Heat oil in an ovenproof frying pan over medium heat. Cook chorizo for five minutes, or until golden. Add onion and cook for 3 minutes, until softened. Transfer both to a bowl, but keep oil in the pan.
  3. Place apple slices in pan and cook for 5 minutes, turning occasionally, until golden and starting to soften. Remove to a separate plate or bowl.
  4. Add spinach and stir briefly until just wilted. Return onion and 3/4 of the chorizo to the pan, and distribute evenly in the pan.
  5. In a clean bowl, whisk eggs and milk until combined. Pour into pan, over the spinach mixture.
  6. Arrange remaining chorizo and apple slices over the egg. Season with salt and pepper. Cook for 3-4 minutes, shaking occasionally, until eggs just start to set. Transfer to oven, and bake for 12-15 minutes until egg is golden and cooked though.

Facebooktwitterredditpinterestlinkedinmail

Cherry Tomato and Zucchini Rice Bake

I wish I knew where – if anywhere – I’d seen this recipe, but I have no idea. I vaguely remember making something similar years and years ago with tuna, and feeling like the tuna ruined it, but I can’t even remember if anything other than rice was common to this dish. All I know is that I’ve been wanting a rice side dish that wasn’t fried rice all week, and kind of just threw it together and hoped for the best.

It worked. The husband ate the leftovers (AKA tomorrow’s lunch) as seconds, much to my horror. It was tasty yet simple (absolute perfect for a Wednesday night where I have a night of lesson planning ahead of me) but I fear that if I don’t write it down, I’ll forget what I did and then never make it again. And that would be tragic.

To add to the happiness surrounding this side dish, it was far fewer calories than I’d anticipated – just 235 per serve, making it an awesome dinner with some lean meat and more veggies – we added grilled pork loin and broccoli, and thoroughly enjoyed it. This calorie count is for a yield of 5 serves; For almost exactly 300 calories, you can have it serve 4, but with the meat and veg, one fifth was perfect. And would have been a perfect amount and calorie count for lunch, too. Not that I’m bitter or anything…

Ingredients

1 cup (200g) raw basmati rice

2 cups chicken stock

1 tsp olive oil

1 brown onion, finely diced

1 medium zucchini, finely diced

1 clove garlic, minced

1tsp minced ginger

200g cherry tomatoes, cut in half (or quartered, if they’re a bit larger)

1/4 cup grated parmesan

2 eggs, beaten

Salt and pepper, to serve

Method

  1. Preheat oven to 180C.
  2. In an oven proof skillet, add rice and stock and bring to the boil on stove. Reduce heat and simmer for 10 minutes, or until just tender. Stir occasionally to prevent sticking. Turn off the burner, place a tea towel over the skillet and firmly cover with a lid. Rest for 15 minutes.
  3. Meanwhile, in another pan, heat oil over medium low heat. Add onions and cook for five minutes, until translucent. Add ginger and garlic and cook for a minute or so. Add zucchini and tomatoes, and cook until softened but not coloured. Set aside until rice is ready.
  4. Stir vegetables through the rice. Mix in the parmesan and egg
    until fully incorporated, and smooth down with a spoon or spatula.
  5. Season well and bake in the oven for 15 minutes, until golden and firm.

Facebooktwitterredditpinterestlinkedinmail

Sweet Chilli Dumpling Stir Fry

Why did I never think to do this?! Why did I inhabit this planet for 33 years without this?!

I LOVE stir fry, we eat some version of it weekly. I LOVE dumplings. My whole family would subsist on nothing but pot stickers, xiao long bao and wontons, given half the chance. Combining the two was so obvious. So perfect. So… not something I’d ever considered until I came across a recipe from taste.com.au. I’ve made it a couple of times, and never the same way twice: different dumplings, different veggies, different ratios. The sauce is amazing, and that always stays the same, but the beauty of stir fry is that you use what you have. So this recipe is a guideline, a serving suggestion at best. But a truly delicious suggestion that I urge everyone to make their own. I’ve made these with various flavours, shapes and styles of dumplings with success, but find pot stickers are the hardiest, and therefore, best to toss around. But substitute away… it’s all good. One day I’ll be super smug and use homemade dumplings (I went to a funky class months ago, and so far have done nothing with that experience), but I’m absolutely not above throwing in some good quality frozen pieces.

This meal serves 4, and is about 350 calories per serve. Of course, that’s hard to gauge when you change everything each time, but if you stick to the spirit of the recipe, it’s a safe bet.

Ingredients

1.5 tbs peanut oil

400g dumplings of your choice – I’m partial to prawn or pork

100ml water

1 onion, thinly sliced

200g mushrooms, sliced

1 small handful of baby capsicum, sliced (or 1 regular pepper)

4 heirloom carrots, peeled and cut into matchsticks

1 small head broccoli or 3 bunches broccolini, cut florets and stalks thinly sliced

100g beans or snow peas, trimmed

400g can baby corn, drained

3 cloves garlic, minced

1tsp minced ginger

1/4 cup oyster sauce

2tbs sweet chilli sauce

1/4 cup Shaoxing wine

Large handful baby spinach

Method

  1. You’ll want everything ready to go before you start. Chop all vegetables and place in one large bowl. Combine oyster sauce, sweet chilli sauce and Shaoxing wine in a jug and set aside.
  2. In a large frypan with a lid, heat 1tbs oil over medium heat. Add dumplings and cook one side without turning or stirring. Carefully pour water into pan (it will sizzle like mad… I often turn the heat down to low because it freaks me out a little), cover with lid and steam for 5 minutes. Transfer to a plate with slotted spoon and keep warm (this is a quick method – throwing a clean teatowel over it should do the trick).
  3. Heat remaining oil in a hot wok (you can use a frypan, in fact I have most of the times I’ve cooked this, but since getting one recently, I cannot recommend a wok highly enough!) and add all the vegetables, ginger and garlic. Stir constantly for about 5 minutes, until veggies are tender but not mushy.
  4. Pour the sauce over the veggies and give a good stir.
  5. Add the spinach and dumplings and turn gently until the dumplings are coated with sauce and the spinach is wilted.

Facebooktwitterredditpinterestlinkedinmail

Sweet Chilli Chicken and Corn Soup with Pumpkin Scones

Oh, look! Another soup! It’s cooling down here now, and I’m swapping my salads for soups as my seasonal staples. I’ve been making this soup for years, and it’s an absolute winner. I mean, chicken and corn soup isn’t anything overly special, but the sweet chilli sauce – such a simple addition to such a simple dish – makes such a difference to the versions I ate growing up. Adding a pumpkin lemonade scone for dipping makes this a delightfully delicious light meal that will leave you feeling like you’ve partaken in something special. Yet, it’s a cinch to make, and so very budget friendly. A serve of each sits right at 400 calories, making it the perfect winter warmer.

Sweet Chilli Chicken and Corn Soup

Serves 4 at 300 calories per serve

Ingredients

1.25 litres chicken stock

2 garlic cloves, minced

1tsp minced ginger

1 onion, finely diced

420g can creamed corn

200g sweetcorn kernels

300g chicken thigh fillets, skin removed

2tsp soy sauce

1tbs sweet chilli sauce

2 eggs whites, beaten

Salt and pepper, to serve

Method

  1. Bring stock to the boil. Add garlic, ginger, corn, onions and chicken to the stock, cover, and reduce heat to medium. Simmer for 10 minutes, or until chicken is mostly cooked through.
  2. Remove chicken from the stock, and using two forks, shred meat. Return to stock and resume simmering (uncovered) for five minutes or until cooked through.
  3. Stir through the soy and sweet chilli sauces. In a thin stream, slowly pour in the egg whites, whisking the soup to incorporate evenly. Cook for another minute, then serve with a generous crack of black pepper and salt to taste

Pumpkin Scones

makes 16 at 100 calories each (they freeze really well)

Ingredients

300g pumpkin (weight without skin and seeds)

2 1/2 cups flour

1/4 teaspoon maldon salt flakes

1/2 cup lemonade (Schweppes works well as it’s not too sweet)

1/2 cup thickened cream

1tbs milk

Method

  1. Steam pumpkin until very tender, drain and cool.
  2. Preheat oven to 220C and prepare a tray with non-stick baking paper (I give it a little spray with oil anyway, because I have trust issues).
  3. Sift the flour and salt into a large bowl.
  4. Combine cream and lemonade. Pour into flour, and using a flat blade knife, mix to combine. Don’t overmix, but do ensure the flour is incorporated. The dough will be rather wet and sticky.
  5. Using a tablespoon or, better yet, a soup spoon, dollop spoonfuls of mixture on the prepared trays, shaping them into neat rounds with only a few millimetres of space between them.
  6. Brush with milk and bake for 12-15 minutes. Remove from oven and allow to cool slightly on the tray. Serve with soup as they are, or spread with just a little butter or (as I tend to do) cottage cheese.

Facebooktwitterredditpinterestlinkedinmail

Spiced Cauliflower Soup

Like so many others – if social media is anything to go by – I’m somewhat struggling to eat well during this time of social isolation and lack of routine. This week was particularly hard for a multitude of reasons, but while those reasons are understandable (a crash of emotions, a huge change to my routine, or what passes for one these days, into one that is significantly more stressful, and one which I find even more challenging than it’s predecessor… my husband’s birthday… finally being allowed out to see people… the list goes on), they’re irrelevant. The fact of the matter is, I feel so much better both mentally and physically when I eat well and exercise. The dog helps me with the latter, but I have to take responsibility for the former. Of course, that’s not about restricting food, it’s just about upping the plants and being mindful of what I’m eating and how it’s affecting me. This week I’ve felt slumpy and grumpy, and at least some of that feeling like crap is related to the fact that I’ve been eating like crap. There’s a chicken/egg element to it, too, but it’s a cycle that isn’t too hard to break once you identify it.

Which brings me to this soup. Not an atonement (because I didn’t do anything wrong – food isn’t a moral compass), not a punishment (food is a blessing, NEVER a punishment!!), just a step back into what makes my tastebuds, mind and body feel good: simple, delicious, nutritious food. A kickstart out of the doldrums and back into mindfulness to all aspects of my life. Adapted from Smitten Kitchen, it is a bowlful of flavour and comfort that tastes divine, fills you up, makes your house smell like heaven, and brings some sensory interest to a very strange yet boring world. All for 10 minutes of easy prep, 20 minutes of simmering away, and a handful of really simple, nourishing ingredients that you probably have stashed already (you can definitely use frozen cauliflower for this). At 211 calories a bowl, it’s also a very low calorie option, perfect if (again, like me) you’re leaning on bread for a little emotional support right now. I can attest that an English Muffin with just a smear of cottage cheese is a perfect companion to this soup.

Serves 4, rather generously

Ingredients

1 tablespoon olive oil

1/2 teaspoon whole cumin seeds

1/2 teaspoon whole fenugreek seeds

1 medium onion, peeled and diced

2 baby chat potatoes (about 200g), washed and diced

2 teaspoons minced ginger

2 cloves garlic, peeled and chopped

1/2 tsp dried chilli flakes (more to taste)

2 teaspoons ground coriander

1 teaspoon ground cumin

1/4 teaspoon ground turmeric

1 small cauliflower

400g tinned tomatoes

3 cups vegetable stock

Salt and pepper, to taste (I ditched the salt and went to town with the pepper)

Yoghurt (coconut if you’re keeping it vegan) to serve

Method

  1. Heat oil in a large pot over medium heat. Add cumin and fenugreek seeds, and wait a few seconds for them to pop.
  2. Immediately add onion and potato, and stir to coat with seeds. Stir in garlic and ginger and cook for 5 minutes.
  3. Reduce heat to low and add cauliflower and spices. Cook, stirring, for a further 5 minutes, ensuring the vegetables are evenly coated.
  4. Stir in stock and tomatoes, season, and bring to the boil. Reduce back to low, cover, and simmer for about 20 minutes, until everything is very tender. Remove from heat and allow to cool slightly.
  5. Use a stick blender to blitz to desired consistency. I like to blend about half way to smooth – I like some texture, so ensure that tiny bits of florets and at least a few small cubes of potato are left intact.
  6. Ladle into bowls and season. Top with yoghurt, if using, and serve.

Facebooktwitterredditpinterestlinkedinmail

Turkey Rissoles

Ok, I know these don’t look like much, and that rissoles are hardly the height of haute cuisine, but I also know that these humble meatballs are deceptively delicious, and deserve a special mention on this blog. I’ve been making these since… um… well, I remember feeding these to my eldest as a baby (I probably omitted the sweet chilli, but with how much Tabasco he puts on everything now, maybe not), and he turns 12 tomorrow. So, definitely very early in my cooking ventures. And they NEVER fail to please a crowd. They really don’t look particularly thrilling, but the Asian flavours from the sweet chili and oyster sauces give a flavour and texture that are just sublime. I actually forgot about them for a few years, then found a typed up recipe in a Google Drive folder, and now they’re enjoying a much deserved revival in our household.

Unlike a lot of rissoles, which are cooked in a fair whack of oil and use fatty beef mince (not that I have a problem with beef mince!), these are really light, and are full of vegetables. They clock in at just 100 calories apiece, which is quite respectable for a decent sized rissole, and when you add a salad, you get an amazing light meal that feels so much more special than the (almost no) effort that goes into making them. They’re also great as sliders with Asian salad or slaw, or cold the next day. Adults love them. Kids love them. Fat 10 month old babies love them. They’re the ultimate family favourite.

Serves 4

Ingredients

Oil spray

500g turkey mince

1/2 cup dried breadcrumbs

2 garlic cloves, grated

1 zucchini, grated

1/2 cup frozen peas

2tbs oyster sauce

2tbs sweet chilli sauce

Pepper to tasteM

Method

  1. Preheat oven to 200C. Lightly spray a baking tray with oil.
  2. Combine all other ingredients gently, ensuring not to over mix.
  3. Divide into 8 patties, place on tray, and flatten slightly.
  4. Bake for 20-25 minutes, until cooked through. Serve

Facebooktwitterredditpinterestlinkedinmail

Easiest Egg Muffins

Looking for something quick and easy to make? Something that could be a meal or a snack, while clocking in at less that 100 calories (93 to be exact)? Something that uses up the sad veggies dwelling in the bottom of your fridge, can be eaten on the run with one hand, are low carb and high protein, and are bursting with veggie goodness?

Well, look no further.

I mean, you could; the internet is full of recipes for egg bites/muffins/mini quiches. But if you’re here… well, it makes perfect sense to look no further. These muffins tick all the boxes.

The only caveat to these is that you MUST use paper cases. Unless losing half your muffin to the bottom of the muffin pan is your thing, of course. Trust me. They stick. But apart from that, they’re so simple, and not at all labour intensive – even making them after a long day of work isn’t as harrowing as it sounds.

I like to make 6 at a time – they’re not going to keep for much more than that. No one wants slimy eggs as they’re running out the door!

Ingredients

6 eggs

125g cherry tomatoes, cut into eights

100g mushrooms, sliced

1 onion, diced

1/2 cup broccoli, finely chopped

Salt and Pepper, to taste

Method

  1. Preheat oven to 180C, and line a muffin pan with 6 paper cases.
  2. Over medium heat, cook onion, mushrooms and broccoli until onion is translucent – about 5 minutes.
  3. Meanwhile, crack eggs into a large bowl, and beat well. Stir in cherry tomatoes.
  4. Add cooked vegetables, and mix to combine. Season with salt and pepper.
  5. Evenly distribute mixture into the paper cases. Bake for 20 minutes, or until golden and firm.

Facebooktwitterredditpinterestlinkedinmail

Spicy Cauliflower and Potato (Aloo Gobi)

In the interminable search for vegetarian lunches, I have found yet ANOTHER spicy roasted cauliflower dish. Who’d ever have thought that I’d be tripping over myself to roast cauliflowers constantly? Sometimes, I don’t even recognise myself. But as with most veggies, roasting cauliflower to sweet perfection is the most wonderful way to avoid the soggy blandness that comes from steaming (or gods forbid, boiling!) them. I wish I’d learned this earlier, I was choking cauli down until I was 30. Now I can’t get enough of it!

I’m really hesitant to call this Aloo Gobi: the spirit is there, but I don’t think we’re talking authenticity here. However, what we ARE talking is a delightfully fragrant bowlful of vegetable goodness that keeps you satisfied both physically and emotionally, and makes your little corner of the world smell like heaven. AND IT’S VEGAN, so we can all feel a little smug on this coolish Meatless Monday. Or not. The vegan-ness isn’t really a selling point for me, and I didn’t even bother mentioning it to the husband. At any rate, it’s healthy and delicious. And low calorie – 250 calories per serve, and chock full of nutrition. Winner winner vegan dinner!

Serves 4 (smallish, but not ridiculously so, serves)

Ingredients

1 head cauliflower, cut into small florets
600g baby chat potatoes, diced
1/2 teaspoon cumin seeds
1/2tbs olive oil

1 medium onion, finely chopped
2 garlic cloves, crushed under the heel of a knife
2 teaspoons minced chilli
2 teaspoons minced ginger
1 teaspoon ground cumin
1/2 teaspoon ground coriander
1/4 teaspoon turmeric
1/2 cup water

Parsley, to serve.

Method

  1. Preheat oven to 200C. Spray two baking trays with oil.
  2. Arrange cauliflower and potatoes on trays, spray with oil and sprinkle with cumin seeds. Season.
  3. Roast vegetables, turning halfway through, for about 30 minutes until until cauliflower is tender and browned in spots (just a little char isn’t a bad thing) and potatoes are just cooked.
  4. Meanwhile, cook onion, garlic, chilli, and ginger in olive oil over low heat in a medium sized pan for 8 minutes or until it begins to turn golden and soft. Stir frequently.
  5. Add ground cumin, coriander, turmeric, cayenne, and cook, stirring constantly for a minute or so. Stir in water, scraping any caramelised bits from the pan. Allow to thicken slightly
  6. Stir in roasted vegetables, turning to coat in the spice mixture.
  7. Serve, sprinkled with parsley.

Facebooktwitterredditpinterestlinkedinmail