Cauliflower and Apple Soup with Charred Brussels Sprouts

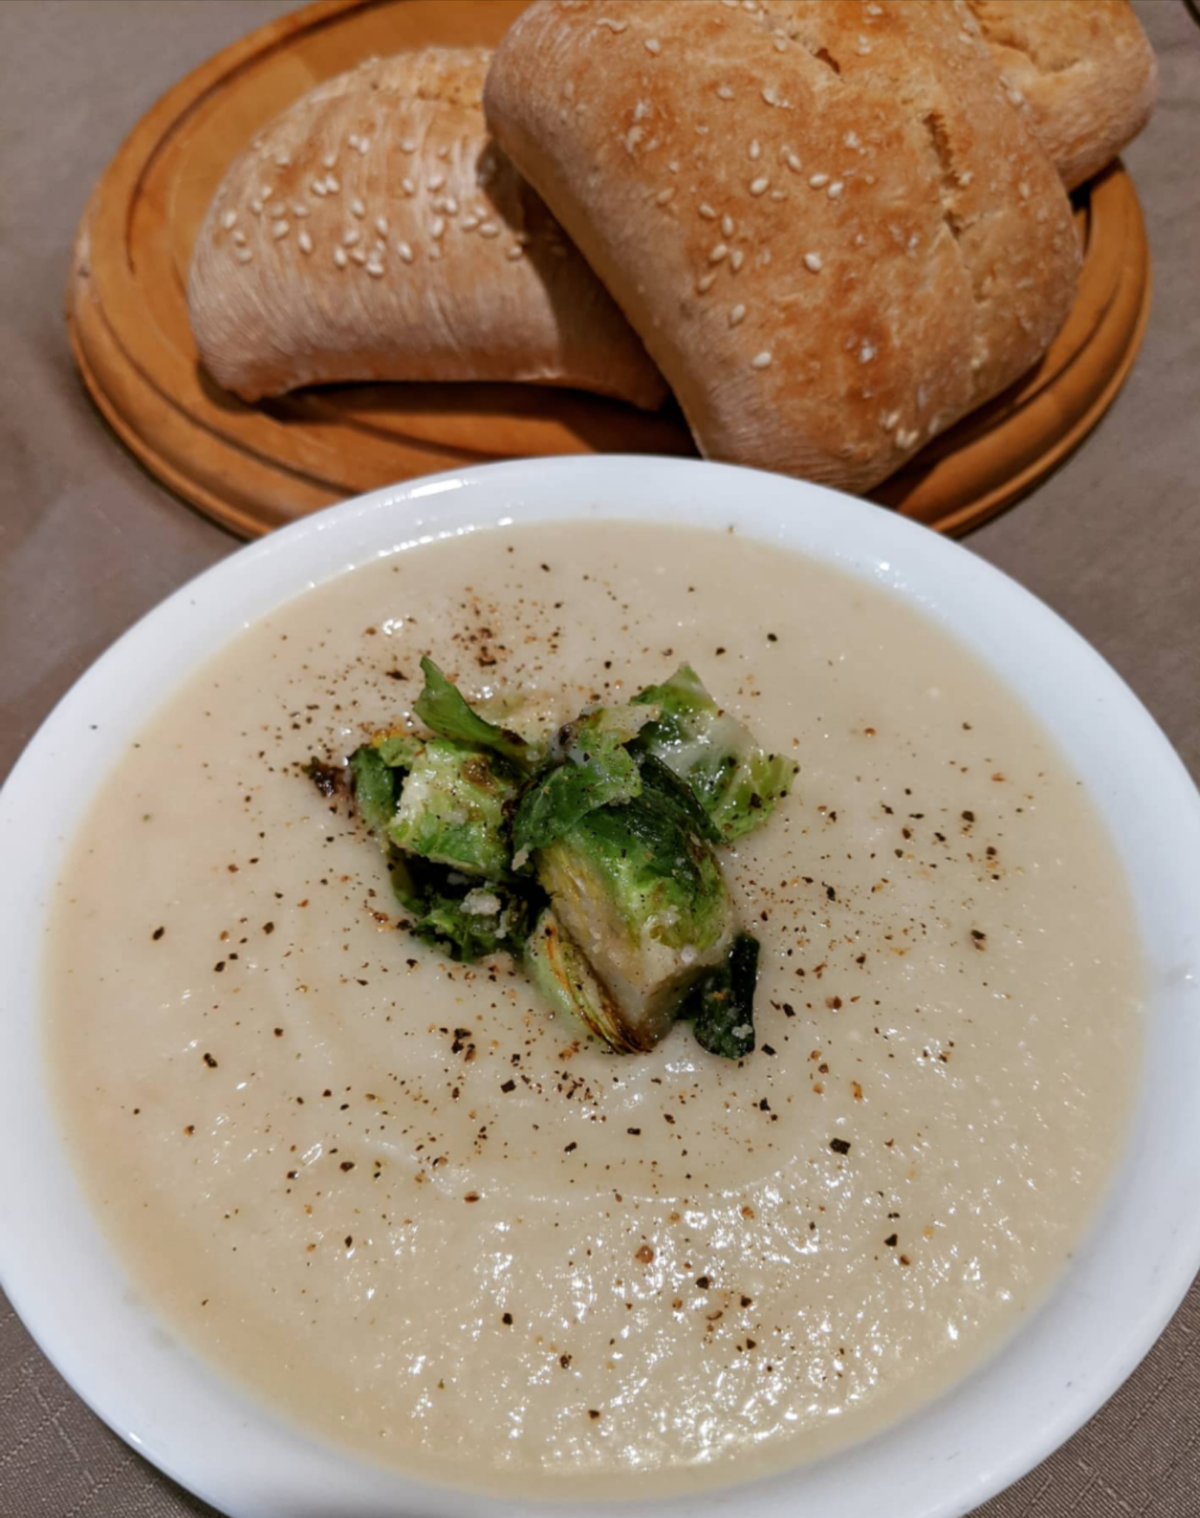
When I told the kids we were having cauliflower soup with brussels sprouts for dinner, they laughed. Often, they’ll ask what’s for dinner, and I’ll respond along the lines of “poop on toast” or “banana and fish casserole” , and I suspect they thought I was joking tonight, too. Even my brussels sprouts loving 9 year old looked a little crestfallen when I actually did pull out the head of cauliflower and started making soup.

I’ll admit, it doesn’t quite scream ‘kids will go crazy over this’, but they did clean their plates, because this creamy yet light soup from the Australian Women’s Weekly is nothing short of delicious. The apple provides a child-quietening sweetness to the dish, while the cream and parmesan adds depth and complexity. The sprouts are certainly not to be skipped – they’re the star, and that slightly charred, nutty flavour elevates a humble soup into something absolutely wonderful. Copious amounts of pepper is also highly, highly recommended here, for the same reason.

The recipe yields 5 serves at 350 calories a serve, and is somewhat accidentally vegetarian: the stock I usually have in the cupboard happens to be vegetarian “chicken style” stock by Massel, and the parmesan I buy also just happens to be vegetarian (yep, I am aware that renders it not truly Parmesan. I am cool with this). These are actually budget decisions, not dietary, but don’t you just love happy accidents?

Ingredients

Spray oil

1 medium cauliflower, roughly chopped

1 onion, chopped

2 Granny Smith apples, peeled, cored and chopped

2 cloves garlic, diced or minced

5 cups chicken or vegetable stock

1tsb lemon juice

1/3 cup parmesan (style) cheese

1/3 cup thickened cream

1tbs olive oil

5 brussels sprouts, trimmed and quartered

1tbs almond meal.

Salt and pepper, to serve

  1. Heat oil in a large saucepan over medium heat. Add onion, cauliflower, apple and cook for 10 minutes, until starting to soften and colour.
  2. Add stock and bring to the boil. Reduce to a simmer, cover, and cook for 25 minutes until everything is very soft.
  3. Remove from heat to cool.
  4. Meanwhile, heat olive oil in a small fry pan and saute sprouts until just starting to char – around 3 minutes. Sprinkle almond meal over the sprouts, toss to combine, and remove from heat.
  5. Use a stick or regular blender to process until smooth (I don’t mind a few little pieces of cauliflower). Stir in lemon juice, cheese and cream.
  6. Ladle soup into bowls and top with sprouts. Season well, and serve with ciabatta or other crusty bread (not included in a calorie count).
Facebooktwitterredditpinterestlinkedinmail

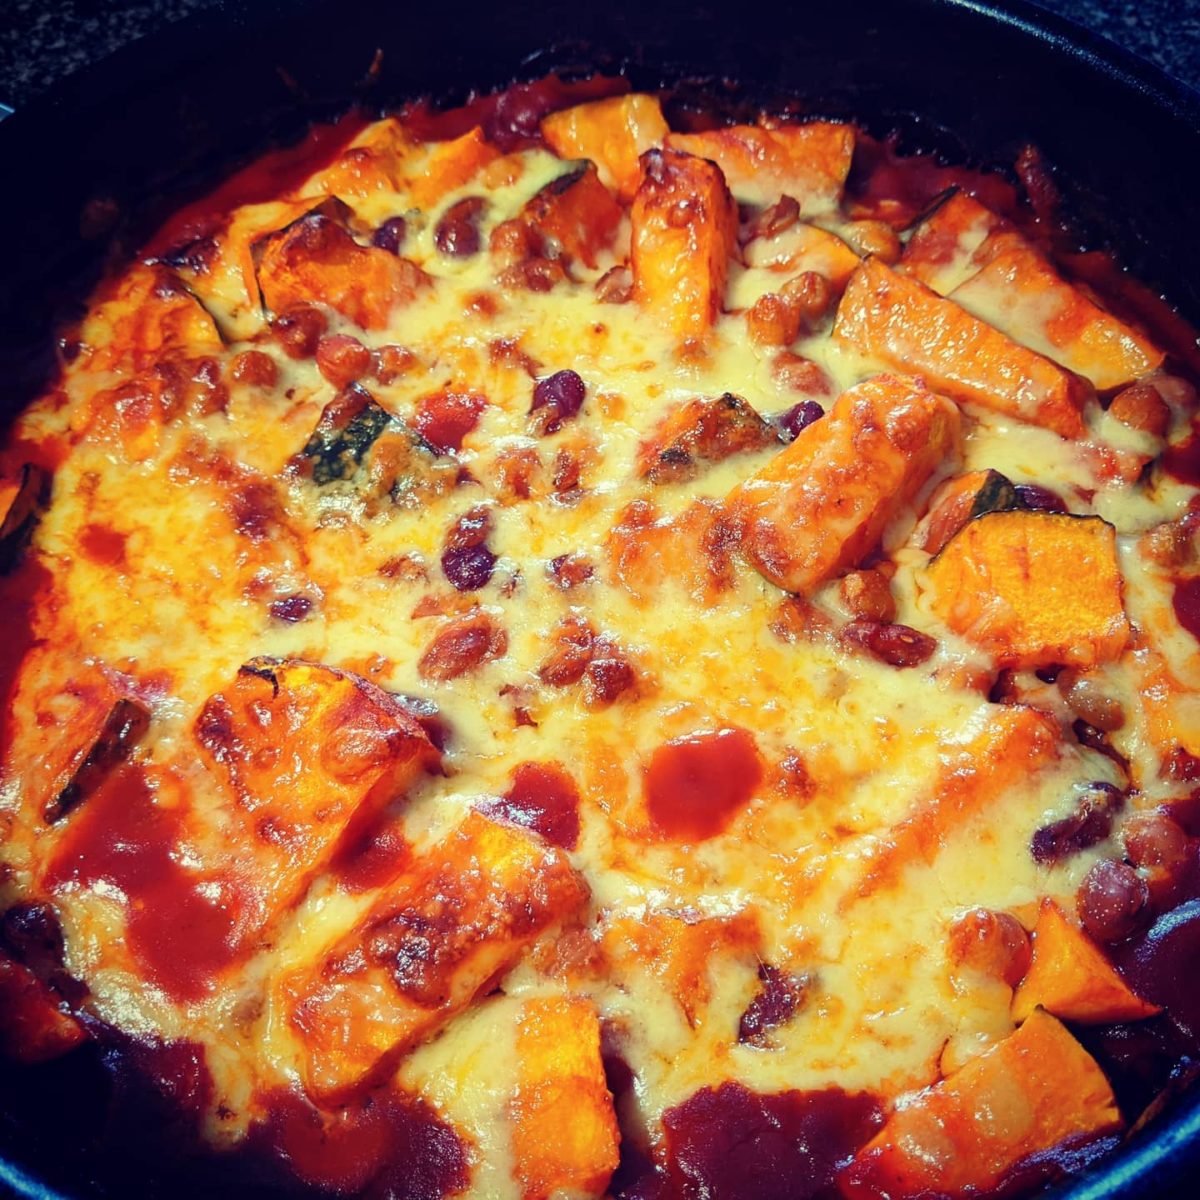
Baked Beans with Pumpkin

As a kid, I always hated the little tins of baked beans that sat in our pantry at all times, and for the longest time I just assumed I hated beans. It didn’t really take up much mental real estate, as we didn’t really eat beans, and there was never a situation where tinned baked beans were the only acceptable option. They were never forced down my throat, as Mum doesn’t like any beans, so I didn’t, either.

Or at least, that’s what I thought for the first 30 or so years of my life. As it turns out, I LOVE beans of all shapes and sized, I just don’t like the weirdly sweet sauce that smothers tinned baked beans (or tinned spaghetti, for that matter). I eat beans weekly, in some form or another, and haven’t found one I don’t like yet.

I’ve still been a little gun shy to make my own baked beans. 6 hours? Overnight soaking, just so I can forget they’re there? Nah. I survived 30 years without them, I can go a little longer, right? But then, I found a recipe in a Women’s Weekly vegetarian cookbook that used tinned beans and took maybe 5 minutes of hands-on time, and 30 minutes total. That, I would try. And, boy, was I rewarded handsomely for my investment. For 30 minutes of work and maybe 5 bucks in ingredients, this recipe yielded a thick, spicy, stew-like dish held together with just enough cheese to feel special, that fills you up for 410 calories per serveand makes you rethink everything you ever thought about baked beans.

In case you can’t tell, I’m a total convert.

Serves 5

Ingredients

500g kent pumpkin, cut into wedges

Spray oil

1 onion, diced

3 x 400g cans 4 bean mix, drained and rinsed

400g can chickpeas, drained and rinsed

2tbs barbecue sauce

1tbs honey

1tsp dijon mustard

2tbs tomato paste

700g passata

Cayenne pepper, to taste

Salt and pepper, to taste


130g grated cheddar

Method

  1. Preheat oven to 220°C. Spray a roasting tray lightly.
  2. Cut pumpkin into large-ish chunks, place on tray and spray lightly again. Roast for 15 minutes, until softened and starting to colour.
  3. Meanwhile, in an ovenproof skillet, cook onion over medium heat for five minutes, until softened. Add beans and chickpeas.
  4. Stir in barbecue sauce, honey, mustard, and tomato paste. Stir to combine and coat the beans and onion.
  5. Add the passata and cayenne, and season well. Boil for five minutes, until thickened slightly.
  6. Add pumpkin to the sauce, and gently stir to cover with sauce. Sprinkle cheese over the top, and bake for 15 minutes until thick and golden.

Facebooktwitterredditpinterestlinkedinmail

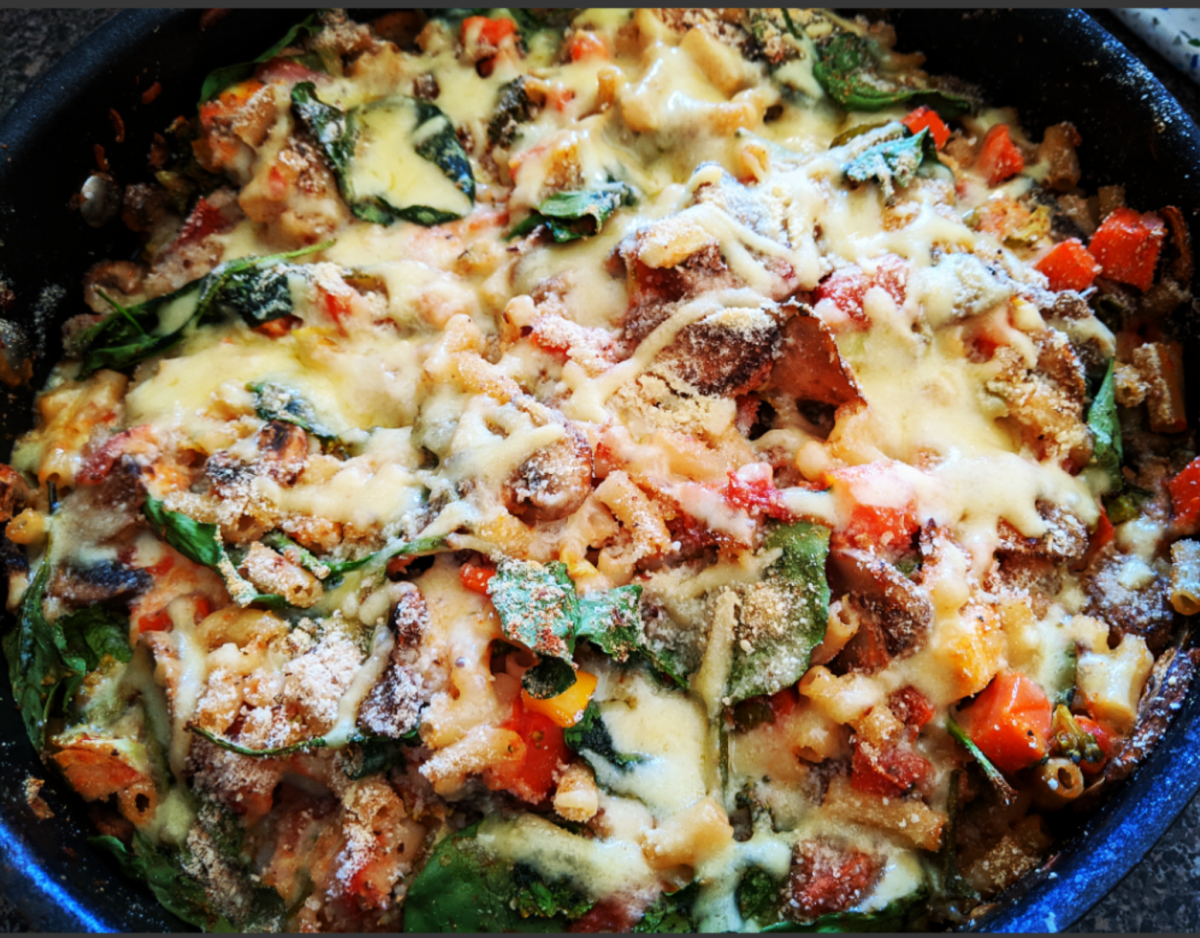
Veggie Mac and Cheese

I REFUSE to believe that healthy is a synonym for yummy-food-deprivation. I’ve been at this game for 3 years now, and never would have stuck with it if the food had to be boring, bland or minimal. No cutting out whole food groups for this gal! I want to have my cake and eat it too!

So I’m having mac and cheese for dinner tonight. With real pasta and three types of cheese. Just, a little less of those, and a whole heap of six different veggies (broccoli, brussels sprouts, onion, yellow capsicum, baby spinach, mushrooms, carrots). Balance. It’s all one big balancing act. I’m sure of it.

Now, this isn’t an everyday kind of dinner for me – In fact, I rarely eat pasta dishes where the pasta is the star anymore; I will almost always swap it for zoodles, because they’re much tastier and give me room for things like garlic bread or extra meat or sauce, which I much, much prefer. But I am only human, carbs aren’t the enemy, and sometimes, you just need a good bowl of macaroni to warm you up like a big old hug.

A bowlful (full!) of this works out to be 460 calories… not at all awful considering it’s a cheesy pasta dish! That’s with a yield of five servings, and that’s a pretty decent serve. Stretching it to six serves isn’t really a stretch at all.

Ingredients

225g macaroni

1 spray oil

1 onion, diced

500g mushrooms, sliced

1 clove garlic, minced

1 yellow capsicum, diced

2 smallish carrots, diced

6 brussels sprouts, thinly sliced

800g tomatoes, diced (canned is fine)

1 small head of broccoli, cut into tiny florets

1tsp dried rosemary

60g baby spinach

220g tub bocconcini

30g dried breadcrumbs

90g grated cheddar

1tbs parmesan

Method

  1. Preheat oven to 180°C.
  2. Cook macaroni, removing from boiling water 2 minutes before packet instructions indicate. Add carrots to boiling water in the last 2 minutes of cooking. Drain and reserve.
  3. Heat the oil in a large ovenproof skillet (otherwise in a large skillet and you can transfer to an oven safe dish after you cook the veggies), and add onion, garlic and mushrooms. Cook for 5 minutes until softened.
  4. Add remaining veggies (the carrot can stay with the pasta), and cook for a further 5 minutes. Add pasta/carrots and rosemary, and toss to combine. Remove from heat.
  5. Tear the bocconcini and stir into the pasta.
  6. Sprinkle the breadcrumbs and remaining cheeses over the pasta and bake, uncovered, for 30 minutes, until golden.

Facebooktwitterredditpinterestlinkedinmail

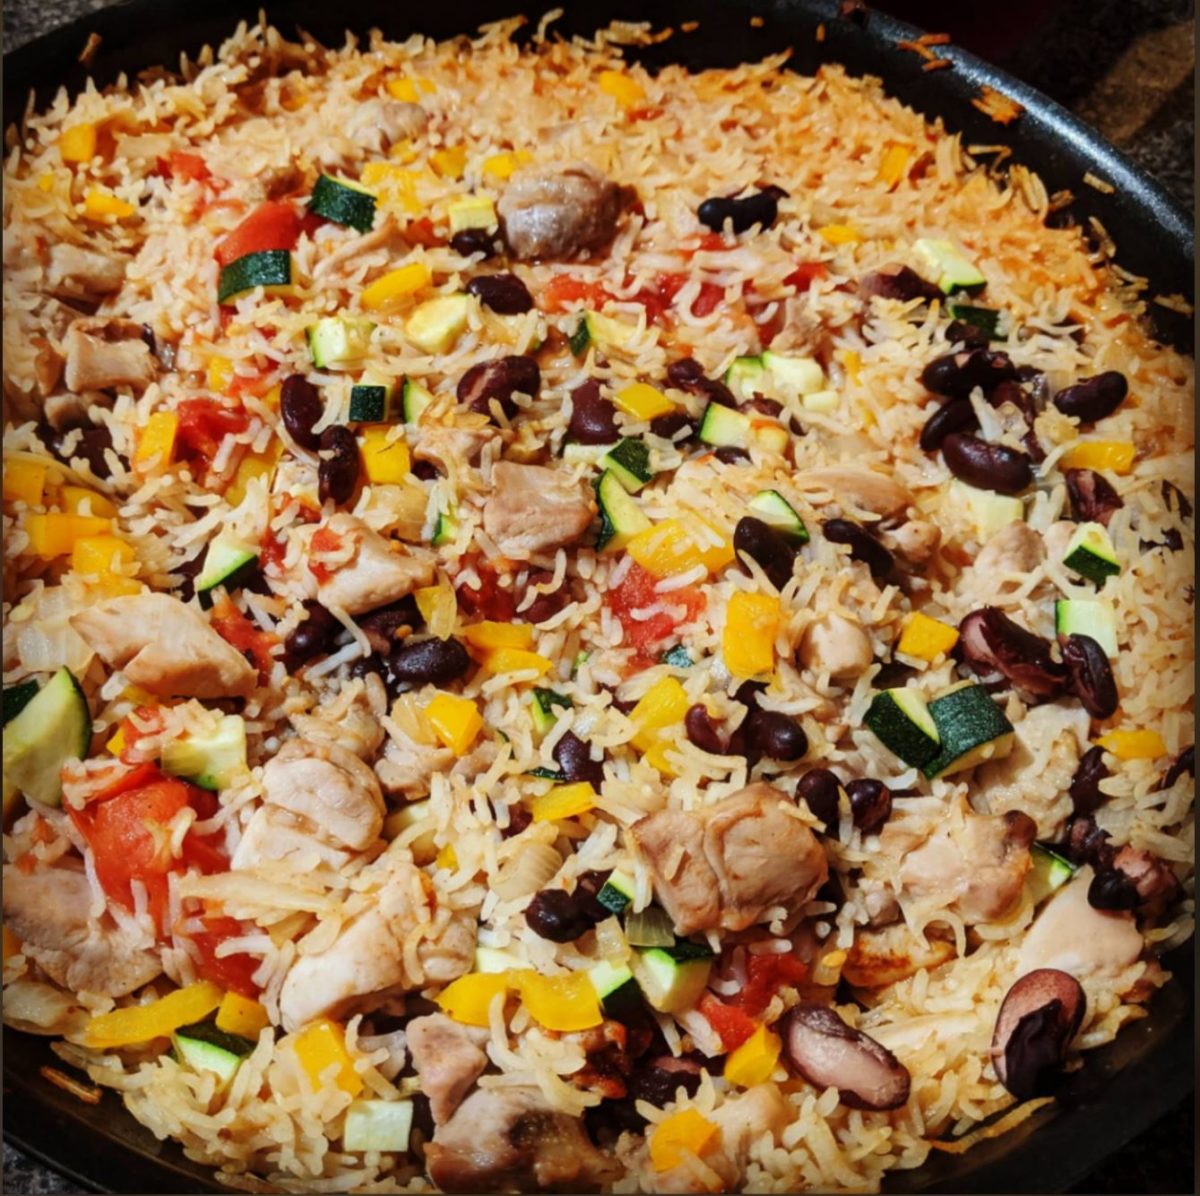
One Pot Chicken, Bean and Veg Rice

Now that I’m back at uni (and doing it so slowly that I’ll be here for about 5 years, which is vaguely horrifying!), while still teaching full time, raising kids, maintaining a marriage, pretending to have a social life,
spoiling a high-maintenance dog, playing sport, making noises about work-life balance (hahahahaha) and trying to stay sane through it all*, I’m relying harder than ever on quick meals that are nutritious, delicious, cheap, and require no mental energy to prepare.

I’m rather fond of this one-pot wonder, which is very tasty, allows the throwing in of whatever you have on hand, can absolutely be made the night before, is basically begging you to use pre-cooked rice (but is still a one-pot cinch if you cook it from scratch) if you’re feeling particularly rushed, and is full of veggies and protein. We use brown rice most of the time, so there is some wholegrain goodness going on there, too. It takes all of 15 minutes in front of the stove, and is an absolute treasure on those evenings when you’re pulled from pillar to post after a long day at work, but want dinner to consist of something decent (does anyone else have those nights when you don’t even have time for takeout? We call them Thursdays around here).

As if this wasn’t already the dinner that keeps of giving, it’s relatively low calorie, with 1/4 serve consisting of 400 calories. I routinely eat 1/5, and it’s more than enough for me, but I generally don’t eat huge meals at night. One day, I’m sure I’ll use barley instead of rice, but that kind of defeats the quickness of the whole thing.


*Note to self: don’t list it all out like that again in black and white if you want a snowball’s chance of that last one!

Ingredients

1 tsp olive oil

1 onion, diced

1 clove garlic, minced

1 yellow capsicum, diced

500g chicken thigh fillet, cubed

400g tomatoes, diced (quartered cherry tomatoes are particularly nice, but regular sized tomatoes are completely fine)

375g microwavable rice (or 3/4 cup rice, cooked however you please. I steam mine, leaving it just underdone)

200g chicken stock

400g red kidney beans, drained

1 zucchini, diced

pinch cayenne, to taste

Salt and pepper, to taste

Method

  1. preheat oven to 180C. Heat oil in an oven-proof skillet over low heat, and cook onion, garlic and capsicum until softened.
  2. Increase heat to medium-high and add chicken, cooking for five minutes, until well browned.
  3. Add remaining ingredients, and stir to combine and coat rice with juices. Ensure that the rice has separated, as it sometimes comes out of the pack in clumps.
  4. Bake for 15 minutes until golden.

Facebooktwitterredditpinterestlinkedinmail

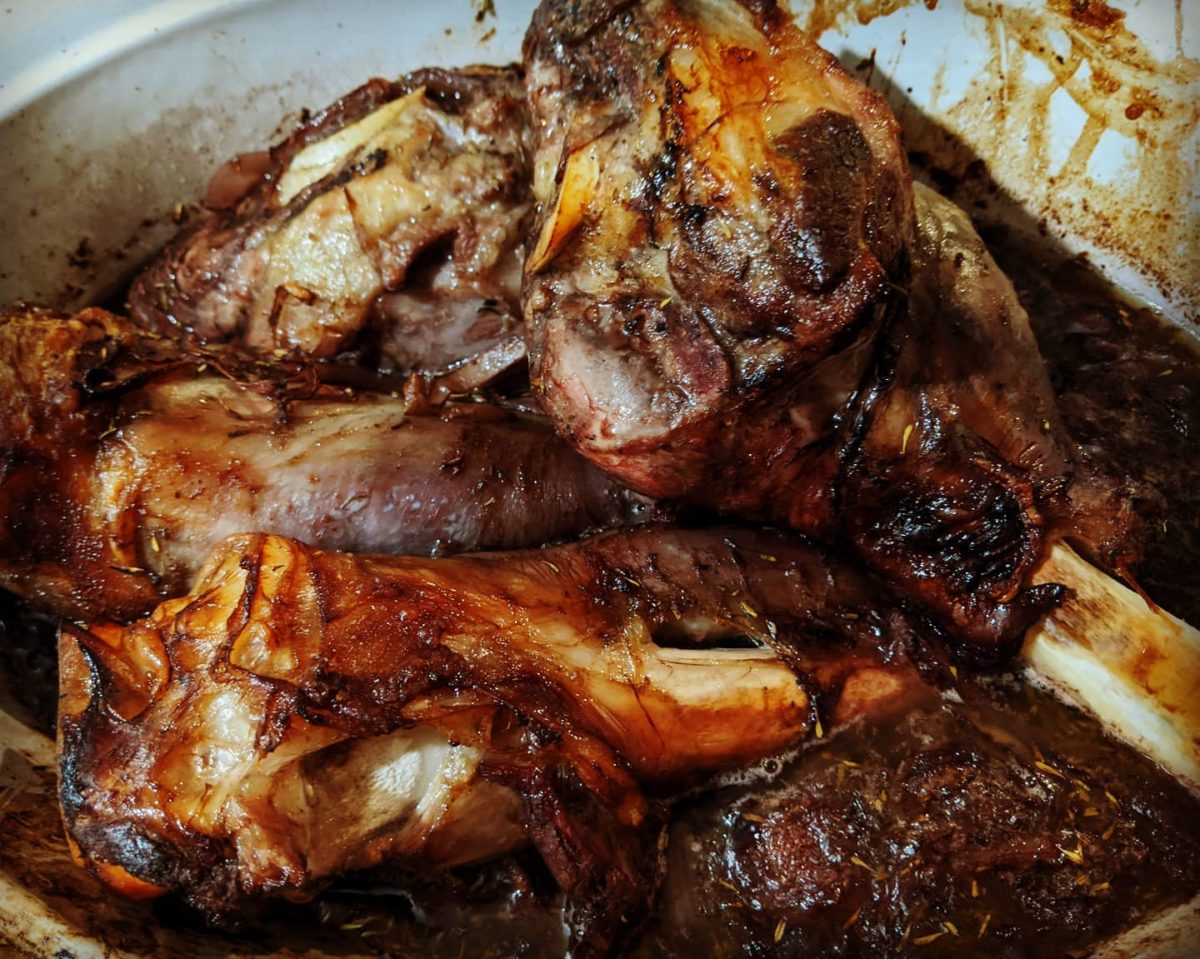
Plum and Red Wine Lamb Shanks

Every school holidays, I spend a fair bit of time with my dad, and one of the little things we do together is go to nice cafe in Windsor (Simon’s), hit up the lolly store opposite while Dad has a conniption over the price of old fashioned sweets that he loved as a kid and bought with currency that was removed from circulation in 1966, then drive up to M & A Butchery in Wilberforce to buy meat while Dad has a conniption over me doing things like spending $20 on a rabbit to cook “for fun”, when he was forced to eat it as a child due to being so poor. I’m not too sure how or when this tradition came to be, but I really do treasure it so.

An extension of this tradition is that I buy and cook lamb shanks on “abattoir day”, largely because the shanks from this place are large, meaty and relatively cheap, unlike what I usually see in the supermarket. I have many recipes for shanks due to a number of old cookbooks that say infuriating things like “try lamb shanks for a cheap and tasty meal”, which pairs beautifully with my dad’s third conniption of the trip: “I can’t believe the price! I used to feed these to Jedda (a dog who died long before my birth) because they were so cheap!” This plum and wine recipe, however, is the Official Family Shank – a firm favourite by far. The sweetness of the jam complements the richness of the lamb, and the peppery undertones bring it all together. Which brings me to the wine: I prefer to use a shiraz, to cut through the sweet, but have made it with several types of wine, and never had a bad experience. Whatever you do, make it a good one, because you really can taste it. It’s worthy of a decent wine, anyway. It’s a crowd pleaser (although for economics, it’d best be a small crowd!) and I often pull it out for dinner guests, and occasions like Quarant-Easter, which was spent in lockdown but still deserved a little pomp and circumstance. I tried to work out the calories, but there are a lot of variables: the size of shanks aren’t standardised and you don’t actually consume all of the sauce, so the best I can come up with, is that with mash and veg, you probably are eating about 700 calories. Not an everyday dish, that’s for sure, but not too bad for a special treat.

Oh, and the leftovers. The best sammich I’ve ever had. Seriously.

Ingredients

4 Frenched lamb shanks

4tbs flour

2 tbs olive oil

1 onion, thinly sliced

1tsp dried rosemary leaves

1tsp dried thyme leaves

1 cup red wine

1 1/2 cup chicken stock

2tbs worcestershire sauce

1 cup plum jam

Pepper, to taste

Mashed potato and steamed veggies, to serve

Method

  1. Preheat oven to 160C.
  2. Dust shanks with flour, and shake off excess.
  3. Heat 1tbs oil in a large, flameproof casserole dish over medium heat. In batches (depending on size of shanks and dish), brown shanks all over, and transfer to a plate.
  4. Heat remaining oil and cook onions for five minutes, until translucent. Add wine and bring to boil. Add stock, herbs, jam, worcestershire sauce, and pepper (generously), and cook for one minute.
  5. Return shanks to the dish. Cover and transfer to oven. Cook for one hour. Remove from oven, baste, and continue cooking uncovered for 30 minutes.
  6. Serve with mashed potatoes and vegetables.

Facebooktwitterredditpinterestlinkedinmail

Craisin & White Choc Oatmeal Cookies

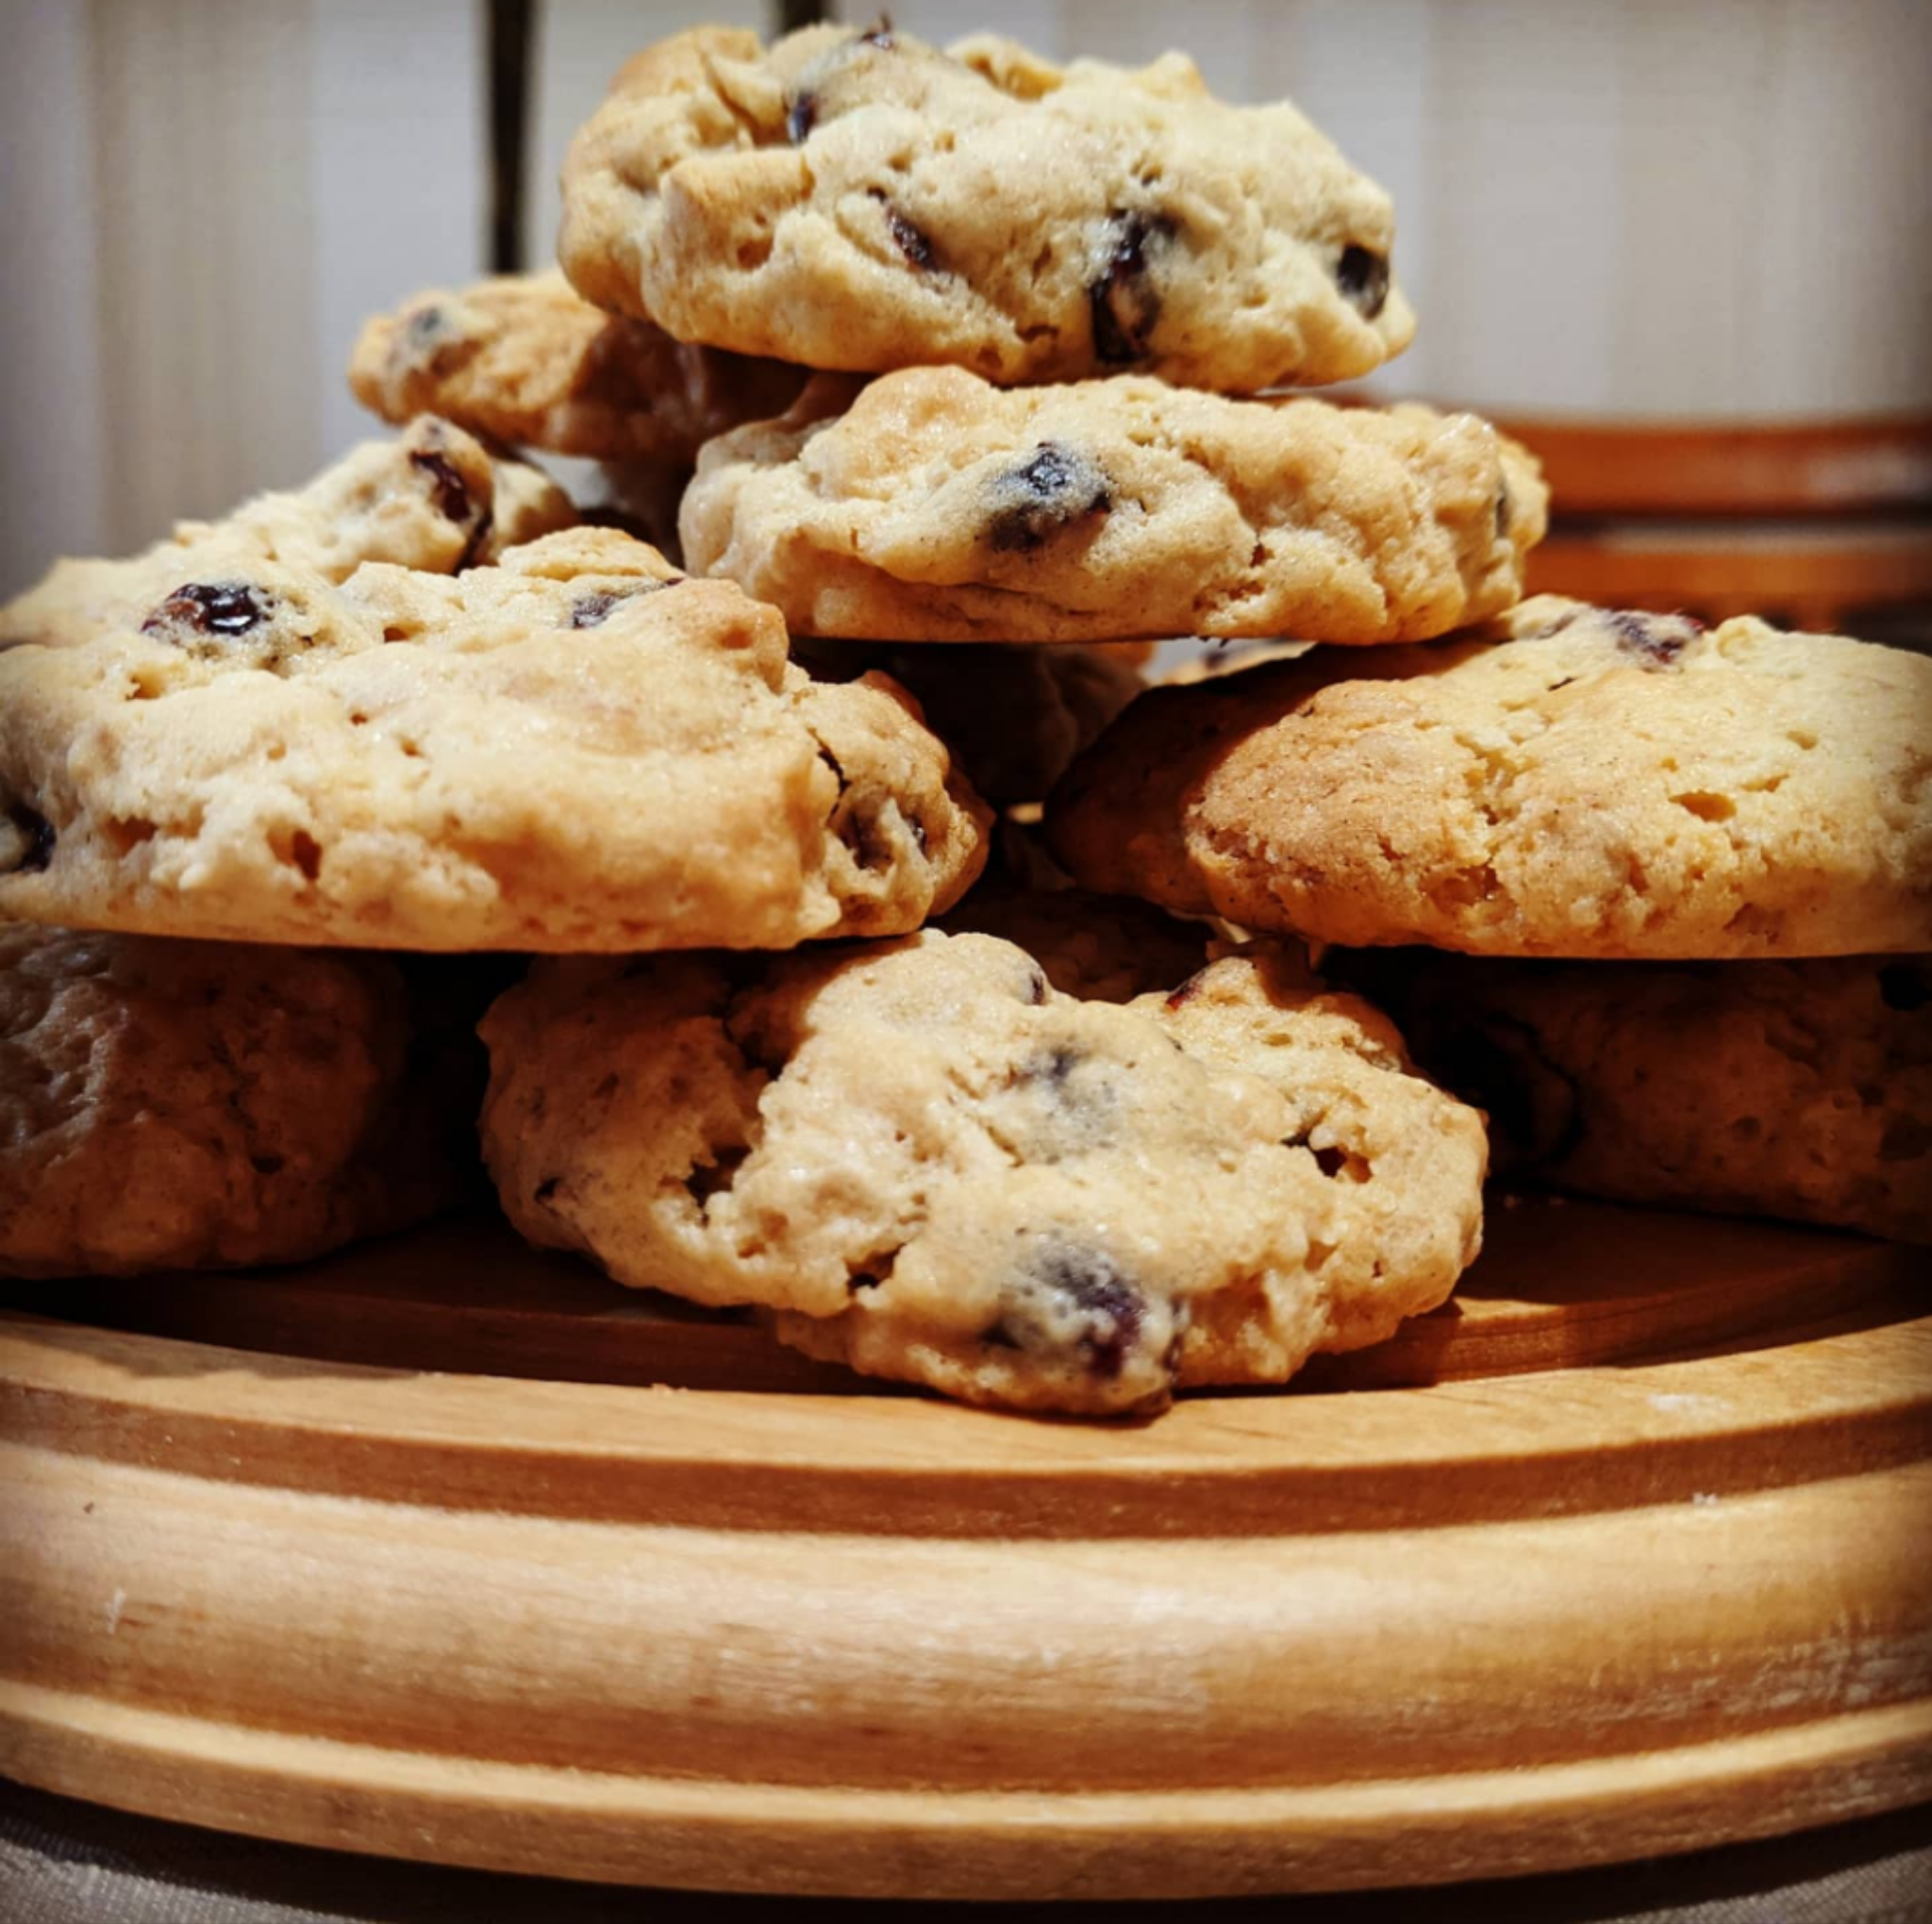
I’ve had an urge to bake cookies this week – I think it’s the cold, rainy weather – far more than I’ve actually had an urge to eat cookies. Surely I’m not the only person that craves the cook more than the result sometimes? However, the result of this urge wasn’t exactly a hardship: chewy, soft cookies that are tart and just sweet enough. Better yet, the result was just that little bit different to a standard chocolate chip cookie (not that I would ever badmouth such a classic!), without being as indulgent as my Reeces snickerdoodles or blackforest cookies (neither of which have made it to my blog, but surely I won’t hold on you forever!), and therefore the perfect compromise.

At 130 calories per cookie, these are pretty standard in terms of your chocolate chip biscuit, which was reassuring, because some cookies hit double this without much increase in size or flavour, and really, you want your treats to be worth it. To me, I haven’t met a cookie worth nearly 300 calories, but I find 130 calories is easy to build into a reasonable day. And really, we’re all entitled to a little treat now and then. The more time I spend in this healthier lifestyle, the less I worry about numbers. It’s a liberating feeling, but I still like knowing what I’m eating, so I keep tabs on caloric values, even if I no longer count them like I used to.

Yield: 24 cookies

Ingredients

1/2 cup butter, softened

1/2 cup brown sugar

1/4 cup white sugar

1 egg

1tsp vanilla extract

1 cup rolled oats

1 cup self raising flour

pinch of salt

3/4 cup craisins

1/2 cup white chocolate chips

Method

  1. Preheat oven to 175C and line 3 baking trays with baking paper.
  2. Beat sugars and butter for 5 minutes, until pale and creamy. Add egg and vanilla, and beat to incorporate.
  3. In a separate bowl, combine remaining ingredients. Add to butter mixture a little at a time, mixing until completely combined.
  4. Roll tablespoonfuls into balls and place 8 on each tray, leaving a few centimetres for slight spreading.
  5. Bake for 15 minutes until firm and golden. Cool on tray for a few minutes, then move to a cooling rack.

NB from Master 12, Miss 9 and The Husband: apparently, they make a fantastic ice cream sandwich.

NB from Mac the dog:


“I am the goodest boy and didn’t eat the cookies, even though Mama left us together unsupervised. She should reward me. With cookies.”

Facebooktwitterredditpinterestlinkedinmail

Okonomiyaki

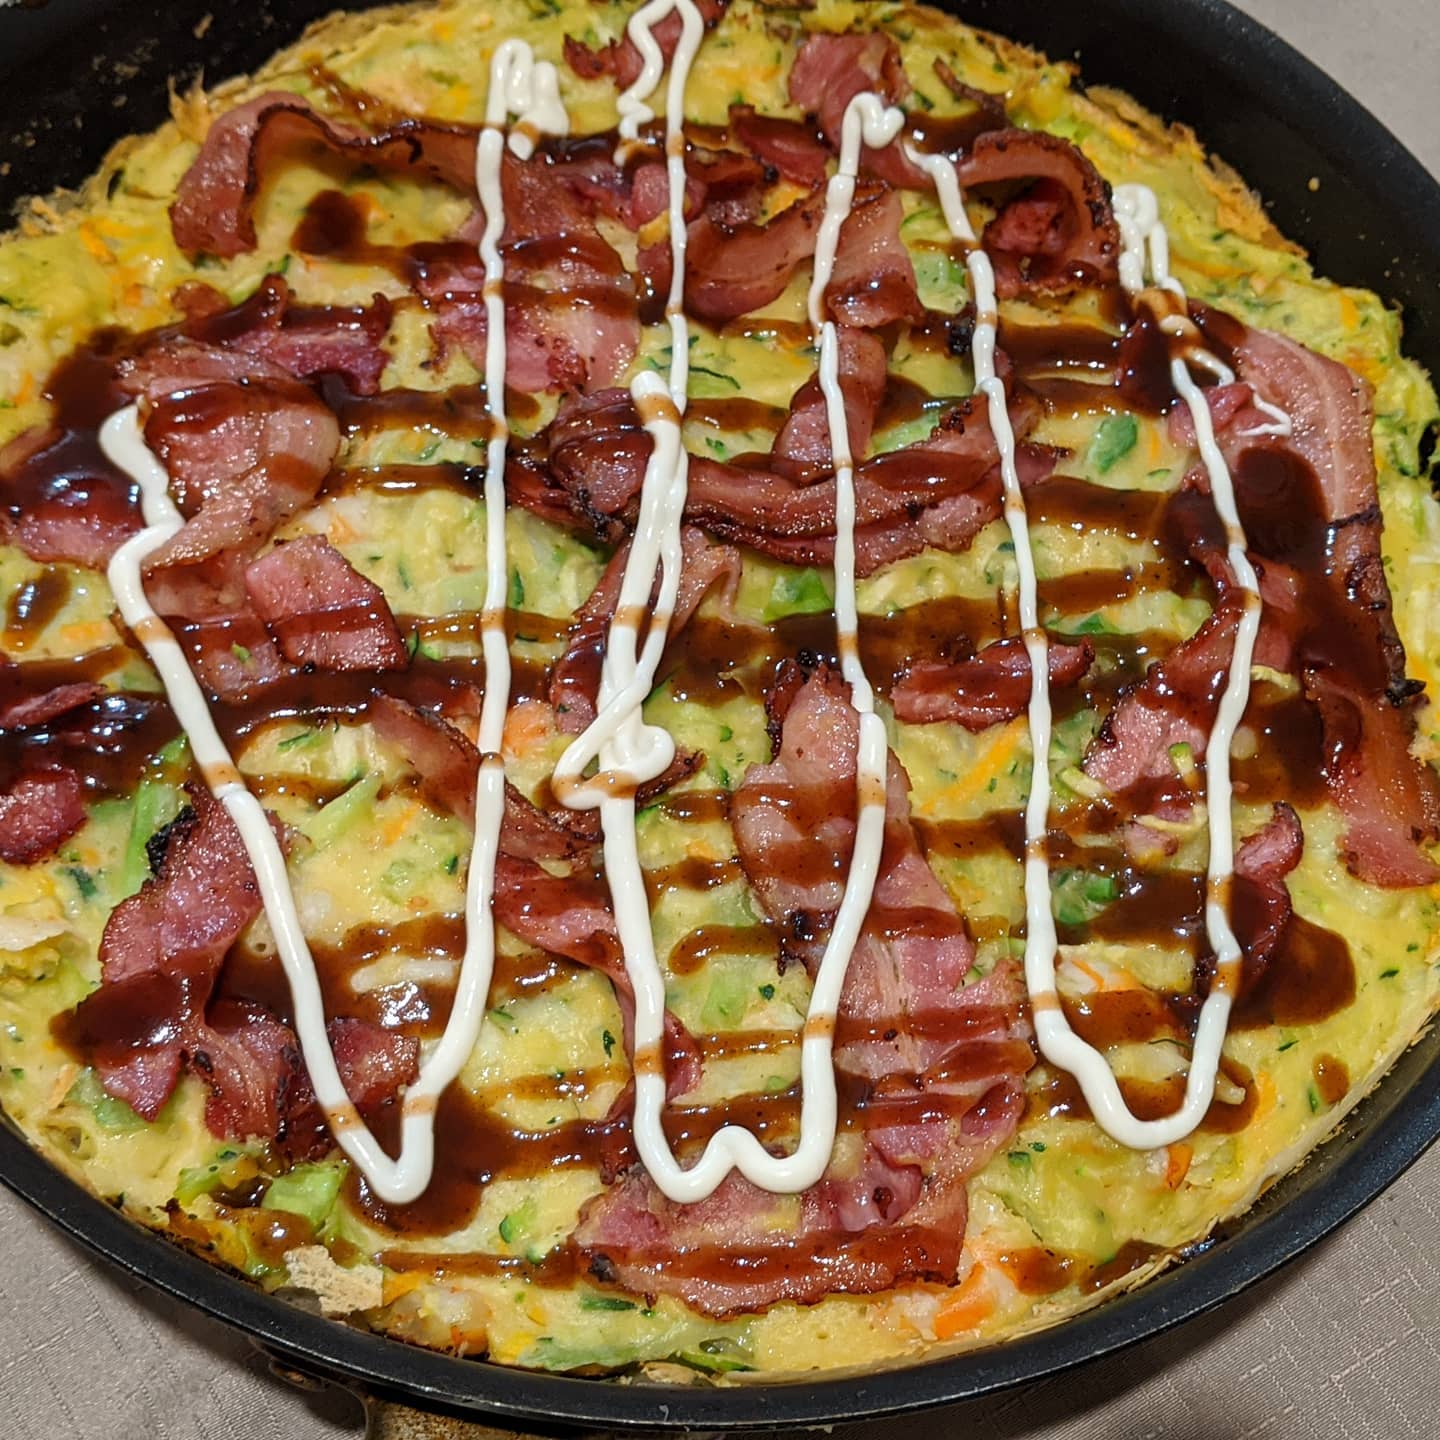
I’ve made a few savoury Japanese pancakes in my time, but this is the closest I’ve come to the okonomiyaki I’ve eaten that were actually made by Japanese people. Other attempts have generally tasted more frittata-esque, lacking the body I craved, and being just a little too eggy (not a complaint that this egg-lover often makes). I do like this one, though. And so did everyone else. A true indicator of how good a dish I make is, is whether or not the leftovers are left over the next day. Both boys in my house eradicated every last crumb of the bit I stashed away for tomorrow morning before I’d even finished my first round.

It hasn’t escaped my notice that most of my blog posts have some iteration of “it’s so quick and easy, it’s low calorie, and uses simple, wholesome ingredients”. What can I say, I have a type! And this is no different. A very generous serve of this is 450 calories, and when I say “generous”, I mean it. It’s a big slice, and it’s very filling, as it’s jam packed full of veggies. I say it serves 4, but 5 at 340 calories isn’t a stretch whatsoever.

Ingredients

200g streaky bacon

1 zucchini, coarsely grated

1 carrot, coarsely grated

1 onion, coarsely grated

1/4 green cabbage, shredded

500g cooked prawns, shelled

1 cup self raising flour

1 cup water

4 eggs

Salt and pepper, to taste

Barbecue sauce, to serve

Mayonnaise (Kewpie, preferably), to serve

Method

  1. Preheat oven to 200C.
  2. In a large oven-proof skillet, cook bacon, removing from heat before it gets crispy (it will crisp up in the oven, and nobody wants burnt bacon!). Set aside on a plate, leaving the grease in the pan.
  3. Place all the vegetables and prawns in the hot skillet, and cook over medium heat, tossing gently, for 5 minutes, until cabbage has wilted, but not coloured.
  4. Meanwhile, whisk eggs, flour and water into a smooth batter. Season well. Pour over the vegetables in the skillet, and mix very gently to distribute the veggies evenly. Cook over the medium heat for 2-3 minutes , until the base is starting to firm up.
  5. Place the bacon rashers over the top and gently press into the batter. You’re not looking to fully submerge the bacon, here.
  6. Transfer skillet to oven and bake for 15 minutes, or until set and golden. Remove from oven, drizzle with sauces and serve warm. (I’m really light on the mayo because it’s a total calorie bomb, but feel free not to be so stingy!)

Facebooktwitterredditpinterestlinkedinmail

Tropicana rolls

OK, this one’s more for the kids. That’s not to say that they’re not delicious – they are – but I prefer a less dense, carby lunch option most of the time. At over 300 calories per roll, they’re not the most calorie-efficient option in my repertoire. However, the kids and their friends gobble them up, and they’re such a cheap and easy fun alternative to fast food or boring old sandwiches. I make them every now and then during term for the kids to take to school, and more often again during the holidays to throw in a bag with some fruit and snacks for days out, or afternoons at baseball (go the Blue Sox!). They freeze really well, too, so it’s super handy to make a double batch and stash a few for whenever you need them. Oh! And you can definitely fry up some diced bacon instead of the pepperoni with no decrease in deliciousness, but the pepperoni is much easier and my kids prefer the little spicy kick that it provides.

With an almost-teenaged-boy-who-is-growing-like-a-weed in the house, I make them pretty big to try and keep his stomach quiet for more than a few minutes, and find that they’re not too big for the also-won’t-stop-growing 9 year old daughter. You can stretch these out to yield 12 rolls, but we make 8 with no complaints from anyone, ever.

Ingredients

4 cups self raising flour

1 cup grated cheese

180g pepperoni, diced

1/3 cup diced pineapple, drained

500ml butter milk (or whole milk with 2tbs lemon juice, left to sit for about 5 minutes to curdle, which is how I normally do it), plus just a little more for brushing.

Method

  1. Preheat oven to 180C and line 2 baking trays with baking paper
  2. In a large bowl, combine flour, cheese, pepperoni and pineapple. Stir to combine.
  3. Make a well in the centre and add milk. Stir until dough comes together in a craggy ball.
  4. With damp hands (because the dough is STICKY), shape dough into 8 balls and place on prepared trays.
  5. Bake for about 30 minutes, until golden on top, and hollow-sounding when tapped.

Facebooktwitterredditpinterestlinkedinmail