IDGAF Rice

We’ve all had those days, haven’t we, where you just don’t give a f&*k anymore. About anything, least of all dinner. Stuff it. Popcorn and icecream is totally a balanced meal, yeah? Corn’s a vegetable AND a grain, ice cream’s a dairy, and if there happens to be boysenberries rippled through it, there’s your fruit! Done. Surely it works that way?!

I’ve touched on the fact that this year hasn’t been my best – I had a car accident that we were (thankfully) able to walk away from, but my anxiety disorder shot through the roof, and it took a good two or three months to calm myself down and be a functional human again. I’m glad to say that through this really stressful time – made worse by the fact that poor mental health can be so invisible… I look like I have my wits about me, and I really didn’t have too much to be anxious about, but that fact just made the anxiety worse because it compounded the guilt of daily panic attacks – I didn’t emotionally eat too badly, didn’t gain any weight, and managed to get nutritious food on the table for my family most nights (although I phoned it in waaaaay more than normal). I credit this very low bar of success to already having a strong arsenal of healthy recipes at the ready at all times, and I really wanted to give credit due to this particular recipe, which got me through a particularly rough day. I cooked and ate this, cried in the shower for 15 minutes, then fell asleep for 15 hours. I was DONE. But my kids didn’t have Weetbix for dinner, and I clung to that win like you would not believe.

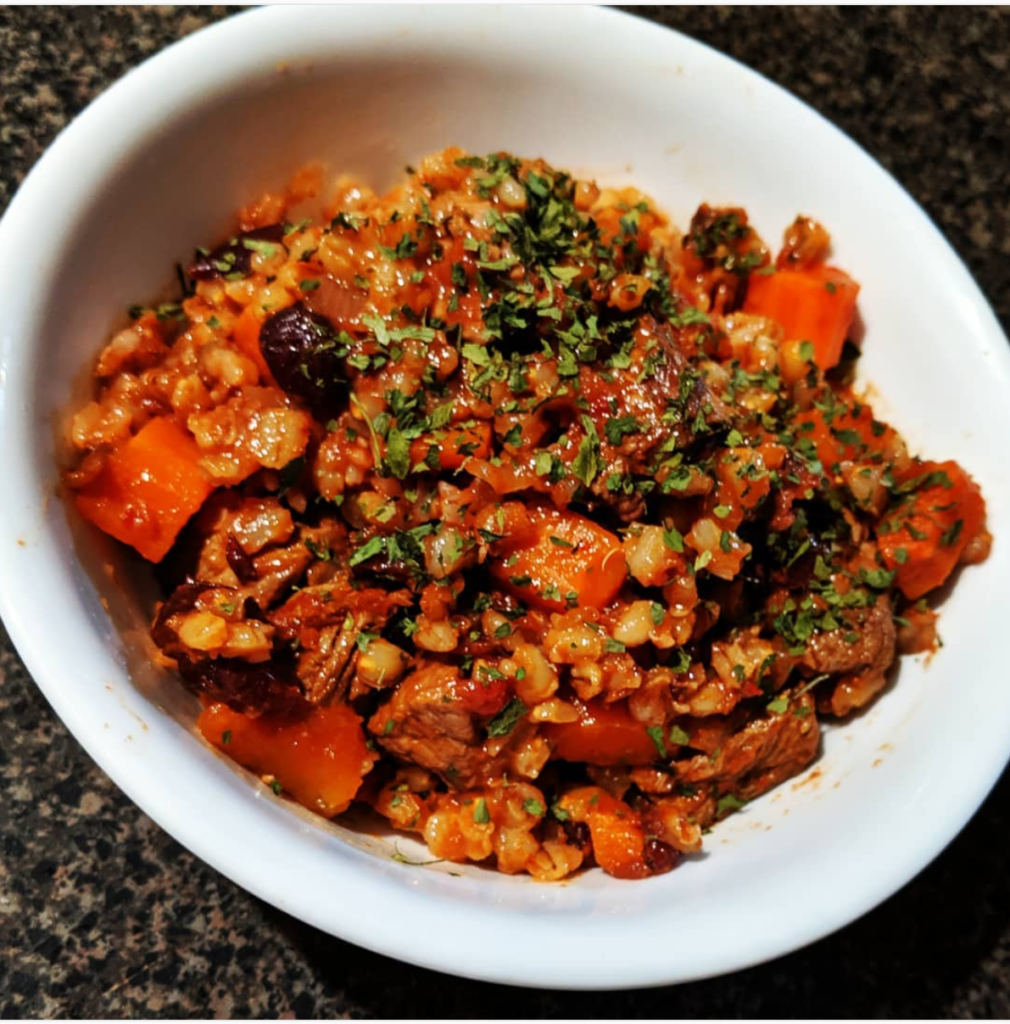
Even if you’re not having the day from hell, this speedy rice is a wonderful take on fast food. It’s pretty nutritious, clocks in at 351 calories per serve, and is so flavourful for such a throw-on meal. The perfect antidote to a lazy mood, a warm hug on a bad day, or a decent meal when things get busy, this bowl is here for you when you don’t – or can’t – have any more effs to give.

Serves 4

Ingredients

450g microwaveable rice

2 x 3 second spray of olive oil

150g sliced mushrooms

1 brown onion, sliced

1tsp minced garlic

1/2 tsp dried chilli flakes

1/2 head of broccoli, cut into small florets

Handful of baby spinach

4 eggs

for the dressing

1tbs white miso paste

2tbs mirin

1tbs kecap manis

1tsp minced ginger

Method

  1. Microwave rice according to packet instructions. Set aside to cool slightly to avoid it going mushy.
  2. Whisk all the dressing ingredients together and set aside.
  3. Place broccoli in a microwave-safe container and cover with water. Microwave for 2 minutes. Drain.
  4. Heat one spray of oil in a medium sized fry pan over medium heat. Add mushrooms and onions and cook for 5 minutes.
  5. Add garlic and chilli and cook for 1 minute until aromatic.
  6. Transfer broccoli to onion mixture and stir to combine. Add soy sauce and allow to cook on medium-low heat.
  7. Meanwhile, heat remaining oil over a clean frypan over high heat. When oil is hot, reduce to medium hear and crack eggs into pan. Lower heat to lowest setting and cook until the whites have set but the yolks are still runny.
  8. Add rice to vegetable mixture, and stir well to combine. Stir in spinach and dressing and transfer to four bowls. Top with an egg and season to serve.

Facebooktwitterredditpinterestlinkedinmail

Dal Makhani

Weeknights are such a balancing act – I won’t bore you with the laundry list of things that need to be done (including the actual laundry), but like every one else, there’s always something that needs to be done, or somewhere we need to be. Between myself, two active kids, an active dog, and a husband who works long hours with a long commute, you can usually find me from the hours of 4-8pm Monday-Friday in some degree of hectic rush. Now, I’m not complaining, not really. I’m grateful to have a job I love, even if it doesn’t always “finish at 3” (ugh). I’m grateful that my kids are active and social, and have found sports and activities that they love, and that hubby and I are in a position to let them explore those interests. I’m grateful to have a puppy I adore, and that we can both exercise together – I don’t know who enjoys his walkies more, McCartney or me. Actually… probably Mac; I don’t recall peeing in excitement over the prospect. And I’m incredibly grateful to be married to a wonderful man who works hard and makes a lot of sacrifices for the wellbeing of our family.

But, man, dinner time can be a challenge. I’ve taken to cooking dinner the night before the more hectic nights, and so I’m constantly on the look out for meals that keep really well, are nutritious and delicious, and are quick/easy to make in the first place, because often, these make ahead meals are the second dinner I’ve cooked that night, after a busy day of work/kid wrangling. Once again, I find myself very grateful that my kids aren’t fussy eaters… I’d go mad if the options were limited even further!

This dal recipe ticks almost all my boxes – it’s healthy, cheap, easy, and it doesn’t just keep well… it’s better the next day! It’s not exactly quick, but that’s only because it simmers away for an hour – it does it’s own thing on a low heat, and needs very little attention (the bare minimum of stove safety ought to cover it), so it’s definitely easy. It’s probably not the most authentic dal – the recipe from which I adapted it is, but I changed it to be quicker and more straight forward, because that’s what I need it to be. So please forgive the tinned beans and commercial chapatis… the aim of the game is to be nourished and warmed quickly and without delay – fiddling around making my own bread isn’t possible on dal day! But what it lacks in authenticity, it makes up for in rich taste. I was surprised at the nutritional breakdown: despite two different types of butter and some cream, it only clocks in at 335 calories per serve, which leaves just enough room for you to justify the chapati, because at least in my view, carbs are life.

Serves 4

Ingredients

1 tbs ghee

2 tbs butter

1 brown onion, diced

1/2 cup passata

1 clove garlic, minced

2 tsp minced ginger

400g can lentils, rinsed and drained

400g can red kidney beans, rinsed and drained

1/2 tsp garam masala

1/2 tsp ground chilli (I used cayenne)

1/2 tsp ground cumin

1 pinch Maldon salt flakes

1.5 cups water

1/4 cup Philadelphia light cream for cooking

1tbs butter, extra

Method

  1. Melt ghee and 2tbs butter in a large heavy based saucepan over medium heat. Add onions and cook for 10 minutes until golden brown.
  2. Add ginger and garlic, and stir for 1 minute, until fragrant.
  3. Mix in the passata and stir until it is fully combined.
  4. Stir in the lentils and kidney beans – it’s okay if some of them are mashed into the sauce.
  5. Add spices, stir well.
  6. Pour in 1/2 cup of water, and stir. Reduce heat to low, and simmer (uncovered) for 45 minutes. Stir every 10 minutes or so to prevent sticking. Add the remaining water in increments throughout the simmering time – I added a quarter cup every time I stirred.
  7. After the dal has simmered for 45 minutes, stir in sugar, cream and another tablespoon of butter. Stir to combine, and simmer for a further 10 minutes. Serve immediately with rice and chapati (neither are counted in the calorie calculation – I skip the rice altogether) or allow to cool, then refrigerate and let the flavours do their thing.

Facebooktwitterredditpinterestlinkedinmail

Butter Bean and Spinach Smash

Image may contain: food

I never thought I’d be the kind of person to own a book called “The Detox Bible”. I don’t believe in detox diets – namely because I feel our bodies are perfectly capable of doing all the detoxification that they need, and don’t need magical juices or powders to help them along. I also don’t believe in “bad” foods that must be avoided at all costs, unless of course, you have an allergy. Nevertheless, when a local bookshop was having a sale on cookbooks and slashing prices by 75%, I’m willing to be more open to things.

I have to say, this book pleasantly surprised me. It’s wheat, refined sugar and dairy free (all of which I happily ignore when it suits me), but really, it’s pretty well balanced. It’s more often a case that these recipes are naturally free of these devil ingredients, than a case of the authors moving heaven and earth to swap these perfectly fine ingredients with ridiculous substitutions. I appreciate such common sense approaches, even if I don’t subscribe to the core philosophy.

Anyway, I digress. This dip is why I bought the book. It’s the first page I opened to when I was flicking through it at the store, and I was immediately sold. I love beans. Like, LOVE beans. My family aren’t quite as enthusiastic, so while I use them regularly, I rarely make them the star of the dish… Until now. Combined with an array of crudités, this dip makes an extremely healthy, delicious, filling and cheap work lunch that will make you feel like some kind of nutritionally superior god/dess for only 240 calories (it’s 170 by itself). Did I mention it’s delicious?! Because, seriously, even I was taken aback with just how GOOD this is. Off a spoon, with crackers, as a bed for your egg – it just works with everything, and my new addiction.

Serves 2

Ingredients

2 handfuls of baby spinach (about 25g)

400g butter beans, drained and rinsed (butter beans are lima beans – I had no idea!)

1tsp olive oil

1tbs lime juice

Salt and pepper to taste

1 cup chopped raw vegetables to serve

Method

  1. Place all ingredients except the crudités into a blender and pulse into a chunky consistency (you can make it completely smooth if you prefer. I like it chunky – the butter beans are creamy enough to provide a lovely texture). If it won’t break down, add a teaspoon of water to help it along.
  2. That’s it. It couldn’t be easier.

Facebooktwitterredditpinterestlinkedinmail

Cream Cheese Snickerdoodles

It’s a tragic truth that here in Australia, snickerdoodles are not readily available. I don’t think I’ve ever been in a store and seen a pack, or heard anyone casually speak of them. If not for the fact that American pop culture is ubiquitous, and the name sticks in your head (or, at least, it does if you have the sense of humour of a 12 year old boy), they’d be an unknown entity to me.

I remember once, when I was first trying my hand at cooking, making some sort of snickerdoodle slice recipe that I’d seen online, and by which I been thoroughly underwhelmed. Experience tells me now that I hadn’t completely cooked the flour out of the batter, which would account for the unpleasant aftertaste, but I still remained vehemently uncurious about these funnily named little snacks. I hadn’t thought about them for years, save for the occasional time they were mentioned in an American movie or show.

The day after Mother’s Day, I found I had a glut of cream cheese left over, and no inspiration for to do with it – not even a stale bagel, nothing. So, I figured I’d do some cream cheese cookies… because what’s life without a little naughtiness, right? It wasn’t until I’d made, eaten, and thoroughly enjoyed these cookies, adapted from This Silly Girl’s Kitchen, that I realised they were, essentially, a somewhat decadent snickerdoodle. Now I get the hype, because these are the best cookies I’ve ever eaten. They’re so fluffy and cake-like, they melt in your mouth, and are sweet without being too sweet. I could eat them all day. Of course, they’re 165 calories per (not huge) cookie, so they’re a special treat, but oh, my, what a treat they are!

This recipe yields 28 cookies.

Ingredients

1/2 cup  butter, softened

125g cream cheese, softened

1 & 1/2 cup icing sugar

1 egg

1 teaspoon vanilla extract

Small pinch Maldon salt flakes

1 & 3/4 cup self raising flour

1/4 cup white sugar

1 tablespoon ground cinnamon

Method

  1. Using a stand or electric mixer, cream the butter and cream cheese until smooth. Gradually add the icing sugar until combined.
  2. Add egg, baking powder, vanilla, and salt. Mix to combine.
  3. Slowly incorporate flour, scraping the sides as needed. Refrigerate for one hour.
  4. Preheat oven to 180 degrees, and line two baking trays with non-stick baking paper.
  5. In a small bowl, mix together the cinnamon and sugar.
  6. Roll 2 teaspoons of dough into small balls, Roll each ball into the cinnamon sugar mixture to fully coat, and place on the trays about 5cm apart – they do spread a bit. Flatten slightly.
  7. Bake for 8-9 minutes, until just set. Be aware that these are a very blonde cookie, and won’t brown much, so don’t overcook. Let cool on baking sheet for 10 minutes (if, after this, they still seem undercooked, place back in hot oven for another two minutes or so). Transfer cookies to a wire rack and cool completely.
Facebooktwitterredditpinterestlinkedinmail

Beef and Barley Stew

Oh, look. Another barley recipe! I don’t actually eat a lot of barley, but I absolutely adore it, and am always so excited to find low-calorie, delicious recipes with what is, hands down, my favourite grain.

Strangely enough, it’s never really occurred to me to cook it in my cast iron pot… I’m usually the goose standing in front of the stove for forty minutes at a time, stirring and adding bits of water at a time to stop it from sticking to the pan. Oh, sure, it’s a labour of love well worth the final result, but frankly, sticking it in the oven with slightly more water than I’d normally use is even better.

The combination of chilli and craisins is an absolute winner here, and lends to a sweet and spicy combo that really keeps things interesting. I know slow-cooking rump steak isn’t really the done thing, but I took the risk in hopes of keeping the recipe as low-cal as possible, and it worked. At 423 cals for a good-sized bowl, this stew is perfect for cooking the night before, ready to nourish and warm you up after a wintery evening of schlepping the kids to their various sporting commitments.

Serves 5

Ingredients

3 tsp olive oil

500g beef rump (don’t trim the fat), cubed

2 cloves garlic

1 onion, diced

3 carrots, diced

2-3 tsp Masterfood minced chilli

400g tinned tomatoes

1 1/2 cups beef stock

1 cup pearl barley

1/2 cup craisins

parsley, to serve

Method

  1. Preheat oven to 160C. In a cast iron or other oven-safe pot with a tight lid, heat half the oil over medium-high heat on the stove, and brown the beef in batches and set aside.
  2. Heat remaining oil over low heat. Add onion and carrots, and cook for 10 minutes, until softened. Stir in garlic and chilli, and mix for 1 minute to combine.
  3. Add beef, tomatoes and stock, and bring to a simmer. Transfer to oven and cook for 1 hour.
  4. Add barley and craisins, and bake for another hour, stirring occasionally to avoid the barley from sticking. Top with another half cup of water as you go, if necessary. (I found I don’t need to, but ovens are fickle and yours may vary).
  5. Either serve immediately, or allow to come to room temperature and then refrigerate. Reheat gently over a medium heat, topping with more water/stock if you find it dries out as it reheats. Garnish with parsley to serve.

Facebooktwitterredditpinterestlinkedinmail

Baked Sweet Potato with Burghul Chilli

Every now and then I think about vegetarianism. I think I’d be good at it. There are SO many good vegetarian dishes that highlight amazing ingredients rather than try to compensate for the lack of meat, and I appreciate that greatly. However, at the end of the day, I enjoy eating meat (although I don’t need to eat it every day) and don’t believe in completely cutting out entire food groups from my diet ( I have no issue at all if you do, I just don’t want to, for various reasons). In saying that, I don’t miss meat at all when I have a great veg meal, and I find myself having more of them lately. I seem to find myself creating delicious vegetarian lunches to take to work, because then my hubby and kids aren’t being forced into anything, I don’t need to worry about balancing nutrients for anyone except myself (which I already do anyway), and I’m cutting down on unnecessary meat, without making any massive changes. I guess I’m coming across a totally uncommitted, fake, wannabe vegetarian, and I’m absolutely okay with that. I’m not any those things, really, least of all a vegetarian; I just love vegetables and experimenting with both cooking and eating, and this seems to be my thing du jour. I think I’ve struck a good balance. I hope so. I can’t say there have been any negative effects since reducing the extraneous meat consumption, and I’m still getting adequate levels of quality protein. Win win!

This vegetarian chili, adapted from The Women’s Weekly’s Eat Well With Wholefoods, is the perfect example of a completely whole meal in and of itself, that is delicious, filling, and complex in flavours and textures. It makes the perfect at-work lunch or light dinner, and at only 304 calories a serve, nobody would blame you if you popped a drained can of tuna in there to bulk it up a bit and/or satisfy the carnivores in your pack. Honestly, though, it doesn’t really need it – it’s filling and hearty just as it is. Conversely, if instead of being a fake vegetarian, you wanted to go the other way and make it vegan, all you need to do is omit the yoghurt. Talk about a crowd pleaser!

Serves 2

Ingredients

Spray oil, or 3 tsp of olive oil

300g sweet potato, cut into large cubes

1 brown onion, diced

1 medium carrot, diced

1 clove garlic

1 tsp minced ginger

1 tsp ground cumin

1/2 tsp cayenne pepper

1 tsp paprika

1 can diced tomatoes

50g burghul

salt and pepper to taste

4 tbs natural yoghurt (I use Danone yopro – high protein, no sugar, thick and creamy)

Dried parsley to serve.

Method

  1. Preheat oven to 200C. Arrange sweet potato on baking tray and spray/drizzle with 2 tsp of the oil. Roast for 45 minutes.
  2. Meanwhile, heat remaining oil in a saucepan over medium-low heat. Reduce heat to low and cook onion and carrot for 10 minutes.
  3. Add all the spices, and stir until combined and aromatic, about 1 minute.
  4. Pour in tomatoes and cook for about 5 minutes. Add burghul and cook for five minutes, stirring occasionally. Season and remove from heat.
  5. Tumble sweet potatoes on to two plates. Spoon the chilli over the vegetables, and top with yoghurt and parsley to serve.

Facebooktwitterredditpinterestlinkedinmail

Curried Lentil and Tomato Stew

I’m still feeling the effects of Maypril (with all the family birthdays plus Easter in this period, hubby and I long ago decided to combine the period from the end of March to beginning of May into one big, expensive conglomerate of cake), and am also in the middle of school holidays, which means my routine has been shot to absolute bits. As a bit of a creature of habit, I’m really yearning to get back to my “New Normal” – that is, the routine that I know allows me to eat a balanced and delicious diet (with room carved our for treats of course!) at regular times, stay active, and control my nutritional intake, while maintaining my weight. While this month has not been a disaster in the sense that I didn’t magically regain 53 (or any) kilos like I felt I surely would, I still haven’t been eating well, and I can feel “old Michelle” issues coming – I’m not sleeping well, I feel bloated, and I’m starting to run out of steam. I know I say that it’s all about Calories In Calories Out, but at this stage of the long-term game, it’s really not. Not every calorie is made equally, and you can’t eat 500 calories worth of chocolate and expect to feel the same as when you eat 500 calories of high quality protein, veggies and wholegrains. Trust me, I know this from experience!

Except for my husband’s birthday next week, I’m all out of Maypril madness so I’m back on track, and so, so happy about it! This is how I know this is a true, permanent lifestyle change for me – fun is fun, but it’s only fun for a very short while. Then I’m itching to go back to New Normal, and don’t feel the slightest bit deprived. New Normal is liberating, and it’s something I jealously guard. I refuse to give it all up for a lifetime of bloat and regret. But then, I also refuse to give up cake, so it’s all a big, mindful balancing act.

Throughout the past four weeks, it’s been lunches that have been the most difficult thing for me to plan. So to mark getting back to New Normal, I meal prepped lunch for the next couple of days. With how much rich, fatty food I’ve devoured lately, a light vegetarian option was absolutely needed, and this stew, adapted from Smitten Kitchen, who adapted it from Ina Garten, who probably adapted it from another recipe that mine doesn’t even faintly resemble (like culinary Chinese Whispers!), fit the bill perfectly. It’s simple to make, low calorie (175 calories), packs a punch, freezes well, costs almost nothing to make, and chances are that you won’t even have to go to the shop, as it’s a meal of staples (you absolutely can use tinned tomatoes, in fact SK’s recipe calls for them. I only used fresh because I have too many and they’re starting to turn). This recipe serves 4, but you can adjust the ratios to make more or less. Four is great though, as it’s the whole can of lentils, so no waste.

Ingredients

3 second spray olive oil

1 brown onion, diced

3 carrots, diced

1 tsp minced ginger

2 tsp minced garlic

6 small tomatoes, finely diced

Small pinch sea salt flakes

1 cup drained tinned lentils

2 cups vegetable stock (chicken stock works well, too)

1 heaped tsp curry powder

1 tsp dried basil

Pepper, to serve.

Method

  1. Heat oil in a saucepan, sweat onion and carrots over a medium-low heat for 5 minutes. Reduce heat to low, add ginger and garlic, and cook for 2 minutes.
  2. Add tomatoes, salt and lentils, mixing to combine. Cook for 3 minutes until tomatoes soften.
  3. Add stock, curry and basil, and bring to the boil. Reduce heat back to low and cook for 30 minutes, stirring occasionally, until thick and stewed.
  4. Serve with cracked pepper.

Facebooktwitterredditpinterestlinkedinmail

Cabbage and Barley Soup

I overdid it this Easter. Like, really overdid it. So much so that I woke up this beautiful Easter Monday feeling terribly ill and with a pain in my belly that my husband was convinced was my appendix getting ready to burst. It wasn’t. It was just my body in revolt from the shocking way I’ve “nourished” it over the past couple of days. I’d entered the long weekend knowing that my usual rules were going out the window, and had every intention of getting back to my usual routine today. It’s always destined to be a Monday, right? However, my body thought it would help me be damned sure that I did in fact get back into it, by making me sick to my stomach at the mere thought of food.

After a few hours of feeling like total crap, I slowly, slowly started feeling better. By late afternoon, I was actually starting to feel hungry.  I was craving vegetables and simplicity. But I also wanted a new-to-me dinner that was interesting, while not putting any stress on my somewhat ginger stomach. Nothing fatty, or rich, and in no way related to chocolate or cake.

Once again, I was relieved that I have an arsenal of recipes stored in My Fitness Pal, with the calories already calculated, links to the recipe, and my own adaptations noted. It REALLY makes life easier, especially when you don’t really have a clear idea of what you want. Scrolling through, I saw the link to Smitten Kitchen’s Cabbage and Farro Soup, and knew that I’d found what I’d be cooking tonight. I did make some changes – I added ginger, used red cabbage instead of green to give it a beautiful rich purple colour (Deb bemoans how beige her soup is, but using red cabbage yields quite a dramatic looking soup), swapped out the farro for the pearl barley I already had in my cupboard, and eliminated some of the oil, because you really don’t need quarter of a cup here. All in all, the results were fantastic, and I’m looking forward to leftovers tomorrow, when the barley has drunk the soup and it transforms into a whole new cabbage dish. I also used a whole – albeit tiny – cabbage, and discarded the core, as a matter of preference. That left me with more cabbage than the original recipe calls for, so I increased the ingredients by 150% , meaning it serves 6, rather than 4. Which is a blessing, because, like I said, leftovers. My take on the recipe yields servings of 222 calories each, and that includes the parmesan with which the soup is served.

Ingredients

1 x 3 second spray olive oil

1 brown onion, thinly sliced

3 tsp  minced garlic

1 tsp minced ginger

1 small red cabbage, core removed, thinly sliced

1.5tbs red wine vinegar

Salt and pepper, to taste

1 cup raw pearl barley

6 cups chicken stock

1tbs lemon juice

4tbs grated parmesan cheese

Method

  1. Heat oil in a large saucepan/stockpot over medium-low heat. Sweat onions for 5 minutes, until softened but not coloured. Add garlic and ginger, and stir to combine.
  2. Add the cabbage over the top of the onion mixture and Cover pot with a lid. Steam the vegetables for 5 minutes, until cabbage starts to wilt. Stir to combine.
  3. Replace lid and cook for a further 15 minutes, stirring occasionally. Cabbage will be very tender, and sweet to taste.
  4. Stir in vinegar, and season with salt and pepper. Be very generous with the pepper, as it complements the dish so well. Add barley and stir to combine.
  5. Pour in the chicken broth. Bring to a simmer, cover, and cook for up to 40 minutes, stirring occasionally.
  6. Remove from heat and stir in lemon juice.
  7. Serve in bowls. Top with parmesan cheese and another good crack of black pepper.

Facebooktwitterredditpinterestlinkedinmail

Crème Pâtissière

If watching shows like Masterchef has taught me anything, it’s that a) you can’t cook without a lame sob story, and b) crème pâtissière is technical and difficult.

Both of these assertions are bull. I knew the former was a load of tripe cooked up by desperate television producers, but for some reason, fell hook, line and sinker for the latter. I’ve always just avoided it, made desserts that don’t call for it. I really don’t cook decadent desserts all that regularly, and there are a slew of other options, so I’ve been able to keep my fear of the Crème pât my little secret for years.

This week, my son turned 11, and the little foodie wanted creme brûlée donuts as his birthday cake. Unwilling to disappoint my first born, and after finding a recipe from Sugar Hero that looked better than the rest, I set out to make his donuts.

The first batch – so good!

I’m still perfecting them, to be honest. The test batch were perfection. They were moist and fluffy, stuffed with silky, delicious creme patissiere, coated in a vanilla glaze, and set alight for a crunchy lid that cracked so satisfyingly, I almost yearned for a cigarette. I dutifully set one aside for my loving husband, and took the rest to my dad’s, where we shared them with some very grateful neighbourhood kids. When I got home, the dog had eaten the husband’s. Hubby was less than amused, but Mac seemed very pleased with his ill-gotten treat.

The second batch failed, epically. Burned on the outside, and raw in the middle. Like, so raw, it looked like I’d already filled them with the custard. Of course, this failed batch was the one that actually counted because I made them on his birthday, which happened to fall on a public holiday, so my emergency back up options were extremely limited. Thankfully, Krispy Kreme was open, and the boy was hardly disappointed in being taken there to go nuts. He was thrilled with this contingency, but I was still so, so disappointed. I think I know what I did wrong, and will try again. But, honestly, I’ll probably keep playing around with donut recipes, while keeping the Sugar Hero one handy, because it really was very good.

What I won’t be looking for, however, is another Crème pâtissière recipe. Sugar Hero NAILED it. It was thick, silky, sweet but not tooth-achingly so, vanilla-y and the right level of eggy. It can also be made ahead of time, which is what I had done with the second batch of donuts. I now had a serving of the custard, and no donuts to squirt them into. As it was Easter weekend, and I had another party to attend the next day, I whipped up a Birthday Custard Sponge from Nigella Lawson, and sandwiched it with the Crème pât. It. Was. Heaven.

This particular recipes yields a fair amount of crème pâtissière, but I truly don’t see that being a problem – it’s very versatile. And delicious by itself. If you find you have any left over from whatever you use it for, a spoon is all you’ll need to rectify that little problem. I’m also looking forward to making a traditional crème brûlée with it.

I’m not even bothering to look up the calories for this one. It’s too variable – how much of it you eat really depends on what you do with it. Chances are, though, if you’re having a crème pât kind of dessert, you don’t really want to know, anyway.

Ingredients

4 yolks

1 whole egg

3 tbsp cornstarch

1/2 cup granulated sugar

2 cups milk

pinch salt

2 tsp vanilla bean paste or 1 tbsp vanilla extract

2 tbsp butter

Method

  1. In a bowl, whisk together the yolks, egg, cornstarch, and 1/4 cup of the sugar, until thick.
  2. In a saucepan, combine the milk, remaining sugar, and salt. Heat the milk over a medium burner until it just starts to boil. Check consistently – if it burns or scalds, you’ll need to start again.
  3. Whisk the egg mixture, slowly drizzling a little hot milk into the bowl as you do. Continue to whisk and drizzle until you’ve added about half of the milk. Keeping the saucepan off the heat, pour the eggs into the milk mixture while whisking continuously.
  4. Return the saucepan to the stove over medium-low heat, whisking constantly. Use a rubber spatula to periodically scrape the bottom of the pan so it doesn’t scorch . Cook until the pastry cream thickens and starts a very gently bubbling, then cook for 1-2 minutes longer. Remove the pan from the heat and whisk in the vanilla bean paste or extract, and butter.
  5. Pour the cream through a wire mesh strainer into a bowl. Use a spatula to help work it through, straining out any clumps of egg that have developed. Press a layer of cling wrap directly on top of the pastry cream to prevent a skin, and let it cool to room temperature. Once at room temperature, refrigerate it until it’s cold, at least 2 hours. This will last 2 days in the fridge.

Facebooktwitterredditpinterestlinkedinmail

Winter Vegetable Soup with Parmesan and Spinach Dumplings

It’s finally cooling down, which means I can pull out my beloved red cast iron pot and whip out the comfort food recipes to help warm me up. Seriously, people joked that I would feel the cold after losing all the weight. They weren’t wrong. Last winter was miserable – I was ALWAYS cold and found it difficult to warm up. I’m hoping this winter, I will be more acclimated and less uncomfortable, despite being slightly smaller again.

It has to be said, that during the Winter months, I sometimes miss some of the heavier stews and casseroles that are suprisingly high in calories despite feeling like a wholesome bowl of goodness. Of course, rather than throwing in the towel and giving in to temptation, I’ve turned to searching for lighter, but equally comforting – recipes to fill the void. Some of them have been sad failures – watery, lame slop with little flavour and no texture. Some – like this awesome “stoup” (soup so thick that it’s almost a stew) adapted once again from Taste – bring joy to my cold self. It’s only 423 calories, and fills the cravings for veggies, bread, cheese and potatoes, making it the perfect winter staple. And unlike many winter warmers, it doesn’t take hours and hours… it’s done in less than an hour. Just to add one more tick to the boxes, this soup is also vegetarian if you use the correct parmesan.

Serves 6

Ingredients

dumplings

large handful baby spinach, shredded

1 1/2 cups flour

2tbs butter, melted and cooled

1/2 cup parmesan cheese

2/3 cup milk


Soup

2-3 second spray oil

1 brown onion, diced

1tsp minced garlic

1tsp minced ginger

1/2 tsp nutmeg

1/2 tsp paprika

1 tsp dried sage

2 carrots, diced

1 bulb fennel, diced

1 medium potato, diced

2 parsnips, diced

400g tinned tomatoes

4 cups vegetable stock

500g pumpkin, diced


Method

1. Combine spinach flour in a mixing bowl and make a well in the centre. In a jug, combine the rest of the dumpling ingredients and pour into the well. Mix gently until well combined. Roll into 15 balls and place on a clean, dry plate.

2. In a large saucepan, heat the oil and sweat onions over medium heat until translucent. Add nutmeg and paprika, stirring for 30 seconds until fragrant.

3. Tip in all vegetables except for the pumpkin and stir to coat with the spices. Add tomatoes and stock, using the stock to clean out the tomato tin. Cook, covered, for 10 minutes, until starting to soften. Stir every few minutes to prevent veggies from catching. Add pumpkin, and cook, covered, for a further 5 minutes, still stirring periodically.

4. Gently place the dumplings atop of the soup and lower the heat to medium-low. Cover again, and cook for 20 minutes, until the dumplings are cooked through. Serve garnished with fennel fronds.Facebooktwitterredditpinterestlinkedinmail