Turkey Rissoles

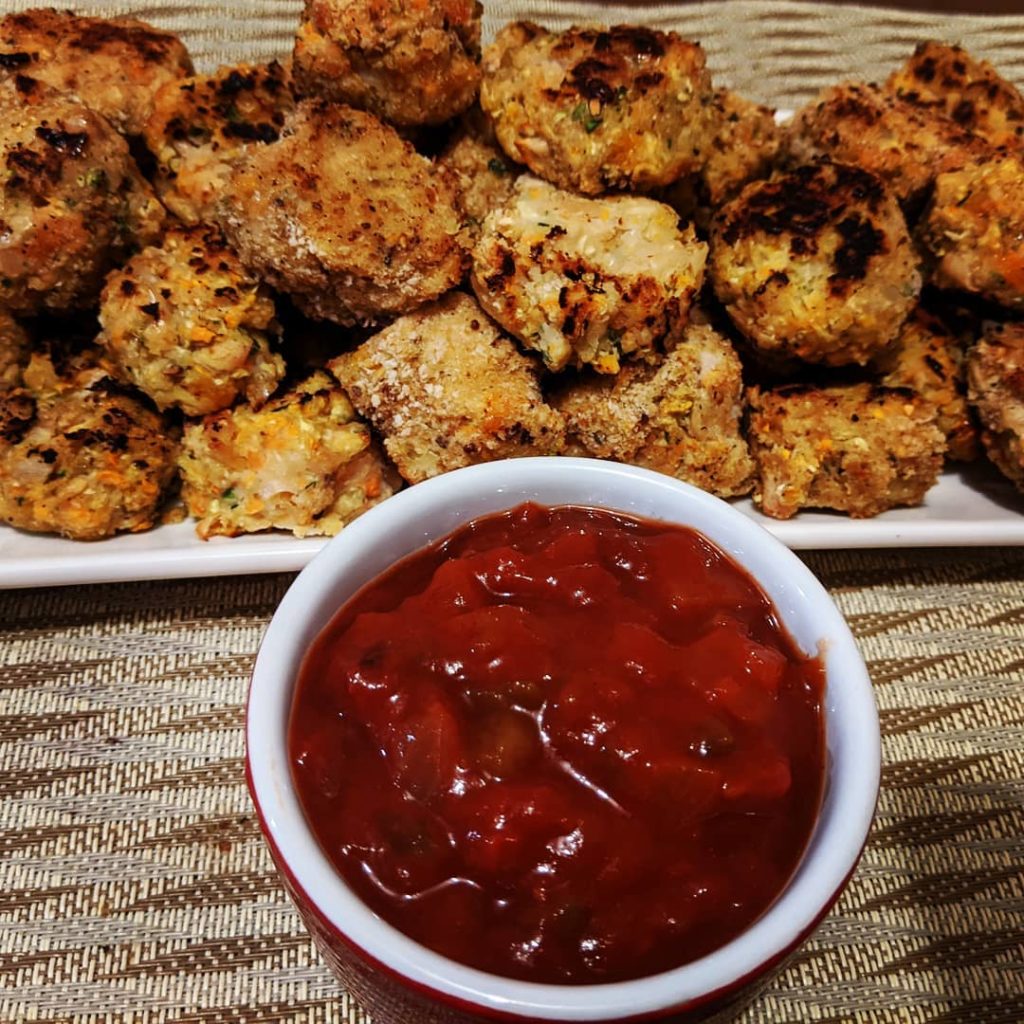
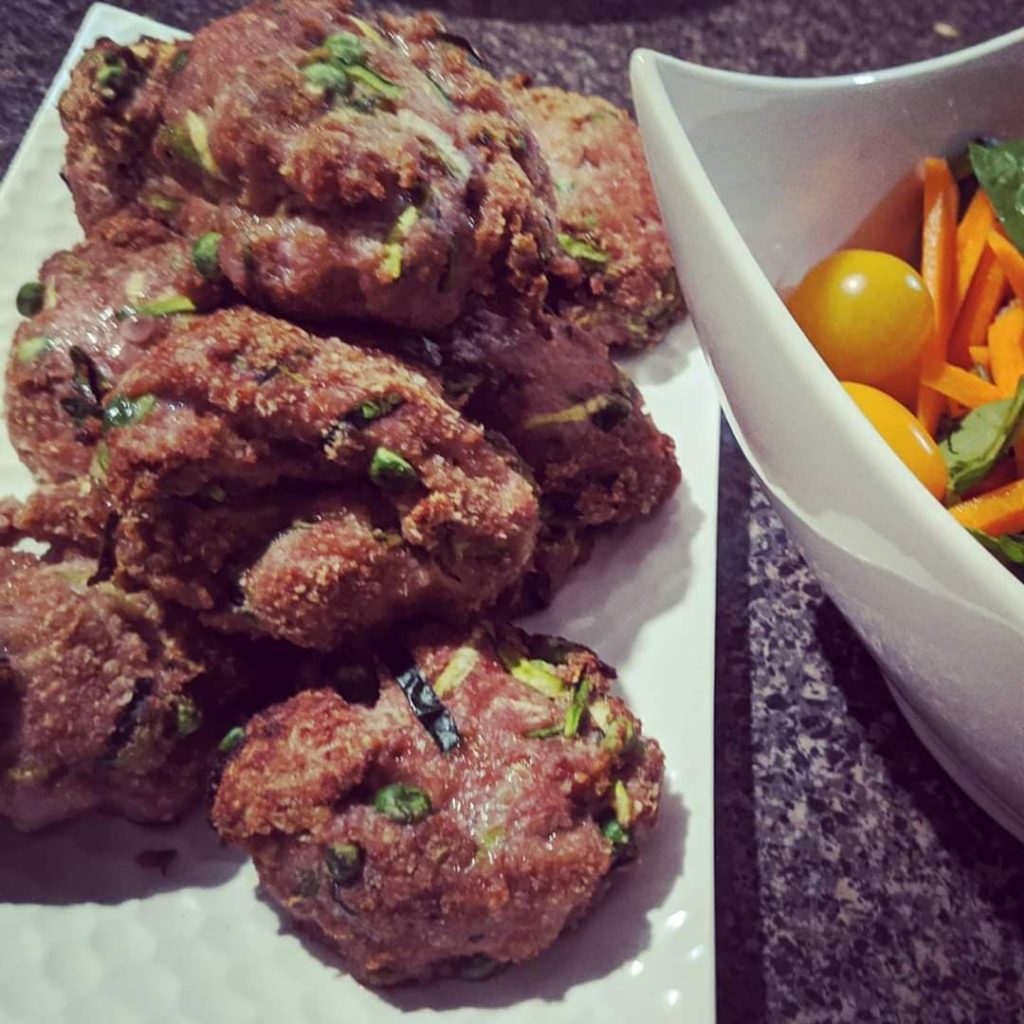
Ok, I know these don’t look like much, and that rissoles are hardly the height of haute cuisine, but I also know that these humble meatballs are deceptively delicious, and deserve a special mention on this blog. I’ve been making these since… um… well, I remember feeding these to my eldest as a baby (I probably omitted the sweet chilli, but with how much Tabasco he puts on everything now, maybe not), and he turns 12 tomorrow. So, definitely very early in my cooking ventures. And they NEVER fail to please a crowd. They really don’t look particularly thrilling, but the Asian flavours from the sweet chili and oyster sauces give a flavour and texture that are just sublime. I actually forgot about them for a few years, then found a typed up recipe in a Google Drive folder, and now they’re enjoying a much deserved revival in our household.

Unlike a lot of rissoles, which are cooked in a fair whack of oil and use fatty beef mince (not that I have a problem with beef mince!), these are really light, and are full of vegetables. They clock in at just 100 calories apiece, which is quite respectable for a decent sized rissole, and when you add a salad, you get an amazing light meal that feels so much more special than the (almost no) effort that goes into making them. They’re also great as sliders with Asian salad or slaw, or cold the next day. Adults love them. Kids love them. Fat 10 month old babies love them. They’re the ultimate family favourite.

Serves 4

Ingredients

Oil spray

500g turkey mince

1/2 cup dried breadcrumbs

2 garlic cloves, grated

1 zucchini, grated

1/2 cup frozen peas

2tbs oyster sauce

2tbs sweet chilli sauce

Pepper to tasteM

Method

  1. Preheat oven to 200C. Lightly spray a baking tray with oil.
  2. Combine all other ingredients gently, ensuring not to over mix.
  3. Divide into 8 patties, place on tray, and flatten slightly.
  4. Bake for 20-25 minutes, until cooked through. Serve

Facebooktwitterredditpinterestlinkedinmail

Risoni Vegetable Bolognese

I had every intention of making a tomato and meatball soup today, I really did. But when push came to shove, I just could not be bothered rolling meatballs. Besides, right now, the idea of squishing other peoples’ food around in my hands sounds tone deaf, all things considered. But really, I just couldn’t be bothered, let’s be honest.

Instead, I dumped everything in one pot, at the advice of Nagi at Recipe Tin Eats. This isn’t her exact recipe – I upped the veggie intake, and cut back on the risoni a little, but the spirit of her recipe is there. And it’s perfect for those CBF kinds of nights. The whole ordeal took maybe 20 minutes, it’s made on staples/stuff I found in my fridge and cabinets (again, perfect for Corona-geddon), was tasty and comforting, and was gobbled up by everyone. It’s not like usual bolognese recipe, but the benefit of that is that you could pretty much throw anything into it and have it come up a winner. It’s one of those magical recipes. So I’m writing it down so that I don’t forget it!

Nagi’s recipe clocked in at 484 calories; mine is 400. Either way, it’s better than takeaway!

Ingredients

1 brown onion

2 cloves garlic, crushed

200g mushrooms, sliced

500g lean mince

700ml passata

2tbs Worcestershire sauce

3 cups chicken stock

2tsp dried parsley

2tsp dried oregano

1tsp dried thyme

1tsp dried basil

1tsp sweet paprika

cayenne pepper, to taste

1 medium zucchini, diced

1 cup risoni/orzo

60g baby spinach

salt and pepper, to taste

Grated parmesan cheese, to taste

Method

  1. Add onion, garlic and mushrooms to a non stick pan over medium heat. Cook, stirring, for 5 minutes or until vegetables are soft and golden.
  2. Brown mince with onion mixture, breaking it up as it cooks.
  3. Stir in passata, herbs, Worcestershire sauce, stock and zucchini. Bring to a simmer, add risoni and stir to distribute evenly.
  4. Cook for 10 minutes, stirring occasionally to prevent the risoni from sticking to the bottom. As you get closer to the ten minute mark, you may need to stir more frequently.
  5. Take off heat, stir in spinach.
  6. Serve, topped with parmesan and seasoned with salt and pepper.

Facebooktwitterredditpinterestlinkedinmail

Easiest Egg Muffins

Looking for something quick and easy to make? Something that could be a meal or a snack, while clocking in at less that 100 calories (93 to be exact)? Something that uses up the sad veggies dwelling in the bottom of your fridge, can be eaten on the run with one hand, are low carb and high protein, and are bursting with veggie goodness?

Well, look no further.

I mean, you could; the internet is full of recipes for egg bites/muffins/mini quiches. But if you’re here… well, it makes perfect sense to look no further. These muffins tick all the boxes.

The only caveat to these is that you MUST use paper cases. Unless losing half your muffin to the bottom of the muffin pan is your thing, of course. Trust me. They stick. But apart from that, they’re so simple, and not at all labour intensive – even making them after a long day of work isn’t as harrowing as it sounds.

I like to make 6 at a time – they’re not going to keep for much more than that. No one wants slimy eggs as they’re running out the door!

Ingredients

6 eggs

125g cherry tomatoes, cut into eights

100g mushrooms, sliced

1 onion, diced

1/2 cup broccoli, finely chopped

Salt and Pepper, to taste

Method

  1. Preheat oven to 180C, and line a muffin pan with 6 paper cases.
  2. Over medium heat, cook onion, mushrooms and broccoli until onion is translucent – about 5 minutes.
  3. Meanwhile, crack eggs into a large bowl, and beat well. Stir in cherry tomatoes.
  4. Add cooked vegetables, and mix to combine. Season with salt and pepper.
  5. Evenly distribute mixture into the paper cases. Bake for 20 minutes, or until golden and firm.

Facebooktwitterredditpinterestlinkedinmail

Spicy Cauliflower and Potato (Aloo Gobi)

In the interminable search for vegetarian lunches, I have found yet ANOTHER spicy roasted cauliflower dish. Who’d ever have thought that I’d be tripping over myself to roast cauliflowers constantly? Sometimes, I don’t even recognise myself. But as with most veggies, roasting cauliflower to sweet perfection is the most wonderful way to avoid the soggy blandness that comes from steaming (or gods forbid, boiling!) them. I wish I’d learned this earlier, I was choking cauli down until I was 30. Now I can’t get enough of it!

I’m really hesitant to call this Aloo Gobi: the spirit is there, but I don’t think we’re talking authenticity here. However, what we ARE talking is a delightfully fragrant bowlful of vegetable goodness that keeps you satisfied both physically and emotionally, and makes your little corner of the world smell like heaven. AND IT’S VEGAN, so we can all feel a little smug on this coolish Meatless Monday. Or not. The vegan-ness isn’t really a selling point for me, and I didn’t even bother mentioning it to the husband. At any rate, it’s healthy and delicious. And low calorie – 250 calories per serve, and chock full of nutrition. Winner winner vegan dinner!

Serves 4 (smallish, but not ridiculously so, serves)

Ingredients

1 head cauliflower, cut into small florets
600g baby chat potatoes, diced
1/2 teaspoon cumin seeds
1/2tbs olive oil

1 medium onion, finely chopped
2 garlic cloves, crushed under the heel of a knife
2 teaspoons minced chilli
2 teaspoons minced ginger
1 teaspoon ground cumin
1/2 teaspoon ground coriander
1/4 teaspoon turmeric
1/2 cup water

Parsley, to serve.

Method

  1. Preheat oven to 200C. Spray two baking trays with oil.
  2. Arrange cauliflower and potatoes on trays, spray with oil and sprinkle with cumin seeds. Season.
  3. Roast vegetables, turning halfway through, for about 30 minutes until until cauliflower is tender and browned in spots (just a little char isn’t a bad thing) and potatoes are just cooked.
  4. Meanwhile, cook onion, garlic, chilli, and ginger in olive oil over low heat in a medium sized pan for 8 minutes or until it begins to turn golden and soft. Stir frequently.
  5. Add ground cumin, coriander, turmeric, cayenne, and cook, stirring constantly for a minute or so. Stir in water, scraping any caramelised bits from the pan. Allow to thicken slightly
  6. Stir in roasted vegetables, turning to coat in the spice mixture.
  7. Serve, sprinkled with parsley.

Facebooktwitterredditpinterestlinkedinmail

Grilled Kangaroo with Agrodolce sauce

Meat as rich and gamey as kangaroo just begs to be paired the syrupy sweet and sour cherry sauce, all sitting atop a bed of peppery leaves, and is simply a match made in heaven. Use a good wine for this one; you can taste it. I used a Pepperjack Cabernet Sauvignon, and thoroughly enjoyed the rest of the bottle with the meal.  


I need to give a big shout out to The Australian Womens Weekly Low Carb Clean Eating cookbook for this one. It’s been a fantastic source of inspiration since I bought it just after Christmas. I love it, because while it CLEARLY has a focus on clean eating, low carb recipes, it doesn’t bemoan missing anything. It celebrates what the recipes DO showcase, and gets the reader excited about the ingredients that are in the recipe, not what could be in there if it weren’t focused on clean eating. I really appreciate that, and find a lot of clean eating books/websites follow a similar tone, which is great. It makes healthy eating so much easier when your resources are proud of what they are, and don’t apologise for not being something else, or over compensate for anything. In a world of detoxes and punishing people for loving food, it’s refreshing.

There are so many recipes from this book that will make it on here, because I’ve only come across one or two so far that aren’t amazing. But I always adapt to suit myself, so I’ll be posting them here so that I don’t forget what I’ve been doing. For example, I used pretty much all the ingredients from the book to make this sensational kangaroo dish, but mine looks absolutely NOTHING like the recipe suggests. But, oh, the taste! The flavours are beyond anything I’ve ever made in my kitchen before. So complex and deep, it’s the best thing I’ve cooked this year.

serves 4 (400 calories per serve)

Ingredients
800g kangaroo filet, marinated in 2tbs olive oil for 30 minutes if not bought pre-oiled
1tbs olive oil
1 red onion, thinly sliced
1 red capsicum, thinly sliced
300g cherries, pitted (feel free to use frozen or canned)
¼ cup red wine vinegar
¼ cup good red wine
1tbs honey very good quality golden syrup or honey
60g baby spinach, washed
¼ large red cabbage, thinly sliced

Method

  1. Preheat oven to 200C. In a frypan, heat oil on medium heat and cook onion and capsicum until softened but not coloured – about 8 minutes.
  2. Add cherries, wine, vinegar and honey/golden syrup and bring to a simmer. Cook, covered, for about 8 minutes.
  3. Heat a grill pan on high and cook kangaroo for 2 minutes. Transfer to oven tray and roast for 8 minutes while the agrodolce sauce simmers away. Stir occasionally.
  4. Remove from oven, cover loosely with foil and allow to rest for 10 minutes.
  5. Meanwhile, increase agrodolce sauce to high until it reduces and is thick and syrupy – about 3 minutes. While it is bubbling away, reheat the grill pan and stir fry the cabbage until softened, but not soggy or losing its purply hue – no more than 1 minute.
  6. Arrange plate with baby spinach and cabbage, top with kangaroo meat and drizzle with the agrodolce sauce.
  7. Serve with a good crack of black pepper, and sprinkle of salt, and a glass of the remaining wine.

Facebooktwitterredditpinterestlinkedinmail

Toblerone Brownies

Let’s just get this out of the way – these are NOT for calorie counting days. At over 300 calories a pop, these delicious morsels are the embodiment of a ‘sometimes treat’.

With that being said, there are three different types of chocolate in here, and one of them is Toblerone. They’re rich, dense, and sweet – a small square is really all you need. On the other hand, there are three different types of chocolate in here, and one of them is Toblerone. They’re amazing. And they have the perfect crumb: they’re not especially fudgey, nor are they merely a chocolate cake with a superiority complex. They’re the perfect brownie, and my go-to recipe whenever the occasion calls for something sweet.


I adapted this recipe from the Taste.com, and after much experimenting, settled on this incarnation. The original recipe has a butterscotch-esque icing, but I found that with such a rich brownie, while the icing was delicious, it was seriously overkill. Conversely, without the icing, using all dark chocolate made them too intense (and I say that as a girl who loves her chocolate dark and bitter). But by using an even mix of dark and milk chocolate, we’re left with a well balanced slab of heaven. Words of advice:

a) splurge on good quality chocolate, you truly can taste the difference.

b) Freeze the Toblerone – it makes it SO MUCH EASIER to work with

Ingredients

250g butter, chopped

100g dark chocolate, broken into largeish pieces

100g milk chocolate, broken into largeish pieces

3/4 cup caster sugar

3 eggs

1 1/4 cups plain flour

2 tablespoons self-raising flour

200g Toblerone chocolate, frozen

Method

  1. Preheat oven to 180C. Line base and sides of an 18cm x 28cm slice pan with baking paper, extending paper 2cm above edges of pan. Spray with oil, or grease using butter (I always do the former).
  2. Place butter, dark chocolate, milk chocolate and sugar in a saucepan over low heat. Cook, stirring occasionally until melted and smooth. Remove from heat and rest for 10 minutes to cool slightly.
  3. Crack eggs, 1 at a time, into chocolate, whisking until combined. Sift in both flours, and fold to combine.
  4. Pour mixture into prepared pan. Tumble in the Toblerone pieces and very slightly press into the mixture.
  5. Bake for 25 to 30 minutes . Cool for 1 hour before lifting from pan (lest it fall apart).

Facebooktwitterredditpinterestlinkedinmail

Chorizo, Lentil and Vegetable Soup

When I can’t decide what I want for dinner, or if I’m not particularly hungry, I almost invariably turn to soup. I just love it – especially the broth kinds.

Today was one of those indecisive days – I didn’t have a clue what I wanted, and I wasn’t feeling hungry or inspired, so looking through my (way too many) cookbooks and saved recipes didn’t float my boat.

So I did what never fails – I trawled my My Fitness Pal recipe collection to see what looked good and had a decent amount of calories and macros – basically, I let nutrition make the decision for me. After scrolling for what seemed forever, this recipe, from Smitten Kitchen, jumped out at me when nothing else looked even mildly interesting.

Of course, I had changed everything in it when I put it into MFP months and months ago. No oil instead of 1/3 of a cup of it, Chorizo instead of sausage meat, baby spinach instead of chard, chicken stock instead of water, and I threw in a zucchini, too. I knew the sum of the parts were good, so I just hoped for the best.

Which is exactly what I got. A flavoursome, complex, delicious, nutritious filling and textured soup that had all of us eating in almost complete silence. I made garlic bread using bread rolls I had laying around, and while they were delicious, the soup is more than able to hold its own, too. The servings are generous, too. The recipe yields six servings for 238 calories per serves, and by ‘serves’, I definitely mean ‘full bowls’.

Ingredients

180g chorizo, sliced into small coins

1 onion, diced

2 medium carrots, peeled and diced

2 cloves garlic, finely chopped

400g tin brown lentils, drained and rinsed

800g tinned tomatoes

2 bay leaves

Salt and pepper, to taste

6 cups chicken stock


1 medium zucchini, diced

60g baby spinach

4tbs grated parmesan cheese, to serve

Method

  1. In a large saucepan, cook chorizo over medium-high heat for 5 minutes, until golden.
  2. Lower heat, and add onion, carrots and garlic. Cook, stirring occasionally, for 5 minutes until vegetables have softened.
  3. Stir in lentils, tomatoes and bay leaves, and season well.
  4. Add chicken stock, and bring to the boil. Turn heat down to medium, and simmer for 20 minutes, until lentils are soft but not mushy.
  5. Tumble zucchini into soup and cook for 3 minutes, until zucchini is tender. Add spinach and remove from heat as soon as it wilts (within 30 seconds or so).
  6. Ladle soup into bowls, being careful to remove the bay leaves. Serve with extra pepper and topped with parmesan cheese.

Facebooktwitterredditpinterestlinkedinmail

Vegetable Nuggets

I’ll just come out and say it… Vegetable nuggets > chicken nuggets.

Yeah, you heard me. Not a sentence I was expecting, either. However, not only are they absolutely delicious, they’re packed full of nutrients and are only 40 calories each. Throw 5 or 6 into a container, add a salad and some salsa you’re good to go with a fabulous work lunch in all of 5 seconds flat. And they’re so cheap and easy to make. You probably don’t have to buy a single thing from the store.

I could go on and on. Suffice to say, these are awesome. Which is a pleasant surprise, because while I was cooking them, I was sure they’d be a disaster. I got the recipe from Taste.com, but found the mixture too wet to roll in egg and breadcrumbs, so I just dumped them into the mixture, and then I worried that they’d fall apart while frying in oil, so I baked them first, then finished them off in a nonstick frypan. Bonus: they’re healthier this way!

This recipe yields 30 nuggets, but I think they’d be great as larger rissoles, too. Maybe as veggie burger patties?

Ingredients

1 brown onion, peeled

1 zucchini, trimmed

1 carrot, peeled and trimmed

2 x 400g can cannellini beans, rinsed, drained

35g Mexican style cheese

1 egg, beaten

1 3/4 cups dried breadcrumbs

Salt and pepper to taste.

Method

  1. Preheat oven to 180°C. Lightly spray two baking trays with oil.
  2. In a food processor, pulse zucchini, carrot and onion until finely chopped. Scrape into a large mixing bowl.
  3. Pulse beans and add to vegetable mixture. Add cheese, egg and breadcrumbs, and season well. Mix to combine.
  4. Roll mixture into 30 balls, place on trays, and bake for 20 minutes. Remove from trays and allow to cool and firm up.
  5. Heat a non-stick pan over medium-high heat. Spray with oil. Add half the balls and fry until golden brown. Remove from pan and repeat with second half. Allow to cool.
  6. Serve with salsa and salad.
Facebooktwitterredditpinterestlinkedinmail

Japanese Curry

Once again, dinner at my house was ascertained by the husband watching TV characters eat something, then looking at me with a half sly, half sheepish grin that absolutely means “hey… you could make that for us!” i KNOW that this is what this smile means, because the worlds usually tumble out of his mouth shortly after the grin spreads across it.

So, props to whatever show had the characters eating a Japanese curry. Actually… I think it might have been a Youtube video of some sort. At any rate, I spent the next hour or so hunting down a good recipe. Which was challenging, because while I have certainly eaten more than my fair share of Japanese food, and a moderate amount of curries, I don’t believe I’d ever had a Japanese curry. So evaluating it was tricky. What sold me on this recipe from Just One Cookbook was that while Nami assures us that we can use store bought curry roux (many sites insist that it’s the done thing), she also provides a fabulous recipe to make it from scratch. The whole dish was out of this world: the sweetness of the apples and honey is perfectly balanced with the heat of the other spices, and made my house smell nothing less than divine. Of course, I’ll keep researching Japanese curries (for science), but I could not be more pleased with this one. The whole family gobbled it up, and as is so often the case with curries, the leftovers the next day were possibly even better than when freshly cooked.

Honestly, I didn’t change much with this recipe. I just wanted to put it all together in one place for ease of reference. Because of the potatoes, rice is unnecessary (but not altogether unwelcome), and one fifth of the recipe is only 396 – very respectable for such a flavour bomb!

Ingredients

Roux:
3 Tbsp butter

4 tbsp flour

3tsp curry powder (6 g)

2tsp turmeric

1 Tbsp garam masala

¼ tsp cayenne pepper

Curry

  • 600g boneless skinless chicken thighs, cut into bite sized pieces
  • 1 pinch maldon salt flakes
  • Freshly ground black pepper
  • 2 carrots, diced
  • 2 onions, diced
  • 2 medium waxy potatoes, peeled and cut into bite sized pieces
  • ½ tbsp minced ginger
  • 2 cloves garlic
  • 1½ tbsp olive oil
  • 4 cups good quality chicken stock
  • 1 red apple
  • 1 Tbsp honey
  • 1 1/2 tbs soy sauce
  • 1 Tbsp ketchup
  • Rice to serve (optional, not included in calorie calculation)

Method

To make the roux:

Melt butter over low heat. Add flour, and using a rubber spatula, cook for 10 minutes, stirring regularly to prevent roux from catching. When roux is browned and bubbling, add the spices and cook for 30 seconds. Remove from heat and set aside until step 7

To make the curry:

  1. Soak the potatoes in warm water while making the roux, or for at least 15 minutes.
  2. Season chicken with salt and pepper and set aside until step 5
  3. Heat oil over low heat and sweat the onions and carrots for five minutes. Add onions and garlic, and cook for 30 seconds.
  4. Add the chicken, and brown all over.
  5. Pour the stock over the chicken. Bring to the boil.
  6. Peel the apple (discarding the skin) and grate directly into the broth. Stir in honey and potatoes and simmer for a 15 minutes, or until potatoes are tender but not mushy.
  7. Incorporate a ladleful or two into the reserved roux, and stir until it is a smooth paste. Spoon the roux into the stock, and stir to combine.
  8. Add soy sauce and ketchup. Simmer, uncovered, for 10 minutes or so, until the curry becomes thick.
  9. Serve with rice if using, and steamed vegetables.
Facebooktwitterredditpinterestlinkedinmail

Pea and Barley Salad

The number of cookbooks in my house is nothing short of ridiculous – and yet, they continue to grow despite occasionally finding one that I don’t remember ever buying or reading. Once I get over the guilt, it’s like nerdy foodie Christmas.

The other day, my son found some such gem hidden in with the rarely touched board games. The Healthy Life Cookbook, probably purchased well before I really cared about such things, was covered in a thin layer of dust – I swear I don’t remember how or when it got into my house. But, with renewed enthusiasm, I pored over the recipes, and stopped dead in my tracks at this one. Barley? Feta cheese? Spinach? I’m in!


At 311 calories for a hearty serve (this recipe yields 4 serves), it’s filling enough for a light dinner, and absolutely perfect for a work lunch. I did learn the hard way, however, to sprinkle the cheese on as you go if you plan on it lasting more than two days (it really doesn’t last much longer than that anyway, but you don’t need slimy feta ruining your Tuesday). Sounds obvious as hell now, but oh well… live and learn.

Ingredients

2 cups vegetable stock

250g frozen peas

3 radishes, diced

40g baby spinach

1/2 cup raw pearl barley

70g Greek feta

Dressing

1tbs olive oil

2tbs red wine vinegar

2tsp dried mint

1 clove minced garlic

Black pepper, to serve

Method

  1. Bring stock to boil over a high heat in a medium saucepain. Boil peas for 4 minutes or until tender. Remove with a slotted spoon and combine with radishes.
  2. Add barley to the stock, reduce heat to medium low, and simmer for 40 minutes or until barley is tender and stock has been absorbed.
  3. Whisk together the ingredients for the dressing and set aside.
  4. Remove pan from heat. Stir in radishes, baby spinach and peas, then add the dressing. Crumble feta over the salad and season with generous cracks of black pepper.

Facebooktwitterredditpinterestlinkedinmail